
 Zoe Nora
Did you know over 80% of professional mixing errors come from bad listening environments, not skill? We need top-notch music production gear to make good choices. Yet, many creators ignore how their speakers and room interact.
Creating a balanced mix is more than just buying expensive gear. It’s about knowing how your acoustic space affects your sound. Whether you’re setting up at home or a professional studio, your equipment choice is key.
This guide will help you pick the right tools for your needs. We’ll talk about accuracy, room size, and where to place your speakers. Don’t forget to find the perfect speaker stand for the best performance. Let’s improve your listening experience together.
Key Takeaways
- Reliable mixing decisions depend heavily on the accuracy of your playback system.
- The listening environment is just as important as the hardware you choose.
- Proper placement and acoustic treatment significantly improve sound quality.
- Budgeting for your setup should include both speakers and essential accessories.
- Understanding technical specifications helps you match gear to your room size.
What Are Studio Monitors?
Studio monitors are professional speakers made to show audio signals as they really are. They are not like regular speakers, which are for fun. Instead, they help us hear our mix just as it is, without any extra sounds.
Understanding Audio Monitoring
Audio monitoring is key for checking our work closely. Using studio reference speakers means we want a true sound. We look at several important things:
- Tonal Accuracy: Making sure no sound is too loud or too quiet.
- Stereo Placement: Figuring out where sounds come from.
- Dynamics: Balancing the quiet and loud parts of our music.
- Detail: Spotting extra sounds that regular speakers might miss.
“The goal of a monitor is not to make the music sound ‘good’ in a flattering way, but to make it sound ‘true’ so that we can make informed decisions.”
Importance in Music Production
We count on these sound monitoring devices to make sure our music sounds right everywhere. If it sounds great on our monitors but not elsewhere, we’ve missed the mark. Studio monitors give us a clear sound, helping us work better.
Using professional speakers helps us avoid the mistake of fixing our mix for other systems. When we trust our studio reference speakers, we know our music will sound great anywhere. These sound monitoring devices are essential for anyone serious about making high-quality music.
Key Features to Look For
Understanding your gear’s core features is key to professional results. When you buy studio monitors, you’re not just getting speakers. You’re investing in a tool that shapes how your mix sounds to the world.
It’s easy to get caught up in marketing. But focusing on technical performance is more important. Let’s look at the key elements of top-notch audio mixing equipment.
Frequency Response
The frequency response shows how well a speaker reproduces sound. For high-fidelity monitors, you want a flat response.
A flat response means the speaker doesn’t boost bass or scoop mids. This lets you make honest mix decisions without being misled by fake frequencies.
Power Handling
Many think more wattage means better sound. But power handling is about handling transients without distortion.
You need enough power for a clean signal at your listening volume. Reliable amplification keeps your audio crisp and clear, even in complex music parts.
“The goal of a monitor is to tell you the truth about your mix, not to make it sound better than it actually is.”
Connectivity Options
Your audio mixing equipment should work well with your setup. Look for balanced inputs like XLR or TRS to reduce noise and interference.
Balanced cables are crucial in a studio with many devices. They provide a clean signal path, keeping your monitoring environment free from hums and buzzes.
Size and Placement
The size of your studio monitors should fit your room. Big speakers in a small room can cause acoustic problems.
For most home studios, five-inch high-fidelity monitors are ideal. They offer detail and are not too big. Proper placement on sturdy stands also improves sound quality.
| Driver Size | Room Size | Best Use Case |
|---|---|---|
| 3-4 Inch | Small/Desktop | Casual editing and small spaces |
| 5-6 Inch | Medium/Home Studio | General mixing and production |
| 8+ Inch | Large/Professional | Full-range monitoring and tracking |
Types of Studio Monitors
We look at different designs to help you pick the best for your space. Choosing the right studio monitors is key to a top-notch creative area.
Active vs. Passive Monitors
When it comes to music production gear, there’s a big difference in how speakers get power. Active speakers have built-in amps, so you don’t need extra power components.
This makes setting up easier and ensures the amp and drivers work well together. On the other hand, passive speakers need an outside amp. This lets you change parts of your setup and upgrade them separately.
Nearfield vs. Farfield Monitors
When checking out studio monitors 101, think about how far you sit from them. Nearfield speakers sit close to you, on a desk or stands a few feet away.
They focus on direct sound, reducing room acoustics’ impact. Farfield studio reference speakers are for bigger rooms. They’re placed further away, giving a wider soundstage for detailed listening.
Subwoofers and Their Role
Adding a subwoofer to your music production gear lets you hear sub-bass frequencies that smaller speakers can’t. This is crucial for music that needs strong low-end, like electronic or hip-hop.
But, adding a subwoofer needs careful room setup. Low frequencies interact a lot with walls and corners. You must treat your space right to avoid muddled or wrong sound from your studio reference speakers.
Top Brands in Studio Monitors
Looking at professional speakers, some big names always shine. Finding the right music production gear is a personal choice. Each maker has its own way of making sound.
While specs are important, how these tools sound in your space matters most. This is where the magic happens.
Yamaha
Yamaha is a big name in studios everywhere, thanks to their HS series. These studio monitors are known for their true sound. This makes them great for making precise mixing choices.
Many engineers choose them because they don’t change the sound. This lets them make exact adjustments while working.
KRK
KRK is famous for its yellow Rokit series. These speakers are loved for their strong bass and bold sound. They make music come alive, perfect for tracking or making electronic beats.
Adam Audio
Adam Audio is known for high-fidelity monitors that show every detail. Their X-ART ribbon tweeters make high notes clear and fast. This helps catch small details in your mix that others might miss.
JBL
JBL has been perfecting studio monitors for years. They use special technology to ensure a wide area sounds good. This is great for rooms where you move around while working.
| Brand | Primary Strength | Best For |
|---|---|---|
| Yamaha | Flat, neutral response | Critical mixing |
| KRK | Punchy low-end | Electronic production |
| Adam Audio | High-frequency detail | Detailed editing |
| JBL | Wide sweet spot | Versatile workspaces |
To pick the best music production gear, try them out in your own space. Room sound and speaker placement change how you hear things. What sounds great in a store might not at home.
Testing your top picks is the best way to find what works for you. See which one fits your workflow and taste in sound.
Budget Considerations
Choosing the right equipment for your studio doesn’t mean spending the most. It’s more about understanding your needs than just looking at prices. Whether it’s for a home or commercial space, finding the right studio monitors is about balancing your budget.
Finding Quality on a Budget
In the $200–$400 per monitor range, you can find great entry-level music production gear. Look for neutral frequency response over fancy features. Good construction means your gear will last as you learn about your room.
Don’t get caught up in high wattage claims. Instead, seek out models with a clean, honest sound. A well-made entry-level speaker is often better than an expensive, poorly designed one.
Mid-Range Monitors Worth Considering
In the $400–$1,000 per monitor range, you get refined performance. This audio mixing equipment has better components and advanced amplification. You’ll see clearer sound and a more stable stereo image, key for professional results.
These monitors are for producers needing consistent sound over long sessions. They offer a reliable reference point that works well with other systems. Investing here means you won’t need to upgrade for years.
High-End Options for Professionals
Going over $1,000 per unit means you’re paying for precision and advanced engineering. These professional speakers have significant headroom for clean output at high volumes. They also have room calibration features to improve your space’s acoustics.
The build quality of high-end music production gear is top-notch, using advanced materials to reduce resonance. You get to hear even the smallest mix flaws. For those who make a living off their ears, this level of audio mixing equipment is essential.
Acoustic Treatment for Optimal Sound
The way your speakers and room interact is key to audio accuracy. Even the best studio monitors can’t give a true sound if your room isn’t right. Sound waves bouncing off hard surfaces can mess up your mix.
For serious audio work, think about how your space affects what you hear. Using studio reference speakers alone isn’t enough. Without a good room, mixing can be off, like with low sounds.
Significance of Room Acoustics
Rooms without control can have standing waves and too much bass. This happens when low sounds bounce off walls, making some notes too loud or missing. It’s hard to get the right sound for drums or bass.
Also, sound bouncing off desks and walls can blur the mix. This makes it hard to place sounds correctly. Always check your sound monitoring devices with your room in mind.
Common Acoustic Treatment Solutions
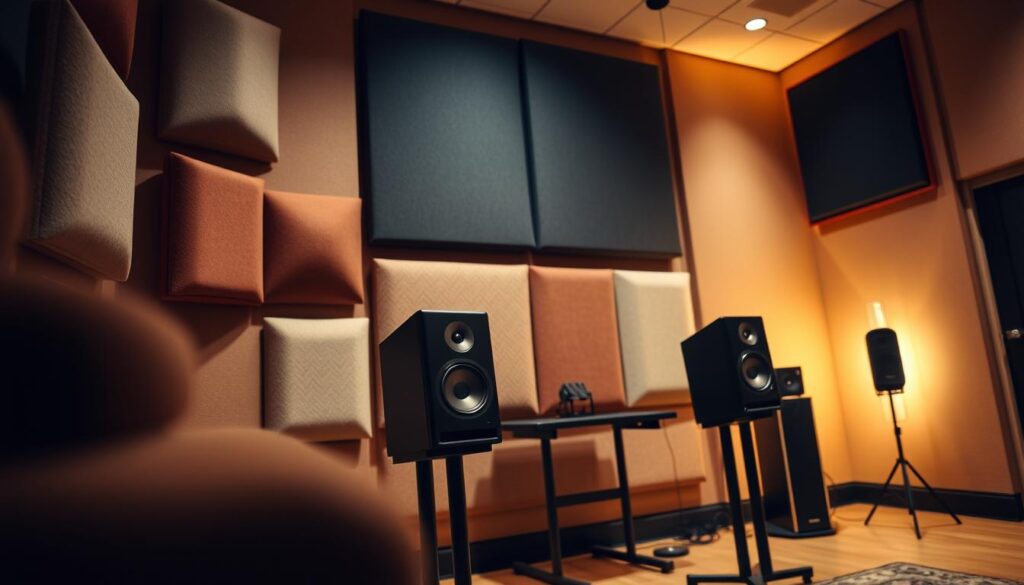
Improving your space doesn’t need to cost a lot. Start by finding where sound bounces back on your walls and ceiling. Putting acoustic panels there can make your mix clearer and tighter.
To fix low-end problems, bass traps are key. These thick absorbers in corners soak up too much sound. You can find acoustic solutions for your space online.
Here are some steps to improve your listening area:
- Broadband absorption: Panels help with mid and high sounds.
- Bass traps: Put these in corners to stop low sounds from building up.
- Soft furnishings: Thick rugs and curtains can reduce echoes.
- Strategic placement: Move your desk and studio monitors to avoid boundary issues.
By treating your room, your sound monitoring devices will give you clear, professional sound. A well-treated room is as important as good studio reference speakers.
Setting Up Your Studio Monitors
We think a good monitoring setup is key to a great mix. When you get studio monitors, how you place them matters a lot. It affects how well you hear your music.
Setting them up right means your studio reference speakers show your music as it really is.
Positioning for Best Sound
To get the best sound, put your monitors in a triangle shape with your head. The distance between them should match the distance to your ears. Maintaining left-right symmetry helps avoid sound issues and keeps the sound balanced.
Here are some key tips for setting up:
- Put the tweeters at ear level for clear high sounds.
- Angle the speakers inward, or toe-in, to face you.
- Avoid corners to prevent too much bass.
- Use stands or pads to keep speakers stable and separate from your desk.
Calibrating Your Monitors
After setting up, calibrate your audio mixing equipment for consistent sound. Start by setting your audio interface output levels to a standard. Make sure both channels are at the same volume.
Use a sound pressure level meter to check your volume. Keep it at a moderate level to avoid ear strain. Use known tracks to test how your system handles different sounds.
Testing and Tuning Your Setup
After calibrating, test your system with careful listening. Pay attention to vocals and bass. If bass is too much, adjust the speakers’ position.
Here’s how to fine-tune your audio mixing equipment:
- Make sure vocals are clear and centered.
- Check that bass is balanced and doesn’t hide mid-range sounds.
- Do repeatable listening checks to ensure a wide sweet spot.
- Adjust the high or low trim switches if needed for room acoustics.
Understanding Specifications
Learning about your hardware’s technical details is key to mastering your sound environment. When looking at studio monitors and other high-fidelity monitors, you’ll see many numbers. These might seem scary at first. But, knowing what they mean helps you choose the right audio mixing equipment.
SPL and Its Importance
Sound Pressure Level (SPL) shows how loud your speakers can get. Many think a higher SPL means louder speakers. But, it’s not just about volume.
Clean headroom is more important. You want your speakers to show every detail clearly, even when you turn it up. A high SPL helps your system handle loud moments without losing quality.
Impedance Explained
Impedance is measured in Ohms and shows how much resistance your speakers have. This is crucial for passive systems that need an external power source.
When using passive monitors, make sure the amplifier’s impedance matches the speakers. This prevents damage. Active systems handle this internally, making setup easier for most users.
The Role of Amp Power
The power an amplifier gives to the drivers affects your sound quality. Modern monitors use special amplifiers to improve their performance:
- Single-amp: One amplifier powers both the tweeter and woofer through a passive crossover.
- Bi-amp: Two amplifiers drive the high and low frequencies, giving better control over each driver.
- Tri-amp: Three amplifiers handle highs, mids, and lows, offering the most precise sound for professionals.
Effective driver control is the main advantage of these setups. By separating power, monitors can deliver a clearer sound across all frequencies.
Common Mistakes to Avoid
Even the most expensive sound monitoring devices can fail if you make common setup mistakes. Many producers focus too much on the hardware and ignore the room’s environment. Knowing these errors helps your studio monitors work their best.
Ignoring Room Acoustics
Ignoring your room’s acoustics is a big mistake. Without proper treatment, your room can distort the sound. This can make bass sound wrong, leading you to cut frequencies that are actually there.
“The room is the most important piece of gear in your studio. If you cannot trust what you hear, you cannot make informed mixing decisions.”
Poor Monitor Placement
Bad placement can mess up your sound. Speakers too close to walls can make bass sound wrong. Try to place them in an equilateral triangle to get a balanced sound.
Also, don’t listen too far off-axis. This makes it hard to hear high frequencies. Keep your tweeters at ear level for the best sound.
Overlooking Calibration
Many start mixing without calibrating their gear. This can make your mix sound off on other systems. Make sure your left and right channels are balanced for accurate mixing.
| Common Mistake | Resulting Issue | Recommended Fix |
|---|---|---|
| Wall Proximity | Muddy Bass | Pull monitors away from walls |
| Asymmetry | Unbalanced Stereo | Measure equal distances |
| No Calibration | Poor Translation | Use SPL meter for levels |
| Hard Surfaces | High-end Flutter | Add acoustic panels |
Fixing these issues can really improve your workflow. When you remove these problems, you can trust your creative choices.
Enhancing Your Monitoring Experience
Improving your audio setup is about finding the right mix of hardware and software. It’s not just about the gear you use. How you set it up and use it matters a lot. We think focusing on your workflow and the space around you is key.
Upgrading Cables and Stands
Having stable equipment is crucial for clear sound. Using sturdy monitor stands or isolation pads is a good start. They keep your studio monitors steady and free from vibrations.
Also, balanced cables are a must for clean signals. They block out interference, keeping your music production gear clear of hum. Good cables are a smart choice, saving you money on fancy extras.
Incorporating Digital Audio Workstations
Your software is the heart of your studio. Learning to route tracks well in your digital audio workstation is key. It lets you get the most out of your audio mixing equipment without distortion.
Plug-ins can help you fine-tune your levels and panning. When your software and hardware work together, you get better results. This teamwork is what makes your music sound professional.
| Accessory Type | Primary Benefit | Impact Level |
|---|---|---|
| Isolation Pads | Reduces surface vibration | High |
| Balanced Cables | Eliminates ground noise | Medium |
| Monitor Stands | Improves stereo imaging | High |
| Cable Ties | Organizes workspace | Low |
Maintenance Tips for Longevity
Keeping your audio equipment in top shape ensures you always hear the truth in your mixes. When you invest in studio monitors, you want them to remain reliable reference tools for many years. Consistent care prevents common issues and keeps your gear performing at its peak.
Regular Cleaning Practices
Dust is the silent enemy of any electronic component. We recommend using a soft, dry microfiber cloth to gently wipe down the cabinets and grilles of your high-fidelity monitors. Avoid using harsh chemicals or abrasive cleaners that could damage the finish or the delicate driver materials.
It is equally important to keep the rear vents and bass ports free from obstructions. If these areas become clogged with dust, your sound monitoring devices may struggle with heat dissipation or airflow. Always ensure that no liquids are placed near your speakers, as accidental spills can cause permanent internal damage.
Protecting Against Damage
Electrical stability is vital for the health of your gear. We strongly suggest using a high-quality surge protector to shield your studio monitors from power spikes. Always turn your speakers on last and off first to prevent harmful transient pops from reaching the drivers.
Proper cable management also plays a significant role in equipment longevity. Use strain relief techniques to ensure that cables do not pull on the input jacks, which can lead to loose connections over time. Placing your high-fidelity monitors on sturdy, isolated stands provides better ventilation and prevents unwanted vibrations.
By maintaining a clean and stable environment, you protect your sound monitoring devices from unnecessary wear. These simple habits reduce the need for preventable repairs and ensure your studio remains a professional space for years to come.
Conclusion: Making Your Choice
Getting the right gear changes how we hear our work. We need to think about our room size, listening distance, and what we want to achieve. This helps us find the perfect fit for our space.
Essential Factors for Success
Choosing studio monitors means finding reliable sound. We look for neutral sound over fancy features. This ensures our mixes sound good everywhere.
High-end speakers are great for big rooms. But, smaller spaces do better with compact, accurate speakers.
Refining Your Monitoring Workflow
It’s not just about the gear. Proper placement, room treatment, and calibration are key. Using familiar tracks helps us see how our devices work in our space.
Don’t just look at specs. The best gear is comfortable for long sessions and shows your audio truthfully. Listen to your ears as you build a system that supports your vision for years.
FAQ
Understanding Audio Monitoring
Importance in Music Production
Frequency Response
Power Handling
Connectivity Options
Size and Placement
Active vs. Passive Monitors
Nearfield vs. Farfield Monitors
Subwoofers and Their Role
Yamaha
KRK
Adam Audio
JBL
Finding Quality on a Budget
Mid-Range Monitors Worth Considering
FAQ
Understanding Audio Monitoring
Studio monitors are professional speakers designed to accurately reproduce audio recordings. Unlike consumer speakers, they aim for a neutral response. This allows us to judge our tracks without artificial coloration.
Importance in Music Production
In our workflows, monitors ensure our mixes “translate” well. They help us identify and correct frequency imbalances. This is crucial for professional-grade music production.
Frequency Response
When comparing equipment, we look for a smooth, flat frequency response. A wide range ensures we can hear all frequencies, vital for professional music production.
Power Handling
We evaluate power handling for volume and headroom. Adequate wattage prevents distortion during dynamic peaks. More power often results in a cleaner sound at moderate levels.
Connectivity Options
Modern monitors offer balanced TRS or XLR inputs. These connections reject noise and interference, crucial near computers and other gear. Flexible connectivity ensures seamless integration into any setup.
Size and Placement
We match driver size to our environment. For small studios, 5-inch monitors are ideal. Larger monitors provide deeper bass but may overwhelm small rooms.
Active vs. Passive Monitors
Most modern monitors are “active,” with built-in amplifiers. This convenience makes them the standard for project studios. Passive designs require an external amplifier, offering flexibility.
Nearfield vs. Farfield Monitors
Nearfield monitors are used in home and project rooms. They are placed close to the listener to minimize room sound. Farfield monitors are larger, used in big studios, and listened to from a distance.
Subwoofers and Their Role
For extreme low-end, we might add a subwoofer. It extends our frequency range but requires quality treatment to manage bass buildup.
Yamaha
Yamaha is known for its “clinical” honesty. The Yamaha HS7 is a staple in many studios, providing a mid-forward sound. They are legendary for their reliability.
KRK
KRK is popular for its punch and low-end energy. Their Rokit series features iconic yellow drivers, widely used by producers for professional standards.
Adam Audio
Adam Audio is sought for exceptional high-frequency detail. Their ribbon tweeters provide fast and accurate transient response, making them highly respected.
JBL
JBL offers professional-grade performance with a wide “sweet spot.” Models like the JBL 3 Series are praised for their image control waveguide.
Finding Quality on a Budget
We believe quality monitors can be found on a budget. In the 0–0 range, we focus on neutral response and solid build. Matching the speaker to the room size is more important than premium brand names.
Mid-Range Monitors Worth Considering
In the 0–
FAQ
Understanding Audio Monitoring
Studio monitors are professional speakers designed to accurately reproduce audio recordings. Unlike consumer speakers, they aim for a neutral response. This allows us to judge our tracks without artificial coloration.
Importance in Music Production
In our workflows, monitors ensure our mixes “translate” well. They help us identify and correct frequency imbalances. This is crucial for professional-grade music production.
Frequency Response
When comparing equipment, we look for a smooth, flat frequency response. A wide range ensures we can hear all frequencies, vital for professional music production.
Power Handling
We evaluate power handling for volume and headroom. Adequate wattage prevents distortion during dynamic peaks. More power often results in a cleaner sound at moderate levels.
Connectivity Options
Modern monitors offer balanced TRS or XLR inputs. These connections reject noise and interference, crucial near computers and other gear. Flexible connectivity ensures seamless integration into any setup.
Size and Placement
We match driver size to our environment. For small studios, 5-inch monitors are ideal. Larger monitors provide deeper bass but may overwhelm small rooms.
Active vs. Passive Monitors
Most modern monitors are “active,” with built-in amplifiers. This convenience makes them the standard for project studios. Passive designs require an external amplifier, offering flexibility.
Nearfield vs. Farfield Monitors
Nearfield monitors are used in home and project rooms. They are placed close to the listener to minimize room sound. Farfield monitors are larger, used in big studios, and listened to from a distance.
Subwoofers and Their Role
For extreme low-end, we might add a subwoofer. It extends our frequency range but requires quality treatment to manage bass buildup.
Yamaha
Yamaha is known for its “clinical” honesty. The Yamaha HS7 is a staple in many studios, providing a mid-forward sound. They are legendary for their reliability.
KRK
KRK is popular for its punch and low-end energy. Their Rokit series features iconic yellow drivers, widely used by producers for professional standards.
Adam Audio
Adam Audio is sought for exceptional high-frequency detail. Their ribbon tweeters provide fast and accurate transient response, making them highly respected.
JBL
JBL offers professional-grade performance with a wide “sweet spot.” Models like the JBL 3 Series are praised for their image control waveguide.
Finding Quality on a Budget
We believe quality monitors can be found on a budget. In the $200–$400 range, we focus on neutral response and solid build. Matching the speaker to the room size is more important than premium brand names.
Mid-Range Monitors Worth Considering
In the $400–$1,000 range, we see improvements in driver materials and amplification. These monitors offer better clarity and lower distortion, adapting to room acoustics.
High-End Options for Professionals
For budgets above $1,000, we invest in high-end refinement. These speakers provide incredible headroom, hand-tuned components, and advanced calibration features. They offer a transparent window into our audio.
Significance of Room Acoustics
Even the best monitors can’t perform in a poorly treated room. Reflections, standing waves, and bass buildup color what we hear. Proper treatment is essential for accurate mixing.
Common Acoustic Treatment Solutions
To fix these issues, we use broadband absorption and bass traps. Simple additions like rugs and curtains also help. Treating our room ensures our monitors provide a trustworthy reference.
Positioning for Best Sound
We place our monitors on stable stands or isolation pads. We arrange them in an equilateral triangle for balanced stereo image. Tweeters should be at ear level and angled slightly toward us.
Calibrating Your Monitors
Once positioned, we calibrate our system. We level-match the speakers and set a consistent listening volume. Software tools and reference tracks help ensure a balanced stereo image.
Testing and Tuning Your Setup
We test our gear using familiar music. We listen for vocal placement, bass clarity, and stereo width. Using “reference tracks” helps us tune our ears to our monitors and room.
SPL and Its Importance
We look at Maximum SPL to understand our monitors’ output capabilities. It’s about handling loud transients without clipping the amplifiers.
Impedance Explained
For passive speakers, impedance matching is critical. We ensure our external amplifier is compatible with the monitors’ ohm rating. Active monitors handle this internally, simplifying our setup.
The Role of Amp Power
High-end monitors often use bi-amped or tri-amped designs. This means each driver has its own amplifier. It leads to better control, lower distortion, and accurate crossovers.
Ignoring Room Acoustics
Ignoring room acoustics is a common mistake. Without treatment, our monitors can’t perform accurately. Treating our room is essential for hearing the true potential of our monitors.
Poor Monitor Placement
Poor placement can create an artificial bass boost. We avoid this by keeping monitors away from walls and ensuring symmetry for balanced stereo image.
Overlooking Calibration
We often forget that our ears can adapt to “wrong” sounds. Without calibration, we might make consistent errors in our tonal judgments. Proper calibration makes our monitors truly dependable.
Upgrading Cables and Stands
To get the most from our gear, we invest in high-quality balanced cables. We also use heavy-duty stands or isolation pads to decouple the speakers from the desk. This prevents desk vibrations from muddying our low-end.
Incorporating Digital Audio Workstations
We integrate our monitors into our digital workflow. Software-based room correction can help flatten the response of our speakers. This provides an extra layer of accuracy to our music production.
Regular Cleaning Practices
We keep our monitors in top shape by dusting the cabinets and grilles regularly. We avoid touching the delicate driver cones or tweeters, as skin oils and pressure can cause permanent damage.
Protecting Against Damage
To ensure longevity, we use surge protectors and follow a strict “last on, first off” power sequence. This prevents loud “pops” from damaging our monitors. Keeping the room at a stable temperature and humidity also preserves the internal components.
Why should we use studio monitors instead of high-end home theater speakers?
Studio monitors are designed for a flat, neutral response. Home theater speakers are often “voiced” to enhance sound. Professional speakers provide an objective truth for accurate mixing.
What is the benefit of “active” studio reference speakers?
Active monitors include built-in amplifiers perfectly matched to the drivers. This ensures correct power and crossover settings for the best sound quality.
How do we determine the best size for our high-fidelity monitors?
We choose our driver size based on room dimensions. For small studios, 5-inch monitors are ideal. In larger rooms, 7-inch or 8-inch monitors allow for deeper low-end frequencies.
Do we really need to invest in acoustic treatment?
Yes, acoustic treatment is as important as the monitors themselves. Without it, sound waves can create “standing waves” that affect bass. Proper treatment ensures accurate mixing.
Can we use balanced and unbalanced cables with our music production gear?
While many monitors accept both, we recommend balanced XLR or TRS cables. These reject noise and hum, ensuring a clean audio signal.
What are “nearfield” monitors and why are they so common?
Nearfield monitors are designed for close listening, typically three to five feet away. They minimize room sound, crucial in smaller studios.
How often should we calibrate our audio mixing equipment?
We recommend calibrating whenever we change our room layout or add new gear. Regular checks with reference tracks keep our ears accustomed to the monitors’ neutral response.
,000 range, we see improvements in driver materials and amplification. These monitors offer better clarity and lower distortion, adapting to room acoustics.
High-End Options for Professionals
For budgets above
FAQ
Understanding Audio Monitoring
Studio monitors are professional speakers designed to accurately reproduce audio recordings. Unlike consumer speakers, they aim for a neutral response. This allows us to judge our tracks without artificial coloration.
Importance in Music Production
In our workflows, monitors ensure our mixes “translate” well. They help us identify and correct frequency imbalances. This is crucial for professional-grade music production.
Frequency Response
When comparing equipment, we look for a smooth, flat frequency response. A wide range ensures we can hear all frequencies, vital for professional music production.
Power Handling
We evaluate power handling for volume and headroom. Adequate wattage prevents distortion during dynamic peaks. More power often results in a cleaner sound at moderate levels.
Connectivity Options
Modern monitors offer balanced TRS or XLR inputs. These connections reject noise and interference, crucial near computers and other gear. Flexible connectivity ensures seamless integration into any setup.
Size and Placement
We match driver size to our environment. For small studios, 5-inch monitors are ideal. Larger monitors provide deeper bass but may overwhelm small rooms.
Active vs. Passive Monitors
Most modern monitors are “active,” with built-in amplifiers. This convenience makes them the standard for project studios. Passive designs require an external amplifier, offering flexibility.
Nearfield vs. Farfield Monitors
Nearfield monitors are used in home and project rooms. They are placed close to the listener to minimize room sound. Farfield monitors are larger, used in big studios, and listened to from a distance.
Subwoofers and Their Role
For extreme low-end, we might add a subwoofer. It extends our frequency range but requires quality treatment to manage bass buildup.
Yamaha
Yamaha is known for its “clinical” honesty. The Yamaha HS7 is a staple in many studios, providing a mid-forward sound. They are legendary for their reliability.
KRK
KRK is popular for its punch and low-end energy. Their Rokit series features iconic yellow drivers, widely used by producers for professional standards.
Adam Audio
Adam Audio is sought for exceptional high-frequency detail. Their ribbon tweeters provide fast and accurate transient response, making them highly respected.
JBL
JBL offers professional-grade performance with a wide “sweet spot.” Models like the JBL 3 Series are praised for their image control waveguide.
Finding Quality on a Budget
We believe quality monitors can be found on a budget. In the $200–$400 range, we focus on neutral response and solid build. Matching the speaker to the room size is more important than premium brand names.
Mid-Range Monitors Worth Considering
In the $400–$1,000 range, we see improvements in driver materials and amplification. These monitors offer better clarity and lower distortion, adapting to room acoustics.
High-End Options for Professionals
For budgets above $1,000, we invest in high-end refinement. These speakers provide incredible headroom, hand-tuned components, and advanced calibration features. They offer a transparent window into our audio.
Significance of Room Acoustics
Even the best monitors can’t perform in a poorly treated room. Reflections, standing waves, and bass buildup color what we hear. Proper treatment is essential for accurate mixing.
Common Acoustic Treatment Solutions
To fix these issues, we use broadband absorption and bass traps. Simple additions like rugs and curtains also help. Treating our room ensures our monitors provide a trustworthy reference.
Positioning for Best Sound
We place our monitors on stable stands or isolation pads. We arrange them in an equilateral triangle for balanced stereo image. Tweeters should be at ear level and angled slightly toward us.
Calibrating Your Monitors
Once positioned, we calibrate our system. We level-match the speakers and set a consistent listening volume. Software tools and reference tracks help ensure a balanced stereo image.
Testing and Tuning Your Setup
We test our gear using familiar music. We listen for vocal placement, bass clarity, and stereo width. Using “reference tracks” helps us tune our ears to our monitors and room.
SPL and Its Importance
We look at Maximum SPL to understand our monitors’ output capabilities. It’s about handling loud transients without clipping the amplifiers.
Impedance Explained
For passive speakers, impedance matching is critical. We ensure our external amplifier is compatible with the monitors’ ohm rating. Active monitors handle this internally, simplifying our setup.
The Role of Amp Power
High-end monitors often use bi-amped or tri-amped designs. This means each driver has its own amplifier. It leads to better control, lower distortion, and accurate crossovers.
Ignoring Room Acoustics
Ignoring room acoustics is a common mistake. Without treatment, our monitors can’t perform accurately. Treating our room is essential for hearing the true potential of our monitors.
Poor Monitor Placement
Poor placement can create an artificial bass boost. We avoid this by keeping monitors away from walls and ensuring symmetry for balanced stereo image.
Overlooking Calibration
We often forget that our ears can adapt to “wrong” sounds. Without calibration, we might make consistent errors in our tonal judgments. Proper calibration makes our monitors truly dependable.
Upgrading Cables and Stands
To get the most from our gear, we invest in high-quality balanced cables. We also use heavy-duty stands or isolation pads to decouple the speakers from the desk. This prevents desk vibrations from muddying our low-end.
Incorporating Digital Audio Workstations
We integrate our monitors into our digital workflow. Software-based room correction can help flatten the response of our speakers. This provides an extra layer of accuracy to our music production.
Regular Cleaning Practices
We keep our monitors in top shape by dusting the cabinets and grilles regularly. We avoid touching the delicate driver cones or tweeters, as skin oils and pressure can cause permanent damage.
Protecting Against Damage
To ensure longevity, we use surge protectors and follow a strict “last on, first off” power sequence. This prevents loud “pops” from damaging our monitors. Keeping the room at a stable temperature and humidity also preserves the internal components.
Why should we use studio monitors instead of high-end home theater speakers?
Studio monitors are designed for a flat, neutral response. Home theater speakers are often “voiced” to enhance sound. Professional speakers provide an objective truth for accurate mixing.
What is the benefit of “active” studio reference speakers?
Active monitors include built-in amplifiers perfectly matched to the drivers. This ensures correct power and crossover settings for the best sound quality.
How do we determine the best size for our high-fidelity monitors?
We choose our driver size based on room dimensions. For small studios, 5-inch monitors are ideal. In larger rooms, 7-inch or 8-inch monitors allow for deeper low-end frequencies.
Do we really need to invest in acoustic treatment?
Yes, acoustic treatment is as important as the monitors themselves. Without it, sound waves can create “standing waves” that affect bass. Proper treatment ensures accurate mixing.
Can we use balanced and unbalanced cables with our music production gear?
While many monitors accept both, we recommend balanced XLR or TRS cables. These reject noise and hum, ensuring a clean audio signal.
What are “nearfield” monitors and why are they so common?
Nearfield monitors are designed for close listening, typically three to five feet away. They minimize room sound, crucial in smaller studios.
How often should we calibrate our audio mixing equipment?
We recommend calibrating whenever we change our room layout or add new gear. Regular checks with reference tracks keep our ears accustomed to the monitors’ neutral response.
,000, we invest in high-end refinement. These speakers provide incredible headroom, hand-tuned components, and advanced calibration features. They offer a transparent window into our audio.
Significance of Room Acoustics
Even the best monitors can’t perform in a poorly treated room. Reflections, standing waves, and bass buildup color what we hear. Proper treatment is essential for accurate mixing.
Common Acoustic Treatment Solutions
To fix these issues, we use broadband absorption and bass traps. Simple additions like rugs and curtains also help. Treating our room ensures our monitors provide a trustworthy reference.
Positioning for Best Sound
We place our monitors on stable stands or isolation pads. We arrange them in an equilateral triangle for balanced stereo image. Tweeters should be at ear level and angled slightly toward us.
Calibrating Your Monitors
Once positioned, we calibrate our system. We level-match the speakers and set a consistent listening volume. Software tools and reference tracks help ensure a balanced stereo image.
Testing and Tuning Your Setup
We test our gear using familiar music. We listen for vocal placement, bass clarity, and stereo width. Using “reference tracks” helps us tune our ears to our monitors and room.
SPL and Its Importance
We look at Maximum SPL to understand our monitors’ output capabilities. It’s about handling loud transients without clipping the amplifiers.
Impedance Explained
For passive speakers, impedance matching is critical. We ensure our external amplifier is compatible with the monitors’ ohm rating. Active monitors handle this internally, simplifying our setup.
The Role of Amp Power
High-end monitors often use bi-amped or tri-amped designs. This means each driver has its own amplifier. It leads to better control, lower distortion, and accurate crossovers.
Ignoring Room Acoustics
Ignoring room acoustics is a common mistake. Without treatment, our monitors can’t perform accurately. Treating our room is essential for hearing the true potential of our monitors.
Poor Monitor Placement
Poor placement can create an artificial bass boost. We avoid this by keeping monitors away from walls and ensuring symmetry for balanced stereo image.
Overlooking Calibration
We often forget that our ears can adapt to “wrong” sounds. Without calibration, we might make consistent errors in our tonal judgments. Proper calibration makes our monitors truly dependable.
Upgrading Cables and Stands
To get the most from our gear, we invest in high-quality balanced cables. We also use heavy-duty stands or isolation pads to decouple the speakers from the desk. This prevents desk vibrations from muddying our low-end.
Incorporating Digital Audio Workstations
We integrate our monitors into our digital workflow. Software-based room correction can help flatten the response of our speakers. This provides an extra layer of accuracy to our music production.
Regular Cleaning Practices
We keep our monitors in top shape by dusting the cabinets and grilles regularly. We avoid touching the delicate driver cones or tweeters, as skin oils and pressure can cause permanent damage.
Protecting Against Damage
To ensure longevity, we use surge protectors and follow a strict “last on, first off” power sequence. This prevents loud “pops” from damaging our monitors. Keeping the room at a stable temperature and humidity also preserves the internal components.
Why should we use studio monitors instead of high-end home theater speakers?
Studio monitors are designed for a flat, neutral response. Home theater speakers are often “voiced” to enhance sound. Professional speakers provide an objective truth for accurate mixing.
What is the benefit of “active” studio reference speakers?
Active monitors include built-in amplifiers perfectly matched to the drivers. This ensures correct power and crossover settings for the best sound quality.
How do we determine the best size for our high-fidelity monitors?
We choose our driver size based on room dimensions. For small studios, 5-inch monitors are ideal. In larger rooms, 7-inch or 8-inch monitors allow for deeper low-end frequencies.
Do we really need to invest in acoustic treatment?
Yes, acoustic treatment is as important as the monitors themselves. Without it, sound waves can create “standing waves” that affect bass. Proper treatment ensures accurate mixing.
Can we use balanced and unbalanced cables with our music production gear?
While many monitors accept both, we recommend balanced XLR or TRS cables. These reject noise and hum, ensuring a clean audio signal.
What are “nearfield” monitors and why are they so common?
Nearfield monitors are designed for close listening, typically three to five feet away. They minimize room sound, crucial in smaller studios.
How often should we calibrate our audio mixing equipment?
We recommend calibrating whenever we change our room layout or add new gear. Regular checks with reference tracks keep our ears accustomed to the monitors’ neutral response.
FAQ
Understanding Audio Monitoring
Studio monitors are professional speakers designed to accurately reproduce audio recordings. Unlike consumer speakers, they aim for a neutral response. This allows us to judge our tracks without artificial coloration.
Importance in Music Production
In our workflows, monitors ensure our mixes “translate” well. They help us identify and correct frequency imbalances. This is crucial for professional-grade music production.
Frequency Response
When comparing equipment, we look for a smooth, flat frequency response. A wide range ensures we can hear all frequencies, vital for professional music production.
Power Handling
We evaluate power handling for volume and headroom. Adequate wattage prevents distortion during dynamic peaks. More power often results in a cleaner sound at moderate levels.
Connectivity Options
Modern monitors offer balanced TRS or XLR inputs. These connections reject noise and interference, crucial near computers and other gear. Flexible connectivity ensures seamless integration into any setup.
Size and Placement
We match driver size to our environment. For small studios, 5-inch monitors are ideal. Larger monitors provide deeper bass but may overwhelm small rooms.
Active vs. Passive Monitors
Most modern monitors are “active,” with built-in amplifiers. This convenience makes them the standard for project studios. Passive designs require an external amplifier, offering flexibility.
Nearfield vs. Farfield Monitors
Nearfield monitors are used in home and project rooms. They are placed close to the listener to minimize room sound. Farfield monitors are larger, used in big studios, and listened to from a distance.
Subwoofers and Their Role
For extreme low-end, we might add a subwoofer. It extends our frequency range but requires quality treatment to manage bass buildup.
Yamaha
Yamaha is known for its “clinical” honesty. The Yamaha HS7 is a staple in many studios, providing a mid-forward sound. They are legendary for their reliability.
KRK
KRK is popular for its punch and low-end energy. Their Rokit series features iconic yellow drivers, widely used by producers for professional standards.
Adam Audio
Adam Audio is sought for exceptional high-frequency detail. Their ribbon tweeters provide fast and accurate transient response, making them highly respected.
JBL
JBL offers professional-grade performance with a wide “sweet spot.” Models like the JBL 3 Series are praised for their image control waveguide.
Finding Quality on a Budget
We believe quality monitors can be found on a budget. In the 0–0 range, we focus on neutral response and solid build. Matching the speaker to the room size is more important than premium brand names.
Mid-Range Monitors Worth Considering
In the 0–
FAQ
Understanding Audio Monitoring
Studio monitors are professional speakers designed to accurately reproduce audio recordings. Unlike consumer speakers, they aim for a neutral response. This allows us to judge our tracks without artificial coloration.
Importance in Music Production
In our workflows, monitors ensure our mixes “translate” well. They help us identify and correct frequency imbalances. This is crucial for professional-grade music production.
Frequency Response
When comparing equipment, we look for a smooth, flat frequency response. A wide range ensures we can hear all frequencies, vital for professional music production.
Power Handling
We evaluate power handling for volume and headroom. Adequate wattage prevents distortion during dynamic peaks. More power often results in a cleaner sound at moderate levels.
Connectivity Options
Modern monitors offer balanced TRS or XLR inputs. These connections reject noise and interference, crucial near computers and other gear. Flexible connectivity ensures seamless integration into any setup.
Size and Placement
We match driver size to our environment. For small studios, 5-inch monitors are ideal. Larger monitors provide deeper bass but may overwhelm small rooms.
Active vs. Passive Monitors
Most modern monitors are “active,” with built-in amplifiers. This convenience makes them the standard for project studios. Passive designs require an external amplifier, offering flexibility.
Nearfield vs. Farfield Monitors
Nearfield monitors are used in home and project rooms. They are placed close to the listener to minimize room sound. Farfield monitors are larger, used in big studios, and listened to from a distance.
Subwoofers and Their Role
For extreme low-end, we might add a subwoofer. It extends our frequency range but requires quality treatment to manage bass buildup.
Yamaha
Yamaha is known for its “clinical” honesty. The Yamaha HS7 is a staple in many studios, providing a mid-forward sound. They are legendary for their reliability.
KRK
KRK is popular for its punch and low-end energy. Their Rokit series features iconic yellow drivers, widely used by producers for professional standards.
Adam Audio
Adam Audio is sought for exceptional high-frequency detail. Their ribbon tweeters provide fast and accurate transient response, making them highly respected.
JBL
JBL offers professional-grade performance with a wide “sweet spot.” Models like the JBL 3 Series are praised for their image control waveguide.
Finding Quality on a Budget
We believe quality monitors can be found on a budget. In the $200–$400 range, we focus on neutral response and solid build. Matching the speaker to the room size is more important than premium brand names.
Mid-Range Monitors Worth Considering
In the $400–$1,000 range, we see improvements in driver materials and amplification. These monitors offer better clarity and lower distortion, adapting to room acoustics.
High-End Options for Professionals
For budgets above $1,000, we invest in high-end refinement. These speakers provide incredible headroom, hand-tuned components, and advanced calibration features. They offer a transparent window into our audio.
Significance of Room Acoustics
Even the best monitors can’t perform in a poorly treated room. Reflections, standing waves, and bass buildup color what we hear. Proper treatment is essential for accurate mixing.
Common Acoustic Treatment Solutions
To fix these issues, we use broadband absorption and bass traps. Simple additions like rugs and curtains also help. Treating our room ensures our monitors provide a trustworthy reference.
Positioning for Best Sound
We place our monitors on stable stands or isolation pads. We arrange them in an equilateral triangle for balanced stereo image. Tweeters should be at ear level and angled slightly toward us.
Calibrating Your Monitors
Once positioned, we calibrate our system. We level-match the speakers and set a consistent listening volume. Software tools and reference tracks help ensure a balanced stereo image.
Testing and Tuning Your Setup
We test our gear using familiar music. We listen for vocal placement, bass clarity, and stereo width. Using “reference tracks” helps us tune our ears to our monitors and room.
SPL and Its Importance
We look at Maximum SPL to understand our monitors’ output capabilities. It’s about handling loud transients without clipping the amplifiers.
Impedance Explained
For passive speakers, impedance matching is critical. We ensure our external amplifier is compatible with the monitors’ ohm rating. Active monitors handle this internally, simplifying our setup.
The Role of Amp Power
High-end monitors often use bi-amped or tri-amped designs. This means each driver has its own amplifier. It leads to better control, lower distortion, and accurate crossovers.
Ignoring Room Acoustics
Ignoring room acoustics is a common mistake. Without treatment, our monitors can’t perform accurately. Treating our room is essential for hearing the true potential of our monitors.
Poor Monitor Placement
Poor placement can create an artificial bass boost. We avoid this by keeping monitors away from walls and ensuring symmetry for balanced stereo image.
Overlooking Calibration
We often forget that our ears can adapt to “wrong” sounds. Without calibration, we might make consistent errors in our tonal judgments. Proper calibration makes our monitors truly dependable.
Upgrading Cables and Stands
To get the most from our gear, we invest in high-quality balanced cables. We also use heavy-duty stands or isolation pads to decouple the speakers from the desk. This prevents desk vibrations from muddying our low-end.
Incorporating Digital Audio Workstations
We integrate our monitors into our digital workflow. Software-based room correction can help flatten the response of our speakers. This provides an extra layer of accuracy to our music production.
Regular Cleaning Practices
We keep our monitors in top shape by dusting the cabinets and grilles regularly. We avoid touching the delicate driver cones or tweeters, as skin oils and pressure can cause permanent damage.
Protecting Against Damage
To ensure longevity, we use surge protectors and follow a strict “last on, first off” power sequence. This prevents loud “pops” from damaging our monitors. Keeping the room at a stable temperature and humidity also preserves the internal components.
Why should we use studio monitors instead of high-end home theater speakers?
Studio monitors are designed for a flat, neutral response. Home theater speakers are often “voiced” to enhance sound. Professional speakers provide an objective truth for accurate mixing.
What is the benefit of “active” studio reference speakers?
Active monitors include built-in amplifiers perfectly matched to the drivers. This ensures correct power and crossover settings for the best sound quality.
How do we determine the best size for our high-fidelity monitors?
We choose our driver size based on room dimensions. For small studios, 5-inch monitors are ideal. In larger rooms, 7-inch or 8-inch monitors allow for deeper low-end frequencies.
Do we really need to invest in acoustic treatment?
Yes, acoustic treatment is as important as the monitors themselves. Without it, sound waves can create “standing waves” that affect bass. Proper treatment ensures accurate mixing.
Can we use balanced and unbalanced cables with our music production gear?
While many monitors accept both, we recommend balanced XLR or TRS cables. These reject noise and hum, ensuring a clean audio signal.
What are “nearfield” monitors and why are they so common?
Nearfield monitors are designed for close listening, typically three to five feet away. They minimize room sound, crucial in smaller studios.
How often should we calibrate our audio mixing equipment?
We recommend calibrating whenever we change our room layout or add new gear. Regular checks with reference tracks keep our ears accustomed to the monitors’ neutral response.
,000 range, we see improvements in driver materials and amplification. These monitors offer better clarity and lower distortion, adapting to room acoustics.
High-End Options for Professionals
For budgets above
FAQ
Understanding Audio Monitoring
Studio monitors are professional speakers designed to accurately reproduce audio recordings. Unlike consumer speakers, they aim for a neutral response. This allows us to judge our tracks without artificial coloration.
Importance in Music Production
In our workflows, monitors ensure our mixes “translate” well. They help us identify and correct frequency imbalances. This is crucial for professional-grade music production.
Frequency Response
When comparing equipment, we look for a smooth, flat frequency response. A wide range ensures we can hear all frequencies, vital for professional music production.
Power Handling
We evaluate power handling for volume and headroom. Adequate wattage prevents distortion during dynamic peaks. More power often results in a cleaner sound at moderate levels.
Connectivity Options
Modern monitors offer balanced TRS or XLR inputs. These connections reject noise and interference, crucial near computers and other gear. Flexible connectivity ensures seamless integration into any setup.
Size and Placement
We match driver size to our environment. For small studios, 5-inch monitors are ideal. Larger monitors provide deeper bass but may overwhelm small rooms.
Active vs. Passive Monitors
Most modern monitors are “active,” with built-in amplifiers. This convenience makes them the standard for project studios. Passive designs require an external amplifier, offering flexibility.
Nearfield vs. Farfield Monitors
Nearfield monitors are used in home and project rooms. They are placed close to the listener to minimize room sound. Farfield monitors are larger, used in big studios, and listened to from a distance.
Subwoofers and Their Role
For extreme low-end, we might add a subwoofer. It extends our frequency range but requires quality treatment to manage bass buildup.
Yamaha
Yamaha is known for its “clinical” honesty. The Yamaha HS7 is a staple in many studios, providing a mid-forward sound. They are legendary for their reliability.
KRK
KRK is popular for its punch and low-end energy. Their Rokit series features iconic yellow drivers, widely used by producers for professional standards.
Adam Audio
Adam Audio is sought for exceptional high-frequency detail. Their ribbon tweeters provide fast and accurate transient response, making them highly respected.
JBL
JBL offers professional-grade performance with a wide “sweet spot.” Models like the JBL 3 Series are praised for their image control waveguide.
Finding Quality on a Budget
We believe quality monitors can be found on a budget. In the $200–$400 range, we focus on neutral response and solid build. Matching the speaker to the room size is more important than premium brand names.
Mid-Range Monitors Worth Considering
In the $400–$1,000 range, we see improvements in driver materials and amplification. These monitors offer better clarity and lower distortion, adapting to room acoustics.
High-End Options for Professionals
For budgets above $1,000, we invest in high-end refinement. These speakers provide incredible headroom, hand-tuned components, and advanced calibration features. They offer a transparent window into our audio.
Significance of Room Acoustics
Even the best monitors can’t perform in a poorly treated room. Reflections, standing waves, and bass buildup color what we hear. Proper treatment is essential for accurate mixing.
Common Acoustic Treatment Solutions
To fix these issues, we use broadband absorption and bass traps. Simple additions like rugs and curtains also help. Treating our room ensures our monitors provide a trustworthy reference.
Positioning for Best Sound
We place our monitors on stable stands or isolation pads. We arrange them in an equilateral triangle for balanced stereo image. Tweeters should be at ear level and angled slightly toward us.
Calibrating Your Monitors
Once positioned, we calibrate our system. We level-match the speakers and set a consistent listening volume. Software tools and reference tracks help ensure a balanced stereo image.
Testing and Tuning Your Setup
We test our gear using familiar music. We listen for vocal placement, bass clarity, and stereo width. Using “reference tracks” helps us tune our ears to our monitors and room.
SPL and Its Importance
We look at Maximum SPL to understand our monitors’ output capabilities. It’s about handling loud transients without clipping the amplifiers.
Impedance Explained
For passive speakers, impedance matching is critical. We ensure our external amplifier is compatible with the monitors’ ohm rating. Active monitors handle this internally, simplifying our setup.
The Role of Amp Power
High-end monitors often use bi-amped or tri-amped designs. This means each driver has its own amplifier. It leads to better control, lower distortion, and accurate crossovers.
Ignoring Room Acoustics
Ignoring room acoustics is a common mistake. Without treatment, our monitors can’t perform accurately. Treating our room is essential for hearing the true potential of our monitors.
Poor Monitor Placement
Poor placement can create an artificial bass boost. We avoid this by keeping monitors away from walls and ensuring symmetry for balanced stereo image.
Overlooking Calibration
We often forget that our ears can adapt to “wrong” sounds. Without calibration, we might make consistent errors in our tonal judgments. Proper calibration makes our monitors truly dependable.
Upgrading Cables and Stands
To get the most from our gear, we invest in high-quality balanced cables. We also use heavy-duty stands or isolation pads to decouple the speakers from the desk. This prevents desk vibrations from muddying our low-end.
Incorporating Digital Audio Workstations
We integrate our monitors into our digital workflow. Software-based room correction can help flatten the response of our speakers. This provides an extra layer of accuracy to our music production.
Regular Cleaning Practices
We keep our monitors in top shape by dusting the cabinets and grilles regularly. We avoid touching the delicate driver cones or tweeters, as skin oils and pressure can cause permanent damage.
Protecting Against Damage
To ensure longevity, we use surge protectors and follow a strict “last on, first off” power sequence. This prevents loud “pops” from damaging our monitors. Keeping the room at a stable temperature and humidity also preserves the internal components.
Why should we use studio monitors instead of high-end home theater speakers?
Studio monitors are designed for a flat, neutral response. Home theater speakers are often “voiced” to enhance sound. Professional speakers provide an objective truth for accurate mixing.
What is the benefit of “active” studio reference speakers?
Active monitors include built-in amplifiers perfectly matched to the drivers. This ensures correct power and crossover settings for the best sound quality.
How do we determine the best size for our high-fidelity monitors?
We choose our driver size based on room dimensions. For small studios, 5-inch monitors are ideal. In larger rooms, 7-inch or 8-inch monitors allow for deeper low-end frequencies.
Do we really need to invest in acoustic treatment?
Yes, acoustic treatment is as important as the monitors themselves. Without it, sound waves can create “standing waves” that affect bass. Proper treatment ensures accurate mixing.
Can we use balanced and unbalanced cables with our music production gear?
While many monitors accept both, we recommend balanced XLR or TRS cables. These reject noise and hum, ensuring a clean audio signal.
What are “nearfield” monitors and why are they so common?
Nearfield monitors are designed for close listening, typically three to five feet away. They minimize room sound, crucial in smaller studios.
How often should we calibrate our audio mixing equipment?
We recommend calibrating whenever we change our room layout or add new gear. Regular checks with reference tracks keep our ears accustomed to the monitors’ neutral response.
,000, we invest in high-end refinement. These speakers provide incredible headroom, hand-tuned components, and advanced calibration features. They offer a transparent window into our audio.
Significance of Room Acoustics
Even the best monitors can’t perform in a poorly treated room. Reflections, standing waves, and bass buildup color what we hear. Proper treatment is essential for accurate mixing.
Common Acoustic Treatment Solutions
To fix these issues, we use broadband absorption and bass traps. Simple additions like rugs and curtains also help. Treating our room ensures our monitors provide a trustworthy reference.
Positioning for Best Sound
We place our monitors on stable stands or isolation pads. We arrange them in an equilateral triangle for balanced stereo image. Tweeters should be at ear level and angled slightly toward us.
Calibrating Your Monitors
Once positioned, we calibrate our system. We level-match the speakers and set a consistent listening volume. Software tools and reference tracks help ensure a balanced stereo image.
Testing and Tuning Your Setup
We test our gear using familiar music. We listen for vocal placement, bass clarity, and stereo width. Using “reference tracks” helps us tune our ears to our monitors and room.
SPL and Its Importance
We look at Maximum SPL to understand our monitors’ output capabilities. It’s about handling loud transients without clipping the amplifiers.
Impedance Explained
For passive speakers, impedance matching is critical. We ensure our external amplifier is compatible with the monitors’ ohm rating. Active monitors handle this internally, simplifying our setup.
The Role of Amp Power
High-end monitors often use bi-amped or tri-amped designs. This means each driver has its own amplifier. It leads to better control, lower distortion, and accurate crossovers.
Ignoring Room Acoustics
Ignoring room acoustics is a common mistake. Without treatment, our monitors can’t perform accurately. Treating our room is essential for hearing the true potential of our monitors.
Poor Monitor Placement
Poor placement can create an artificial bass boost. We avoid this by keeping monitors away from walls and ensuring symmetry for balanced stereo image.
Overlooking Calibration
We often forget that our ears can adapt to “wrong” sounds. Without calibration, we might make consistent errors in our tonal judgments. Proper calibration makes our monitors truly dependable.
Upgrading Cables and Stands
To get the most from our gear, we invest in high-quality balanced cables. We also use heavy-duty stands or isolation pads to decouple the speakers from the desk. This prevents desk vibrations from muddying our low-end.
Incorporating Digital Audio Workstations
We integrate our monitors into our digital workflow. Software-based room correction can help flatten the response of our speakers. This provides an extra layer of accuracy to our music production.
Regular Cleaning Practices
We keep our monitors in top shape by dusting the cabinets and grilles regularly. We avoid touching the delicate driver cones or tweeters, as skin oils and pressure can cause permanent damage.
Protecting Against Damage
To ensure longevity, we use surge protectors and follow a strict “last on, first off” power sequence. This prevents loud “pops” from damaging our monitors. Keeping the room at a stable temperature and humidity also preserves the internal components.
Why should we use studio monitors instead of high-end home theater speakers?
Studio monitors are designed for a flat, neutral response. Home theater speakers are often “voiced” to enhance sound. Professional speakers provide an objective truth for accurate mixing.
What is the benefit of “active” studio reference speakers?
Active monitors include built-in amplifiers perfectly matched to the drivers. This ensures correct power and crossover settings for the best sound quality.
How do we determine the best size for our high-fidelity monitors?
We choose our driver size based on room dimensions. For small studios, 5-inch monitors are ideal. In larger rooms, 7-inch or 8-inch monitors allow for deeper low-end frequencies.
Do we really need to invest in acoustic treatment?
Yes, acoustic treatment is as important as the monitors themselves. Without it, sound waves can create “standing waves” that affect bass. Proper treatment ensures accurate mixing.
Can we use balanced and unbalanced cables with our music production gear?
While many monitors accept both, we recommend balanced XLR or TRS cables. These reject noise and hum, ensuring a clean audio signal.
What are “nearfield” monitors and why are they so common?
Nearfield monitors are designed for close listening, typically three to five feet away. They minimize room sound, crucial in smaller studios.
How often should we calibrate our audio mixing equipment?
We recommend calibrating whenever we change our room layout or add new gear. Regular checks with reference tracks keep our ears accustomed to the monitors’ neutral response.
High-End Options for Professionals
FAQ
Understanding Audio Monitoring
Studio monitors are professional speakers designed to accurately reproduce audio recordings. Unlike consumer speakers, they aim for a neutral response. This allows us to judge our tracks without artificial coloration.
Importance in Music Production
In our workflows, monitors ensure our mixes “translate” well. They help us identify and correct frequency imbalances. This is crucial for professional-grade music production.
Frequency Response
When comparing equipment, we look for a smooth, flat frequency response. A wide range ensures we can hear all frequencies, vital for professional music production.
Power Handling
We evaluate power handling for volume and headroom. Adequate wattage prevents distortion during dynamic peaks. More power often results in a cleaner sound at moderate levels.
Connectivity Options
Modern monitors offer balanced TRS or XLR inputs. These connections reject noise and interference, crucial near computers and other gear. Flexible connectivity ensures seamless integration into any setup.
Size and Placement
We match driver size to our environment. For small studios, 5-inch monitors are ideal. Larger monitors provide deeper bass but may overwhelm small rooms.
Active vs. Passive Monitors
Most modern monitors are “active,” with built-in amplifiers. This convenience makes them the standard for project studios. Passive designs require an external amplifier, offering flexibility.
Nearfield vs. Farfield Monitors
Nearfield monitors are used in home and project rooms. They are placed close to the listener to minimize room sound. Farfield monitors are larger, used in big studios, and listened to from a distance.
Subwoofers and Their Role
For extreme low-end, we might add a subwoofer. It extends our frequency range but requires quality treatment to manage bass buildup.
Yamaha
Yamaha is known for its “clinical” honesty. The Yamaha HS7 is a staple in many studios, providing a mid-forward sound. They are legendary for their reliability.
KRK
KRK is popular for its punch and low-end energy. Their Rokit series features iconic yellow drivers, widely used by producers for professional standards.
Adam Audio
Adam Audio is sought for exceptional high-frequency detail. Their ribbon tweeters provide fast and accurate transient response, making them highly respected.
JBL
JBL offers professional-grade performance with a wide “sweet spot.” Models like the JBL 3 Series are praised for their image control waveguide.
Finding Quality on a Budget
We believe quality monitors can be found on a budget. In the 0–0 range, we focus on neutral response and solid build. Matching the speaker to the room size is more important than premium brand names.
Mid-Range Monitors Worth Considering
In the 0–
FAQ
Understanding Audio Monitoring
Studio monitors are professional speakers designed to accurately reproduce audio recordings. Unlike consumer speakers, they aim for a neutral response. This allows us to judge our tracks without artificial coloration.
Importance in Music Production
In our workflows, monitors ensure our mixes “translate” well. They help us identify and correct frequency imbalances. This is crucial for professional-grade music production.
Frequency Response
When comparing equipment, we look for a smooth, flat frequency response. A wide range ensures we can hear all frequencies, vital for professional music production.
Power Handling
We evaluate power handling for volume and headroom. Adequate wattage prevents distortion during dynamic peaks. More power often results in a cleaner sound at moderate levels.
Connectivity Options
Modern monitors offer balanced TRS or XLR inputs. These connections reject noise and interference, crucial near computers and other gear. Flexible connectivity ensures seamless integration into any setup.
Size and Placement
We match driver size to our environment. For small studios, 5-inch monitors are ideal. Larger monitors provide deeper bass but may overwhelm small rooms.
Active vs. Passive Monitors
Most modern monitors are “active,” with built-in amplifiers. This convenience makes them the standard for project studios. Passive designs require an external amplifier, offering flexibility.
Nearfield vs. Farfield Monitors
Nearfield monitors are used in home and project rooms. They are placed close to the listener to minimize room sound. Farfield monitors are larger, used in big studios, and listened to from a distance.
Subwoofers and Their Role
For extreme low-end, we might add a subwoofer. It extends our frequency range but requires quality treatment to manage bass buildup.
Yamaha
Yamaha is known for its “clinical” honesty. The Yamaha HS7 is a staple in many studios, providing a mid-forward sound. They are legendary for their reliability.
KRK
KRK is popular for its punch and low-end energy. Their Rokit series features iconic yellow drivers, widely used by producers for professional standards.
Adam Audio
Adam Audio is sought for exceptional high-frequency detail. Their ribbon tweeters provide fast and accurate transient response, making them highly respected.
JBL
JBL offers professional-grade performance with a wide “sweet spot.” Models like the JBL 3 Series are praised for their image control waveguide.
Finding Quality on a Budget
We believe quality monitors can be found on a budget. In the $200–$400 range, we focus on neutral response and solid build. Matching the speaker to the room size is more important than premium brand names.
Mid-Range Monitors Worth Considering
In the $400–$1,000 range, we see improvements in driver materials and amplification. These monitors offer better clarity and lower distortion, adapting to room acoustics.
High-End Options for Professionals
For budgets above $1,000, we invest in high-end refinement. These speakers provide incredible headroom, hand-tuned components, and advanced calibration features. They offer a transparent window into our audio.
Significance of Room Acoustics
Even the best monitors can’t perform in a poorly treated room. Reflections, standing waves, and bass buildup color what we hear. Proper treatment is essential for accurate mixing.
Common Acoustic Treatment Solutions
To fix these issues, we use broadband absorption and bass traps. Simple additions like rugs and curtains also help. Treating our room ensures our monitors provide a trustworthy reference.
Positioning for Best Sound
We place our monitors on stable stands or isolation pads. We arrange them in an equilateral triangle for balanced stereo image. Tweeters should be at ear level and angled slightly toward us.
Calibrating Your Monitors
Once positioned, we calibrate our system. We level-match the speakers and set a consistent listening volume. Software tools and reference tracks help ensure a balanced stereo image.
Testing and Tuning Your Setup
We test our gear using familiar music. We listen for vocal placement, bass clarity, and stereo width. Using “reference tracks” helps us tune our ears to our monitors and room.
SPL and Its Importance
We look at Maximum SPL to understand our monitors’ output capabilities. It’s about handling loud transients without clipping the amplifiers.
Impedance Explained
For passive speakers, impedance matching is critical. We ensure our external amplifier is compatible with the monitors’ ohm rating. Active monitors handle this internally, simplifying our setup.
The Role of Amp Power
High-end monitors often use bi-amped or tri-amped designs. This means each driver has its own amplifier. It leads to better control, lower distortion, and accurate crossovers.
Ignoring Room Acoustics
Ignoring room acoustics is a common mistake. Without treatment, our monitors can’t perform accurately. Treating our room is essential for hearing the true potential of our monitors.
Poor Monitor Placement
Poor placement can create an artificial bass boost. We avoid this by keeping monitors away from walls and ensuring symmetry for balanced stereo image.
Overlooking Calibration
We often forget that our ears can adapt to “wrong” sounds. Without calibration, we might make consistent errors in our tonal judgments. Proper calibration makes our monitors truly dependable.
Upgrading Cables and Stands
To get the most from our gear, we invest in high-quality balanced cables. We also use heavy-duty stands or isolation pads to decouple the speakers from the desk. This prevents desk vibrations from muddying our low-end.
Incorporating Digital Audio Workstations
We integrate our monitors into our digital workflow. Software-based room correction can help flatten the response of our speakers. This provides an extra layer of accuracy to our music production.
Regular Cleaning Practices
We keep our monitors in top shape by dusting the cabinets and grilles regularly. We avoid touching the delicate driver cones or tweeters, as skin oils and pressure can cause permanent damage.
Protecting Against Damage
To ensure longevity, we use surge protectors and follow a strict “last on, first off” power sequence. This prevents loud “pops” from damaging our monitors. Keeping the room at a stable temperature and humidity also preserves the internal components.
Why should we use studio monitors instead of high-end home theater speakers?
Studio monitors are designed for a flat, neutral response. Home theater speakers are often “voiced” to enhance sound. Professional speakers provide an objective truth for accurate mixing.
What is the benefit of “active” studio reference speakers?
Active monitors include built-in amplifiers perfectly matched to the drivers. This ensures correct power and crossover settings for the best sound quality.
How do we determine the best size for our high-fidelity monitors?
We choose our driver size based on room dimensions. For small studios, 5-inch monitors are ideal. In larger rooms, 7-inch or 8-inch monitors allow for deeper low-end frequencies.
Do we really need to invest in acoustic treatment?
Yes, acoustic treatment is as important as the monitors themselves. Without it, sound waves can create “standing waves” that affect bass. Proper treatment ensures accurate mixing.
Can we use balanced and unbalanced cables with our music production gear?
While many monitors accept both, we recommend balanced XLR or TRS cables. These reject noise and hum, ensuring a clean audio signal.
What are “nearfield” monitors and why are they so common?
Nearfield monitors are designed for close listening, typically three to five feet away. They minimize room sound, crucial in smaller studios.
How often should we calibrate our audio mixing equipment?
We recommend calibrating whenever we change our room layout or add new gear. Regular checks with reference tracks keep our ears accustomed to the monitors’ neutral response.
,000 range, we see improvements in driver materials and amplification. These monitors offer better clarity and lower distortion, adapting to room acoustics.
High-End Options for Professionals
For budgets above
FAQ
Understanding Audio Monitoring
Studio monitors are professional speakers designed to accurately reproduce audio recordings. Unlike consumer speakers, they aim for a neutral response. This allows us to judge our tracks without artificial coloration.
Importance in Music Production
In our workflows, monitors ensure our mixes “translate” well. They help us identify and correct frequency imbalances. This is crucial for professional-grade music production.
Frequency Response
When comparing equipment, we look for a smooth, flat frequency response. A wide range ensures we can hear all frequencies, vital for professional music production.
Power Handling
We evaluate power handling for volume and headroom. Adequate wattage prevents distortion during dynamic peaks. More power often results in a cleaner sound at moderate levels.
Connectivity Options
Modern monitors offer balanced TRS or XLR inputs. These connections reject noise and interference, crucial near computers and other gear. Flexible connectivity ensures seamless integration into any setup.
Size and Placement
We match driver size to our environment. For small studios, 5-inch monitors are ideal. Larger monitors provide deeper bass but may overwhelm small rooms.
Active vs. Passive Monitors
Most modern monitors are “active,” with built-in amplifiers. This convenience makes them the standard for project studios. Passive designs require an external amplifier, offering flexibility.
Nearfield vs. Farfield Monitors
Nearfield monitors are used in home and project rooms. They are placed close to the listener to minimize room sound. Farfield monitors are larger, used in big studios, and listened to from a distance.
Subwoofers and Their Role
For extreme low-end, we might add a subwoofer. It extends our frequency range but requires quality treatment to manage bass buildup.
Yamaha
Yamaha is known for its “clinical” honesty. The Yamaha HS7 is a staple in many studios, providing a mid-forward sound. They are legendary for their reliability.
KRK
KRK is popular for its punch and low-end energy. Their Rokit series features iconic yellow drivers, widely used by producers for professional standards.
Adam Audio
Adam Audio is sought for exceptional high-frequency detail. Their ribbon tweeters provide fast and accurate transient response, making them highly respected.
JBL
JBL offers professional-grade performance with a wide “sweet spot.” Models like the JBL 3 Series are praised for their image control waveguide.
Finding Quality on a Budget
We believe quality monitors can be found on a budget. In the $200–$400 range, we focus on neutral response and solid build. Matching the speaker to the room size is more important than premium brand names.
Mid-Range Monitors Worth Considering
In the $400–$1,000 range, we see improvements in driver materials and amplification. These monitors offer better clarity and lower distortion, adapting to room acoustics.
High-End Options for Professionals
For budgets above $1,000, we invest in high-end refinement. These speakers provide incredible headroom, hand-tuned components, and advanced calibration features. They offer a transparent window into our audio.
Significance of Room Acoustics
Even the best monitors can’t perform in a poorly treated room. Reflections, standing waves, and bass buildup color what we hear. Proper treatment is essential for accurate mixing.
Common Acoustic Treatment Solutions
To fix these issues, we use broadband absorption and bass traps. Simple additions like rugs and curtains also help. Treating our room ensures our monitors provide a trustworthy reference.
Positioning for Best Sound
We place our monitors on stable stands or isolation pads. We arrange them in an equilateral triangle for balanced stereo image. Tweeters should be at ear level and angled slightly toward us.
Calibrating Your Monitors
Once positioned, we calibrate our system. We level-match the speakers and set a consistent listening volume. Software tools and reference tracks help ensure a balanced stereo image.
Testing and Tuning Your Setup
We test our gear using familiar music. We listen for vocal placement, bass clarity, and stereo width. Using “reference tracks” helps us tune our ears to our monitors and room.
SPL and Its Importance
We look at Maximum SPL to understand our monitors’ output capabilities. It’s about handling loud transients without clipping the amplifiers.
Impedance Explained
For passive speakers, impedance matching is critical. We ensure our external amplifier is compatible with the monitors’ ohm rating. Active monitors handle this internally, simplifying our setup.
The Role of Amp Power
High-end monitors often use bi-amped or tri-amped designs. This means each driver has its own amplifier. It leads to better control, lower distortion, and accurate crossovers.
Ignoring Room Acoustics
Ignoring room acoustics is a common mistake. Without treatment, our monitors can’t perform accurately. Treating our room is essential for hearing the true potential of our monitors.
Poor Monitor Placement
Poor placement can create an artificial bass boost. We avoid this by keeping monitors away from walls and ensuring symmetry for balanced stereo image.
Overlooking Calibration
We often forget that our ears can adapt to “wrong” sounds. Without calibration, we might make consistent errors in our tonal judgments. Proper calibration makes our monitors truly dependable.
Upgrading Cables and Stands
To get the most from our gear, we invest in high-quality balanced cables. We also use heavy-duty stands or isolation pads to decouple the speakers from the desk. This prevents desk vibrations from muddying our low-end.
Incorporating Digital Audio Workstations
We integrate our monitors into our digital workflow. Software-based room correction can help flatten the response of our speakers. This provides an extra layer of accuracy to our music production.
Regular Cleaning Practices
We keep our monitors in top shape by dusting the cabinets and grilles regularly. We avoid touching the delicate driver cones or tweeters, as skin oils and pressure can cause permanent damage.
Protecting Against Damage
To ensure longevity, we use surge protectors and follow a strict “last on, first off” power sequence. This prevents loud “pops” from damaging our monitors. Keeping the room at a stable temperature and humidity also preserves the internal components.
Why should we use studio monitors instead of high-end home theater speakers?
Studio monitors are designed for a flat, neutral response. Home theater speakers are often “voiced” to enhance sound. Professional speakers provide an objective truth for accurate mixing.
What is the benefit of “active” studio reference speakers?
Active monitors include built-in amplifiers perfectly matched to the drivers. This ensures correct power and crossover settings for the best sound quality.
How do we determine the best size for our high-fidelity monitors?
We choose our driver size based on room dimensions. For small studios, 5-inch monitors are ideal. In larger rooms, 7-inch or 8-inch monitors allow for deeper low-end frequencies.
Do we really need to invest in acoustic treatment?
Yes, acoustic treatment is as important as the monitors themselves. Without it, sound waves can create “standing waves” that affect bass. Proper treatment ensures accurate mixing.
Can we use balanced and unbalanced cables with our music production gear?
While many monitors accept both, we recommend balanced XLR or TRS cables. These reject noise and hum, ensuring a clean audio signal.
What are “nearfield” monitors and why are they so common?
Nearfield monitors are designed for close listening, typically three to five feet away. They minimize room sound, crucial in smaller studios.
How often should we calibrate our audio mixing equipment?
We recommend calibrating whenever we change our room layout or add new gear. Regular checks with reference tracks keep our ears accustomed to the monitors’ neutral response.
,000, we invest in high-end refinement. These speakers provide incredible headroom, hand-tuned components, and advanced calibration features. They offer a transparent window into our audio.
Significance of Room Acoustics
Even the best monitors can’t perform in a poorly treated room. Reflections, standing waves, and bass buildup color what we hear. Proper treatment is essential for accurate mixing.
Common Acoustic Treatment Solutions
To fix these issues, we use broadband absorption and bass traps. Simple additions like rugs and curtains also help. Treating our room ensures our monitors provide a trustworthy reference.
Positioning for Best Sound
We place our monitors on stable stands or isolation pads. We arrange them in an equilateral triangle for balanced stereo image. Tweeters should be at ear level and angled slightly toward us.
Calibrating Your Monitors
Once positioned, we calibrate our system. We level-match the speakers and set a consistent listening volume. Software tools and reference tracks help ensure a balanced stereo image.
Testing and Tuning Your Setup
We test our gear using familiar music. We listen for vocal placement, bass clarity, and stereo width. Using “reference tracks” helps us tune our ears to our monitors and room.
SPL and Its Importance
We look at Maximum SPL to understand our monitors’ output capabilities. It’s about handling loud transients without clipping the amplifiers.
Impedance Explained
For passive speakers, impedance matching is critical. We ensure our external amplifier is compatible with the monitors’ ohm rating. Active monitors handle this internally, simplifying our setup.
The Role of Amp Power
High-end monitors often use bi-amped or tri-amped designs. This means each driver has its own amplifier. It leads to better control, lower distortion, and accurate crossovers.
Ignoring Room Acoustics
Ignoring room acoustics is a common mistake. Without treatment, our monitors can’t perform accurately. Treating our room is essential for hearing the true potential of our monitors.
Poor Monitor Placement
Poor placement can create an artificial bass boost. We avoid this by keeping monitors away from walls and ensuring symmetry for balanced stereo image.
Overlooking Calibration
We often forget that our ears can adapt to “wrong” sounds. Without calibration, we might make consistent errors in our tonal judgments. Proper calibration makes our monitors truly dependable.
Upgrading Cables and Stands
To get the most from our gear, we invest in high-quality balanced cables. We also use heavy-duty stands or isolation pads to decouple the speakers from the desk. This prevents desk vibrations from muddying our low-end.
Incorporating Digital Audio Workstations
We integrate our monitors into our digital workflow. Software-based room correction can help flatten the response of our speakers. This provides an extra layer of accuracy to our music production.
Regular Cleaning Practices
We keep our monitors in top shape by dusting the cabinets and grilles regularly. We avoid touching the delicate driver cones or tweeters, as skin oils and pressure can cause permanent damage.
Protecting Against Damage
To ensure longevity, we use surge protectors and follow a strict “last on, first off” power sequence. This prevents loud “pops” from damaging our monitors. Keeping the room at a stable temperature and humidity also preserves the internal components.
Why should we use studio monitors instead of high-end home theater speakers?
Studio monitors are designed for a flat, neutral response. Home theater speakers are often “voiced” to enhance sound. Professional speakers provide an objective truth for accurate mixing.
What is the benefit of “active” studio reference speakers?
Active monitors include built-in amplifiers perfectly matched to the drivers. This ensures correct power and crossover settings for the best sound quality.
How do we determine the best size for our high-fidelity monitors?
We choose our driver size based on room dimensions. For small studios, 5-inch monitors are ideal. In larger rooms, 7-inch or 8-inch monitors allow for deeper low-end frequencies.
Do we really need to invest in acoustic treatment?
Yes, acoustic treatment is as important as the monitors themselves. Without it, sound waves can create “standing waves” that affect bass. Proper treatment ensures accurate mixing.
Can we use balanced and unbalanced cables with our music production gear?
While many monitors accept both, we recommend balanced XLR or TRS cables. These reject noise and hum, ensuring a clean audio signal.
What are “nearfield” monitors and why are they so common?
Nearfield monitors are designed for close listening, typically three to five feet away. They minimize room sound, crucial in smaller studios.
How often should we calibrate our audio mixing equipment?
We recommend calibrating whenever we change our room layout or add new gear. Regular checks with reference tracks keep our ears accustomed to the monitors’ neutral response.
FAQ
Understanding Audio Monitoring
Studio monitors are professional speakers designed to accurately reproduce audio recordings. Unlike consumer speakers, they aim for a neutral response. This allows us to judge our tracks without artificial coloration.
Importance in Music Production
In our workflows, monitors ensure our mixes “translate” well. They help us identify and correct frequency imbalances. This is crucial for professional-grade music production.
Frequency Response
When comparing equipment, we look for a smooth, flat frequency response. A wide range ensures we can hear all frequencies, vital for professional music production.
Power Handling
We evaluate power handling for volume and headroom. Adequate wattage prevents distortion during dynamic peaks. More power often results in a cleaner sound at moderate levels.
Connectivity Options
Modern monitors offer balanced TRS or XLR inputs. These connections reject noise and interference, crucial near computers and other gear. Flexible connectivity ensures seamless integration into any setup.
Size and Placement
We match driver size to our environment. For small studios, 5-inch monitors are ideal. Larger monitors provide deeper bass but may overwhelm small rooms.
Active vs. Passive Monitors
Most modern monitors are “active,” with built-in amplifiers. This convenience makes them the standard for project studios. Passive designs require an external amplifier, offering flexibility.
Nearfield vs. Farfield Monitors
Nearfield monitors are used in home and project rooms. They are placed close to the listener to minimize room sound. Farfield monitors are larger, used in big studios, and listened to from a distance.
Subwoofers and Their Role
For extreme low-end, we might add a subwoofer. It extends our frequency range but requires quality treatment to manage bass buildup.
Yamaha
Yamaha is known for its “clinical” honesty. The Yamaha HS7 is a staple in many studios, providing a mid-forward sound. They are legendary for their reliability.
KRK
KRK is popular for its punch and low-end energy. Their Rokit series features iconic yellow drivers, widely used by producers for professional standards.
Adam Audio
Adam Audio is sought for exceptional high-frequency detail. Their ribbon tweeters provide fast and accurate transient response, making them highly respected.
JBL
JBL offers professional-grade performance with a wide “sweet spot.” Models like the JBL 3 Series are praised for their image control waveguide.
Finding Quality on a Budget
We believe quality monitors can be found on a budget. In the 0–0 range, we focus on neutral response and solid build. Matching the speaker to the room size is more important than premium brand names.
Mid-Range Monitors Worth Considering
In the 0–
FAQ
Understanding Audio Monitoring
Studio monitors are professional speakers designed to accurately reproduce audio recordings. Unlike consumer speakers, they aim for a neutral response. This allows us to judge our tracks without artificial coloration.
Importance in Music Production
In our workflows, monitors ensure our mixes “translate” well. They help us identify and correct frequency imbalances. This is crucial for professional-grade music production.
Frequency Response
When comparing equipment, we look for a smooth, flat frequency response. A wide range ensures we can hear all frequencies, vital for professional music production.
Power Handling
We evaluate power handling for volume and headroom. Adequate wattage prevents distortion during dynamic peaks. More power often results in a cleaner sound at moderate levels.
Connectivity Options
Modern monitors offer balanced TRS or XLR inputs. These connections reject noise and interference, crucial near computers and other gear. Flexible connectivity ensures seamless integration into any setup.
Size and Placement
We match driver size to our environment. For small studios, 5-inch monitors are ideal. Larger monitors provide deeper bass but may overwhelm small rooms.
Active vs. Passive Monitors
Most modern monitors are “active,” with built-in amplifiers. This convenience makes them the standard for project studios. Passive designs require an external amplifier, offering flexibility.
Nearfield vs. Farfield Monitors
Nearfield monitors are used in home and project rooms. They are placed close to the listener to minimize room sound. Farfield monitors are larger, used in big studios, and listened to from a distance.
Subwoofers and Their Role
For extreme low-end, we might add a subwoofer. It extends our frequency range but requires quality treatment to manage bass buildup.
Yamaha
Yamaha is known for its “clinical” honesty. The Yamaha HS7 is a staple in many studios, providing a mid-forward sound. They are legendary for their reliability.
KRK
KRK is popular for its punch and low-end energy. Their Rokit series features iconic yellow drivers, widely used by producers for professional standards.
Adam Audio
Adam Audio is sought for exceptional high-frequency detail. Their ribbon tweeters provide fast and accurate transient response, making them highly respected.
JBL
JBL offers professional-grade performance with a wide “sweet spot.” Models like the JBL 3 Series are praised for their image control waveguide.
Finding Quality on a Budget
We believe quality monitors can be found on a budget. In the $200–$400 range, we focus on neutral response and solid build. Matching the speaker to the room size is more important than premium brand names.
Mid-Range Monitors Worth Considering
In the $400–$1,000 range, we see improvements in driver materials and amplification. These monitors offer better clarity and lower distortion, adapting to room acoustics.
High-End Options for Professionals
For budgets above $1,000, we invest in high-end refinement. These speakers provide incredible headroom, hand-tuned components, and advanced calibration features. They offer a transparent window into our audio.
Significance of Room Acoustics
Even the best monitors can’t perform in a poorly treated room. Reflections, standing waves, and bass buildup color what we hear. Proper treatment is essential for accurate mixing.
Common Acoustic Treatment Solutions
To fix these issues, we use broadband absorption and bass traps. Simple additions like rugs and curtains also help. Treating our room ensures our monitors provide a trustworthy reference.
Positioning for Best Sound
We place our monitors on stable stands or isolation pads. We arrange them in an equilateral triangle for balanced stereo image. Tweeters should be at ear level and angled slightly toward us.
Calibrating Your Monitors
Once positioned, we calibrate our system. We level-match the speakers and set a consistent listening volume. Software tools and reference tracks help ensure a balanced stereo image.
Testing and Tuning Your Setup
We test our gear using familiar music. We listen for vocal placement, bass clarity, and stereo width. Using “reference tracks” helps us tune our ears to our monitors and room.
SPL and Its Importance
We look at Maximum SPL to understand our monitors’ output capabilities. It’s about handling loud transients without clipping the amplifiers.
Impedance Explained
For passive speakers, impedance matching is critical. We ensure our external amplifier is compatible with the monitors’ ohm rating. Active monitors handle this internally, simplifying our setup.
The Role of Amp Power
High-end monitors often use bi-amped or tri-amped designs. This means each driver has its own amplifier. It leads to better control, lower distortion, and accurate crossovers.
Ignoring Room Acoustics
Ignoring room acoustics is a common mistake. Without treatment, our monitors can’t perform accurately. Treating our room is essential for hearing the true potential of our monitors.
Poor Monitor Placement
Poor placement can create an artificial bass boost. We avoid this by keeping monitors away from walls and ensuring symmetry for balanced stereo image.
Overlooking Calibration
We often forget that our ears can adapt to “wrong” sounds. Without calibration, we might make consistent errors in our tonal judgments. Proper calibration makes our monitors truly dependable.
Upgrading Cables and Stands
To get the most from our gear, we invest in high-quality balanced cables. We also use heavy-duty stands or isolation pads to decouple the speakers from the desk. This prevents desk vibrations from muddying our low-end.
Incorporating Digital Audio Workstations
We integrate our monitors into our digital workflow. Software-based room correction can help flatten the response of our speakers. This provides an extra layer of accuracy to our music production.
Regular Cleaning Practices
We keep our monitors in top shape by dusting the cabinets and grilles regularly. We avoid touching the delicate driver cones or tweeters, as skin oils and pressure can cause permanent damage.
Protecting Against Damage
To ensure longevity, we use surge protectors and follow a strict “last on, first off” power sequence. This prevents loud “pops” from damaging our monitors. Keeping the room at a stable temperature and humidity also preserves the internal components.
Why should we use studio monitors instead of high-end home theater speakers?
Studio monitors are designed for a flat, neutral response. Home theater speakers are often “voiced” to enhance sound. Professional speakers provide an objective truth for accurate mixing.
What is the benefit of “active” studio reference speakers?
Active monitors include built-in amplifiers perfectly matched to the drivers. This ensures correct power and crossover settings for the best sound quality.
How do we determine the best size for our high-fidelity monitors?
We choose our driver size based on room dimensions. For small studios, 5-inch monitors are ideal. In larger rooms, 7-inch or 8-inch monitors allow for deeper low-end frequencies.
Do we really need to invest in acoustic treatment?
Yes, acoustic treatment is as important as the monitors themselves. Without it, sound waves can create “standing waves” that affect bass. Proper treatment ensures accurate mixing.
Can we use balanced and unbalanced cables with our music production gear?
While many monitors accept both, we recommend balanced XLR or TRS cables. These reject noise and hum, ensuring a clean audio signal.
What are “nearfield” monitors and why are they so common?
Nearfield monitors are designed for close listening, typically three to five feet away. They minimize room sound, crucial in smaller studios.
How often should we calibrate our audio mixing equipment?
We recommend calibrating whenever we change our room layout or add new gear. Regular checks with reference tracks keep our ears accustomed to the monitors’ neutral response.
,000 range, we see improvements in driver materials and amplification. These monitors offer better clarity and lower distortion, adapting to room acoustics.
High-End Options for Professionals
For budgets above
FAQ
Understanding Audio Monitoring
Studio monitors are professional speakers designed to accurately reproduce audio recordings. Unlike consumer speakers, they aim for a neutral response. This allows us to judge our tracks without artificial coloration.
Importance in Music Production
In our workflows, monitors ensure our mixes “translate” well. They help us identify and correct frequency imbalances. This is crucial for professional-grade music production.
Frequency Response
When comparing equipment, we look for a smooth, flat frequency response. A wide range ensures we can hear all frequencies, vital for professional music production.
Power Handling
We evaluate power handling for volume and headroom. Adequate wattage prevents distortion during dynamic peaks. More power often results in a cleaner sound at moderate levels.
Connectivity Options
Modern monitors offer balanced TRS or XLR inputs. These connections reject noise and interference, crucial near computers and other gear. Flexible connectivity ensures seamless integration into any setup.
Size and Placement
We match driver size to our environment. For small studios, 5-inch monitors are ideal. Larger monitors provide deeper bass but may overwhelm small rooms.
Active vs. Passive Monitors
Most modern monitors are “active,” with built-in amplifiers. This convenience makes them the standard for project studios. Passive designs require an external amplifier, offering flexibility.
Nearfield vs. Farfield Monitors
Nearfield monitors are used in home and project rooms. They are placed close to the listener to minimize room sound. Farfield monitors are larger, used in big studios, and listened to from a distance.
Subwoofers and Their Role
For extreme low-end, we might add a subwoofer. It extends our frequency range but requires quality treatment to manage bass buildup.
Yamaha
Yamaha is known for its “clinical” honesty. The Yamaha HS7 is a staple in many studios, providing a mid-forward sound. They are legendary for their reliability.
KRK
KRK is popular for its punch and low-end energy. Their Rokit series features iconic yellow drivers, widely used by producers for professional standards.
Adam Audio
Adam Audio is sought for exceptional high-frequency detail. Their ribbon tweeters provide fast and accurate transient response, making them highly respected.
JBL
JBL offers professional-grade performance with a wide “sweet spot.” Models like the JBL 3 Series are praised for their image control waveguide.
Finding Quality on a Budget
We believe quality monitors can be found on a budget. In the $200–$400 range, we focus on neutral response and solid build. Matching the speaker to the room size is more important than premium brand names.
Mid-Range Monitors Worth Considering
In the $400–$1,000 range, we see improvements in driver materials and amplification. These monitors offer better clarity and lower distortion, adapting to room acoustics.
High-End Options for Professionals
For budgets above $1,000, we invest in high-end refinement. These speakers provide incredible headroom, hand-tuned components, and advanced calibration features. They offer a transparent window into our audio.
Significance of Room Acoustics
Even the best monitors can’t perform in a poorly treated room. Reflections, standing waves, and bass buildup color what we hear. Proper treatment is essential for accurate mixing.
Common Acoustic Treatment Solutions
To fix these issues, we use broadband absorption and bass traps. Simple additions like rugs and curtains also help. Treating our room ensures our monitors provide a trustworthy reference.
Positioning for Best Sound
We place our monitors on stable stands or isolation pads. We arrange them in an equilateral triangle for balanced stereo image. Tweeters should be at ear level and angled slightly toward us.
Calibrating Your Monitors
Once positioned, we calibrate our system. We level-match the speakers and set a consistent listening volume. Software tools and reference tracks help ensure a balanced stereo image.
Testing and Tuning Your Setup
We test our gear using familiar music. We listen for vocal placement, bass clarity, and stereo width. Using “reference tracks” helps us tune our ears to our monitors and room.
SPL and Its Importance
We look at Maximum SPL to understand our monitors’ output capabilities. It’s about handling loud transients without clipping the amplifiers.
Impedance Explained
For passive speakers, impedance matching is critical. We ensure our external amplifier is compatible with the monitors’ ohm rating. Active monitors handle this internally, simplifying our setup.
The Role of Amp Power
High-end monitors often use bi-amped or tri-amped designs. This means each driver has its own amplifier. It leads to better control, lower distortion, and accurate crossovers.
Ignoring Room Acoustics
Ignoring room acoustics is a common mistake. Without treatment, our monitors can’t perform accurately. Treating our room is essential for hearing the true potential of our monitors.
Poor Monitor Placement
Poor placement can create an artificial bass boost. We avoid this by keeping monitors away from walls and ensuring symmetry for balanced stereo image.
Overlooking Calibration
We often forget that our ears can adapt to “wrong” sounds. Without calibration, we might make consistent errors in our tonal judgments. Proper calibration makes our monitors truly dependable.
Upgrading Cables and Stands
To get the most from our gear, we invest in high-quality balanced cables. We also use heavy-duty stands or isolation pads to decouple the speakers from the desk. This prevents desk vibrations from muddying our low-end.
Incorporating Digital Audio Workstations
We integrate our monitors into our digital workflow. Software-based room correction can help flatten the response of our speakers. This provides an extra layer of accuracy to our music production.
Regular Cleaning Practices
We keep our monitors in top shape by dusting the cabinets and grilles regularly. We avoid touching the delicate driver cones or tweeters, as skin oils and pressure can cause permanent damage.
Protecting Against Damage
To ensure longevity, we use surge protectors and follow a strict “last on, first off” power sequence. This prevents loud “pops” from damaging our monitors. Keeping the room at a stable temperature and humidity also preserves the internal components.
Why should we use studio monitors instead of high-end home theater speakers?
Studio monitors are designed for a flat, neutral response. Home theater speakers are often “voiced” to enhance sound. Professional speakers provide an objective truth for accurate mixing.
What is the benefit of “active” studio reference speakers?
Active monitors include built-in amplifiers perfectly matched to the drivers. This ensures correct power and crossover settings for the best sound quality.
How do we determine the best size for our high-fidelity monitors?
We choose our driver size based on room dimensions. For small studios, 5-inch monitors are ideal. In larger rooms, 7-inch or 8-inch monitors allow for deeper low-end frequencies.
Do we really need to invest in acoustic treatment?
Yes, acoustic treatment is as important as the monitors themselves. Without it, sound waves can create “standing waves” that affect bass. Proper treatment ensures accurate mixing.
Can we use balanced and unbalanced cables with our music production gear?
While many monitors accept both, we recommend balanced XLR or TRS cables. These reject noise and hum, ensuring a clean audio signal.
What are “nearfield” monitors and why are they so common?
Nearfield monitors are designed for close listening, typically three to five feet away. They minimize room sound, crucial in smaller studios.
How often should we calibrate our audio mixing equipment?
We recommend calibrating whenever we change our room layout or add new gear. Regular checks with reference tracks keep our ears accustomed to the monitors’ neutral response.
,000, we invest in high-end refinement. These speakers provide incredible headroom, hand-tuned components, and advanced calibration features. They offer a transparent window into our audio.
Significance of Room Acoustics
Even the best monitors can’t perform in a poorly treated room. Reflections, standing waves, and bass buildup color what we hear. Proper treatment is essential for accurate mixing.
Common Acoustic Treatment Solutions
To fix these issues, we use broadband absorption and bass traps. Simple additions like rugs and curtains also help. Treating our room ensures our monitors provide a trustworthy reference.
Positioning for Best Sound
We place our monitors on stable stands or isolation pads. We arrange them in an equilateral triangle for balanced stereo image. Tweeters should be at ear level and angled slightly toward us.
Calibrating Your Monitors
Once positioned, we calibrate our system. We level-match the speakers and set a consistent listening volume. Software tools and reference tracks help ensure a balanced stereo image.
Testing and Tuning Your Setup
We test our gear using familiar music. We listen for vocal placement, bass clarity, and stereo width. Using “reference tracks” helps us tune our ears to our monitors and room.
SPL and Its Importance
We look at Maximum SPL to understand our monitors’ output capabilities. It’s about handling loud transients without clipping the amplifiers.
Impedance Explained
For passive speakers, impedance matching is critical. We ensure our external amplifier is compatible with the monitors’ ohm rating. Active monitors handle this internally, simplifying our setup.
The Role of Amp Power
High-end monitors often use bi-amped or tri-amped designs. This means each driver has its own amplifier. It leads to better control, lower distortion, and accurate crossovers.
Ignoring Room Acoustics
Ignoring room acoustics is a common mistake. Without treatment, our monitors can’t perform accurately. Treating our room is essential for hearing the true potential of our monitors.
Poor Monitor Placement
Poor placement can create an artificial bass boost. We avoid this by keeping monitors away from walls and ensuring symmetry for balanced stereo image.
Overlooking Calibration
We often forget that our ears can adapt to “wrong” sounds. Without calibration, we might make consistent errors in our tonal judgments. Proper calibration makes our monitors truly dependable.
Upgrading Cables and Stands
To get the most from our gear, we invest in high-quality balanced cables. We also use heavy-duty stands or isolation pads to decouple the speakers from the desk. This prevents desk vibrations from muddying our low-end.
Incorporating Digital Audio Workstations
We integrate our monitors into our digital workflow. Software-based room correction can help flatten the response of our speakers. This provides an extra layer of accuracy to our music production.
Regular Cleaning Practices
We keep our monitors in top shape by dusting the cabinets and grilles regularly. We avoid touching the delicate driver cones or tweeters, as skin oils and pressure can cause permanent damage.
Protecting Against Damage
To ensure longevity, we use surge protectors and follow a strict “last on, first off” power sequence. This prevents loud “pops” from damaging our monitors. Keeping the room at a stable temperature and humidity also preserves the internal components.
Why should we use studio monitors instead of high-end home theater speakers?
Studio monitors are designed for a flat, neutral response. Home theater speakers are often “voiced” to enhance sound. Professional speakers provide an objective truth for accurate mixing.
What is the benefit of “active” studio reference speakers?
Active monitors include built-in amplifiers perfectly matched to the drivers. This ensures correct power and crossover settings for the best sound quality.
How do we determine the best size for our high-fidelity monitors?
We choose our driver size based on room dimensions. For small studios, 5-inch monitors are ideal. In larger rooms, 7-inch or 8-inch monitors allow for deeper low-end frequencies.
Do we really need to invest in acoustic treatment?
Yes, acoustic treatment is as important as the monitors themselves. Without it, sound waves can create “standing waves” that affect bass. Proper treatment ensures accurate mixing.
Can we use balanced and unbalanced cables with our music production gear?
While many monitors accept both, we recommend balanced XLR or TRS cables. These reject noise and hum, ensuring a clean audio signal.
What are “nearfield” monitors and why are they so common?
Nearfield monitors are designed for close listening, typically three to five feet away. They minimize room sound, crucial in smaller studios.
How often should we calibrate our audio mixing equipment?
We recommend calibrating whenever we change our room layout or add new gear. Regular checks with reference tracks keep our ears accustomed to the monitors’ neutral response.