
 Zoe Nora
Did you know over 90% of amateur audio mixes fail to achieve professional clarity? This is because of cluttered frequency ranges. Many producers see audio processing as just turning up the volume. But, true sonic balance needs a deeper approach.
Mastering your equalizer settings is the best way to make a muddy recording sound polished. It becomes radio-ready.
We see this process as sculpting sound, not just adjusting levels. By learning to carve out space for each instrument, you make sure each one fits perfectly in the mix. If you’re ready to explore more, check out how to use an Equalizer (EQ) to improve your workflow. Precision is key to avoid harsh or unbalanced audio.
Key Takeaways
- Focus on the overall mix balance instead of making one sound stand out.
- Use frequency sweeps to identify and remove unwanted, piercing resonances.
- Apply high-pass filters to clean up muddy low-end frequencies effectively.
- Avoid excessive boosts that can make your audio sound unnatural or dull.
- Remember that processing cannot fix a poor-quality original recording.
What is an Equalizer (EQ)?
Ever wondered about sound shaping? An Equalizer (EQ) is key in making music sound great. It changes how we hear music by adjusting sound levels in different ranges. This turns a messy mix into something clear and balanced.
Definition of an Equalizer
An audio equalizer lets us tweak sound levels in specific ranges. It’s like a fancy tone control. Instead of just turning up the volume, we can boost or cut certain sounds like bass or treble.
How an Equalizer Works
An equalizer works by adjusting volume for different sound ranges. By tweaking these ranges, we shape the sound of our audio. This helps us get rid of unwanted sounds or make vocals pop.
Today, we use EQ plugins for precise control. These tools show us the changes we make in real-time. This lets us fine-tune the sound of our music.
Types of Equalizers
Equalizers come in many forms, from old hardware to modern software. Many like using a EQ plugin because it’s easy to use. No matter the type, the goal is always to balance the sound.
The Equalizer is crucial in any audio setup. Learning to use an audio equalizer well helps every sound in a mix stand out. This skill is essential for making music sound professional.
The Importance of EQ in Audio
The true power of any sound system lies in how we shape the frequency response. Many listeners think high-end hardware is enough. But, an Equalizer (EQ) is key to making raw audio sound professional. We see it as a vital tool for improving our sound.
Enhancing Sound Quality
When we listen to complex tracks, different instruments fight for space in the frequency spectrum. A sound equalizer helps us sort out these clashes. By adjusting specific bands, we get a clearer sound.
This process is crucial for removing unwanted resonances. These can make a recording sound harsh or hollow. Correct adjustments make the audio much clearer and more immersive.
Tailoring Sound to Personal Preferences
Audio is very personal, and what sounds great to one person might not to another. A music equalizer lets us adjust the sound to our liking. We can customize the sound to fit our mood, whether we prefer deep bass or bright treble.
Some headphones or speakers have a certain “color” to their sound. An Equalizer lets us tweak these biases to match our taste. This ensures our favorite tracks sound just right to us.
EQ in Various Audio Applications
EQ is used in many places, from home setups to professional studios. In studios, engineers use an Equalizer to balance mixes for all playback systems. At home, a music equalizer helps with room acoustics.
| Application | Primary Goal | Typical Adjustment |
|---|---|---|
| Studio Mixing | Clarity and Balance | Precise surgical cuts |
| Live Sound | Feedback Prevention | Broad frequency shaping |
| Home Audio | Personal Enjoyment | Bass and treble boosts |
| Streaming | Consistency | Dynamic range optimization |
In every setting, the goal is the same: to enhance the listening experience. By mastering the sound equalizer, we control our audio world. It’s a skill that requires patience and attention to detail.
Types of Equalizer Settings
Modern audio production uses several methods for adjusting frequencies. Each method has its own purpose. Whether you use a hardware unit or a digital EQ plugin, knowing these tools is key to balancing your mix.
Parametric EQ
The parametric equalizer is known for its surgical precision. It lets us pick a frequency, adjust its gain, and control its bandwidth, or Q factor.
This tool is great for removing harsh sounds or making space for instruments. Its flexibility makes it a must-have in professional EQ plugin suites.
Graphic EQ
A graphic equalizer uses a visual approach to sound shaping. It has sliders for fixed frequency bands, making quick adjustments easy.
“The beauty of a graphic interface lies in its ability to show you the shape of your sound at a single glance.”
Graphic EQs are perfect for live sound settings where speed matters. We can quickly see which equalizer settings are affecting specific ranges.
Shelving EQ
Shelving filters adjust frequencies above or below a point smoothly. They’re great for adding a high-end shine to vocals or reducing low-end booms.
Unlike peak filters, shelving filters affect a range of frequencies, not just one. Mastering these equalizer settings is crucial for a polished sound.
| Type | Best Use Case | Precision Level |
|---|---|---|
| Parametric | Surgical correction | High |
| Graphic | Broad tone shaping | Medium |
| Shelving | Overall balance | Low |
Choosing the right graphic equalizer or parametric tool depends on your goals. By trying out different types, we can better control our audio projects.
How to Use an EQ Effectively
Often, the best audio results come from small, thoughtful changes. When adjusting your equalizer settings, aim to improve audio clarity without adding unwanted sounds.
General EQ Tips
Begin with subtractive EQ, which means cutting out bad frequencies rather than boosting good ones. This method keeps the sound natural while making it clearer.
Always listen to your audio in the context of the full track. Making changes in isolation can lead to a mix that sounds disjointed or unbalanced when played back as a whole.
Identifying Frequencies
To find harsh or unwanted resonances, use the frequency sweep technique. Boost a narrow band by a few decibels and slowly sweep across the frequency spectrum until the unpleasant sound becomes prominent.
Once you identify the specific frequency causing the issue, simply cut that band by a small amount. This precise method allows you to clean up your audio while maintaining the integrity of the original recording.
Avoiding Over-EQing
It’s easy to overdo it, but over-EQing can make your sound thin or unnatural. Make small changes and often compare your work to the original signal by toggling the bypass switch.
| Frequency Range | Common Issue | Recommended Action |
|---|---|---|
| Low End (20Hz-250Hz) | Muddy or boomy sound | Gentle cut to clear space |
| Mid Range (250Hz-4kHz) | Boxy or nasal tone | Narrow cut to remove resonance |
| High End (4kHz-20kHz) | Harsh or sibilant | Smooth shelf or subtle dip |
By keeping your equalizer settings moderate, you ensure your audio stays balanced and professional. The best adjustments are often those that listeners don’t notice but feel.
Frequency Ranges Explained
Every sound you hear has a specific place in the frequency range. Knowing these zones is key for audio fans. By seeing the audio spectrum as a roadmap, we can make smart choices when adjusting tracks. This skill lets us shape our sound with expert precision.
Low Frequencies (Bass)
The low end, from 20Hz to 250Hz, gives your audio its foundation and impact. This is where the kick drum and bass guitar live, making the rhythm we feel in our chests. If your setup is off, check out 12 home audio setup fixes for better bass.
Mid Frequencies
Mid frequencies, from 250Hz to 4kHz, are the heart of most sounds and voices. This range gives the presence and character that define a mix. When balanced, the audio feels warm and natural.
But, too much here can make the sound muddy. We use EQ to clear out space, keeping lead vocals or main instruments clear.
High Frequencies (Treble)
The high frequencies, from 4kHz to 20kHz, add clarity, detail, and “air” to a recording. This range captures the crispness of cymbals, the breathiness of vocals, and the textures of acoustic instruments. A gentle boost here can make a track sound more open and polished.
| Frequency Range | Category | Primary Characteristic |
|---|---|---|
| 20Hz – 250Hz | Low (Bass) | Power and Foundation |
| 250Hz – 4kHz | Mid | Presence and Body |
| 4kHz – 20kHz | High (Treble) | Clarity and Detail |
Common EQ Settings for Different Genres
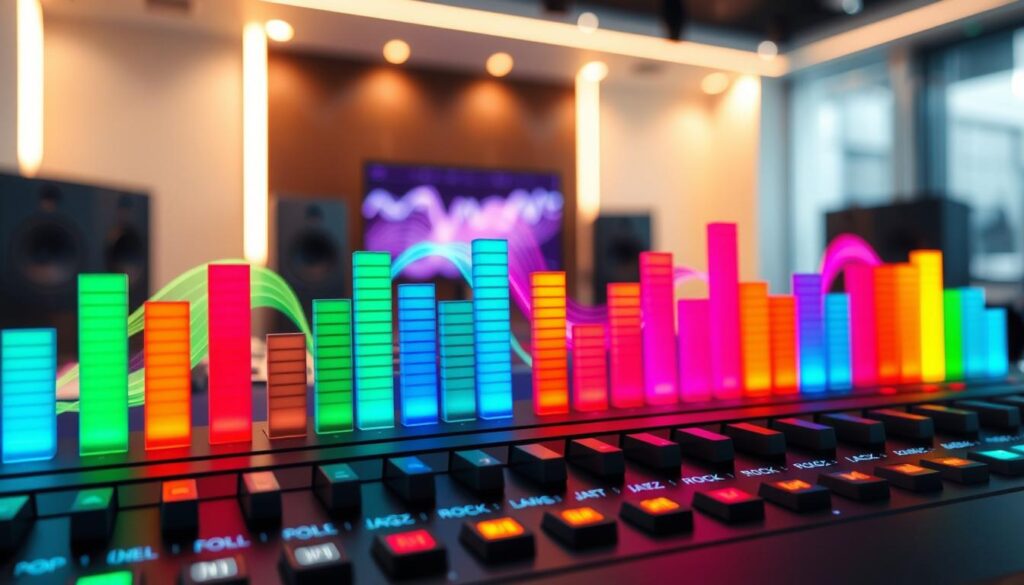
Knowing how to tweak your music equalizer for different genres is key to a top-notch home audio setup. Many people use a “V-curve” EQ setting, which boosts bass and treble but cuts the mids. This can cause listener fatigue. It’s better to test your equalizer settings across genres to find a balanced sound that doesn’t get tiring.
Rock Music
Rock music is all about the energy of electric guitars and the strong beat of drums. To enhance these, add a bit of boost to the low-mids, around 200Hz to 400Hz, to give guitars more body. A small increase in the 3kHz range can also make the snare drum’s attack and vocal clarity stand out.
Classical Music
Classical music aims to keep the natural sound of the recording. Avoid big EQ changes, as they can mess with the sound of instruments like violins or cellos. A very slight boost in high frequencies above 10kHz can add a bit of air and transparency to the sound.
Electronic Music
Electronic music often has deep bass lines and sharp percussion. You might want to boost the sub-bass below 60Hz to feel the kick drum’s impact. But, don’t overdo the highs, as it can make synthesizers sound too harsh.
| Genre | Low Frequencies | Mid Frequencies | High Frequencies |
|---|---|---|---|
| Rock | Moderate Boost | Strong Boost | Slight Boost |
| Classical | Flat | Flat | Gentle Lift |
| Electronic | Heavy Boost | Slight Cut | Moderate Boost |
EQ and Vocal Treatment
When mixing audio, the human voice needs precise EQ adjustments. Vocals are key, carrying emotions and messages. Proper equalization makes them clear and distinct, without getting lost in other sounds.
Making Vocals Stand Out
To make vocals pop, we enhance their presence in the mix. A boost in upper-mid frequencies helps the voice stand out. This makes every word clear, even in complex mixes.
It’s also important to avoid vocals getting lost to other sounds. By cutting competing frequencies, we create a dedicated pocket for the voice. This results in a polished, balanced sound.
Common Vocal Frequencies to Adjust
Knowing specific frequency ranges is key for vocal shaping. We start by removing “mud” in the low-mid range, between 200Hz and 400Hz. This prevents the voice from sounding muffled.
For better intelligibility, we focus on 3kHz to 5kHz. A slight boost here makes vocals feel closer. But, too much can cause harshness.
Lastly, we tackle harsh “s” and “t” sounds, between 6kHz and 8kHz. A narrow EQ cut or de-esser helps keep the vocal smooth. By managing these areas, the vocal remains the main focus.
Real-World Applications of EQ
Sound processing is everywhere, not just in studios. It’s in our headphones during commutes and at concerts. An audio equalizer ensures our music and speech sound clear and balanced. We often don’t notice how these tweaks change how we hear music and speech.
EQ in Streaming Services
Today’s streaming services let us tweak our sound. We can make bass louder for hip-hop or treble clearer for podcasts. This personalized approach helps us get the best sound from our devices.
Live Sound Engineering
Live sound engineers deal with tricky room acoustics. They use an audio equalizer to fix bad sound. By tweaking the sound, they make sure everyone hears the music well.
Home Audio Systems
Modern home audio systems tackle tough acoustic problems. They use automatic room correction to fix sound issues. This tech makes our living rooms sound like professional studios.
| Application | Primary Goal | Common Tool |
|---|---|---|
| Streaming | Personal Preference | Software EQ |
| Live Sound | Feedback Control | Digital Console |
| Home Audio | Room Correction | Automatic EQ |
Mistakes to Avoid with EQ Settings
Getting professional audio quality is more than just knowing how to use a sound equalizer. Many people make mistakes that hurt their audio. By knowing these common errors, you can improve your sound.
Overcompensation
Boosting frequencies too much is a common mistake. It might seem like you’re adding clarity, but it can introduce harsh distortion. Less is usually more when adjusting.
Instead of boosting, try removing unwanted frequencies. This keeps your audio natural and makes room for other sounds. If you’re pushing a gain knob too hard, step back and check your source material.
Ignoring Context
Adjusting an EQ plugin without listening to the full mix is a big mistake. A sound that works alone might not fit with others. Always make final decisions with the full mix playing.
Listening to just one track can hide frequency masking between instruments. Learn more about balancing by checking out these 8 home audio setup tips to maximize sound from bookshelf speakers. Keeping the big picture in mind is key for a balanced soundstage.
Relying Solely on Presets
Factory equalizer settings are handy, but they rarely fit your specific project. Every recording environment and instrument is unique. Relying on presets can lead to a generic sound.
Use presets as a starting point, then tweak them manually. This helps you develop your ears and understand how frequencies interact.
| Common Mistake | Resulting Issue | Recommended Fix |
|---|---|---|
| Extreme Boosting | Harsh distortion | Use subtractive EQ |
| Soloing Tracks | Frequency masking | Mix in full context |
| Preset Reliance | Generic, flat sound | Manual fine-tuning |
| Ignoring Phase | Thin, weak audio | Check phase alignment |
Tools for Setting Up EQ
Finding the best equalizer for your needs is key. You have software and hardware options. Each affects your final sound. It’s important to pick tools that fit well with what you already use.
Software Equalizers
Equalizer software is a top choice for many producers today. It’s flexible and works well with digital audio workstations. You can make and save many presets easily.
These digital tools often have a graphic equalizer view. This helps you see which frequencies you’re changing. It’s great for spotting issues in your mix. Plus, they offer precise control that’s hard to get with hardware.
Hardware Equalizers
Hardware units give a unique sound that many pros love. They add a warmth and character that digital tools can’t match. Working with physical knobs and faders can enhance your creativity.
Even though hardware takes up space and needs upkeep, its sound quality is worth it. Many engineers use it for tracking or mastering to give their work a professional touch. It’s a matter of whether you value digital ease or analog richness.
| Feature | Software Equalizer | Hardware Equalizer |
|---|---|---|
| Flexibility | High (Unlimited instances) | Low (Limited by units) |
| Sound Quality | Clean and precise | Warm and colored |
| Workflow | DAW integration | Tactile and hands-on |
| Cost | Affordable to free | High investment |
Evaluating Your EQ Settings
After making changes, it’s time to check if they worked. Disciplined evaluation is crucial to avoid a muddy mix. Make sure your EQ settings improve the sound, not hide important details.
Listening Techniques
Ear fatigue is a common problem in audio production. Listening to the same sound for too long can make it hard to notice changes. Take a five-minute break every hour to reset your hearing.
Also, listen at different volumes. If your mix sounds good at high volumes but not at lower ones, your EQ might be too strong. Always check your mix at a moderate volume to keep things balanced.
Using Reference Tracks
Using a reference track is the best way to check your work. Compare your project to a well-mastered song in the same genre. This helps you see if your EQ settings are correct.
When using a reference, pay attention to the bass, mids, and treble. If your track sounds thin compared to the reference, you might need to tweak your low-end EQ. Consistency is key. Choose a reference track you know well to ensure your final mix is top-notch.
Keeping Your EQ Skills Sharp
Getting professional audio clarity is a journey that takes patience and curiosity. Finding the best equalizer is just the start for audio lovers.
Active Exploration
Try new settings on different tracks to see how they change the sound. You might find new textures by experimenting with frequencies. This hands-on approach helps you connect with your equipment better.
Community Insights
Share your mixes with others to get new views on your work. Peers might spot details you miss. Their feedback helps you improve and trains your ears.
Educational Growth
Check out resources from leaders like Sound on Sound or Pensado’s Place to stay updated. These platforms share top equalizer techniques. Regular study keeps your skills sharp as audio tech changes.
Being dedicated to this craft makes a simple tool powerful for expressing yourself. Keep listening, adjusting, and enjoy the journey of creating your perfect sound.