
 Zoe Nora
Did you know your physical space affects more than half of your audio quality? Even the most expensive speakers can’t perform well without proper management of their surroundings. We often spend thousands on equipment but forget about the space where sound waves travel.
We think true high-fidelity audio starts with sound optimization. By improving your listening environment, you can change how you enjoy music. This ensures every note is clear and precise when it reaches your ears.
This article is a key resource for those wanting to learn room correction at home. We’ll show you how to get professional-grade audio without a huge budget.
Key Takeaways
- Physical space significantly impacts audio fidelity more than equipment alone.
- High-end speakers require a controlled environment to reach their full potential.
- Sound optimization is the first step toward achieving a balanced audio profile.
- Strategic placement and acoustic management define the listening experience.
- Mastering these techniques allows for professional-grade sound in any home.
What is Room Correction and Why is it Important?
Your listening space plays a big role in every sound you hear. We often focus on better amplifiers or cables. But, the physical environment is the most influential factor in your audio chain. To get high-fidelity sound, we need to manage how sound waves interact with our surroundings.
Understanding Room Acoustics
Room acoustics is how sound behaves in a closed space. Sound waves don’t go straight to your ears. They bounce off walls, ceilings, and floors, creating complex reflections.
Effective room correction helps control these reflections. It ensures the direct sound from your speakers is clear and accurate. Without it, the original recording gets mixed with the room’s sound.
The Impact of Room Shape and Size
The size and shape of your room affect low-frequency sound waves. A square room can cause standing waves, making bass sound uneven. Your speaker setup must adjust for these room limitations to get balanced sound.
Bigger rooms give sound waves more space but longer decay times. Smaller rooms can have intense pressure buildup. Knowing these factors is key to a top-notch listening experience.
Common Sound Issues Caused by Poor Acoustics
Modern interior design can harm high-quality audio. Large glass surfaces and hard floors reflect sound, causing disruptive reverberation. This makes it hard to hear musical details.
When your speaker setup is in a room with many hard surfaces, echoes make it hard to pick out instruments. Room correction helps fix these problems. It turns a regular living area into a place where music can really stand out.
Types of Room Correction Methods
Managing your listening space is a two-part job. It involves both physical changes and digital tweaks. The best results often come from combining these two approaches.
Passive Room Treatment Solutions
Passive acoustic treatment changes your room’s physical setup. It uses soft materials like heavy curtains or foam panels. These help absorb sound waves that cause harshness.
But, managing low-frequency sounds is tougher. Bass needs thick, dense materials or bass traps in corners. These changes help your room sound better, making it ready for a top-notch surround sound setup.
Active Room Correction Technologies
Active room correction uses digital signal processing (DSP). It analyzes and adjusts audio before it hits your speakers. This tech is great for fixing frequency issues that physical treatments can’t handle.
It uses sound equalization to fix room problems. By understanding your room’s sound signature, it applies filters. This makes the sound more even and neutral at your listening spot.
Comparison of Different Methodologies
You don’t have to pick just one method. Passive treatments handle room reflections, while active systems fine-tune the sound. Together, they create a balanced, clear sound.
| Methodology | Primary Focus | Best For |
|---|---|---|
| Passive Treatment | Reflections & Decay | High-frequency control |
| Active Correction | Frequency Response | Bass modes & peaks |
| Hybrid Approach | Total Optimization | Balanced, clear sound |
Start with basic physical treatments to improve your room’s sound. Then, use digital sound equalization for the last touch. This will give you a professional listening experience.
Evaluating Your Room for Correction Needs
We can’t fix what we don’t measure. So, evaluating our room is key. Before we start, we need to understand how sound acts in our space. This data-driven approach helps us focus on what really needs work.
Identifying Acoustic Problem Areas
Every room is different, shaped by its size, furniture, and walls. We often face issues like standing waves, making bass sound off. Early reflections from walls can also mess up the soundstage.
Spotting these problems helps us avoid guesswork. We can then choose the right solution, like adding panels or using software. Knowing these issues is the first step to a balanced sound.
Using Measurement Tools for Assessment
To accurately measure our space, we use top-notch tools. A calibrated USB microphone and Room EQ Wizard (REW) software give us the facts. This combo is essential for audio calibration, showing us our room’s sound performance.
With our data, we can pinpoint where sound is too loud or too quiet. While some prefer automatic room correction, manual measurement is best. It lets us fix the real problems for a clearer sound.
Implementing Passive Acoustic Treatments
We can greatly improve our audio quality by using sound absorption and diffusion. You don’t need expensive renovations or complex studio builds to enhance your room acoustics. Simple physical changes can make a big difference for your audio gear.
Sound Absorption Materials Explained
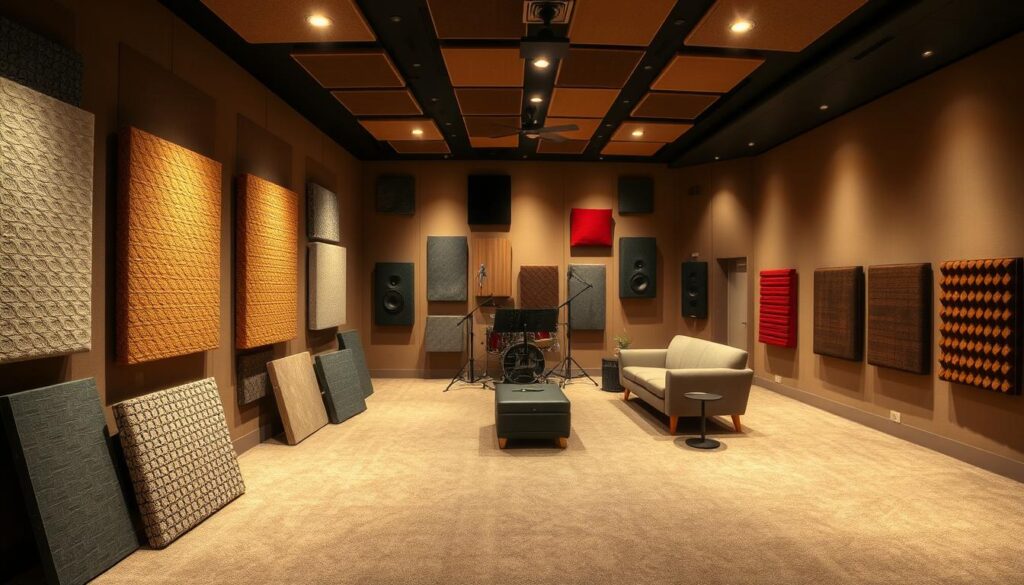
To reduce echoes, we need materials that absorb sound energy, not reflect it. Acoustic foam is great for high frequencies, while denser materials like mineral wool or fiberglass panels handle lower frequencies better. Heavy curtains, thick rugs, and plush furniture also help dampen sound reflections.
Strategically Placing Acoustic Panels
Where you place these materials is key. Identify the “first reflection points” on your side walls. These are where sound bounces off the wall before reaching your ears. Placing panels here will significantly clarify the stereo image and improve your speaker setup.
Tips for DIY Acoustic Treatments
You don’t have to spend a lot to get professional results with your acoustic treatment. Using bookshelves filled with books of different sizes is a clever trick. They act as both absorbers and diffusers because of their irregular surfaces. This simple addition helps break up standing waves and creates a more natural, diffused sound field in your speaker setup.
Another DIY method is building your own wooden frames and filling them with safe, high-density insulation. Wrap these frames in breathable fabric to make custom panels that match your home decor. These small changes to your room acoustics will greatly enhance your music and movie experience.
Active Room Correction Systems: An Overview
Digital signal processing is changing how we get studio-quality sound at home. Unlike physical treatments, active systems fix sound issues before we hear them. They help us get the sound equalization quality of professional studios.
Concept of Digital Signal Processing (DSP)
DSP is like a smart filter for your audio. It figures out your room’s sound signature and makes adjustments. This way, it automatically fixes sound issues in your space.
It finds out where your room’s sound is too loud or too quiet. Then, it tweaks the sound to make it flat and even. This ensures your speakers sound their best, no matter your room’s size or shape.
Popular DSP Software and Hardware Options
Many people use special hardware and software for sound optimization. These tools range from easy-to-use devices to complex software. The right choice depends on your budget and how much control you want.
Here’s a table of top room correction solutions:
| Solution Name | Type | Primary Benefit |
|---|---|---|
| Dirac Live | Software | Advanced impulse response correction |
| MiniDSP | Hardware | Versatile external processing |
| Sonarworks | Software | Studio-grade calibration for headphones/speakers |
| Trinnov | Hardware | High-end professional 3D mapping |
Adding these systems to your setup changes your listening experience. Whether you pick hardware or software, you’re getting a more accurate sound. Proper sound equalization makes every sound just as the artist meant it to be.
Setting Up Room Correction Software
Setting up software is key to getting the best sound from your speakers. By following a few steps, you can make your listening space sound amazing. This ensures your speaker setup plays sound as accurately as possible.
Step-by-Step Installation Guide
First, download the latest software from the maker’s website. Make sure your computer can handle the software’s needs during audio calibration. Then, plug in your measurement microphone to the interface.
It’s important to use a USB cable for the computer and DAC connection. This reduces signal problems and gives the most precise measurements during room correction. Follow the instructions to adjust the microphone levels before starting the sweep tests.
Key Settings to Adjust for Optimal Results
After the initial tests, tweak the software settings for your room. Choose target curves that match your listening style. A balanced sound might need a bit less high frequency to avoid ear strain.
Also, look at the filter limits in your audio calibration software. Limiting corrections to lower frequencies keeps your speakers’ natural sound while fixing room issues. Adjusting these settings carefully helps avoid common mistakes and gets you a top-notch speaker setup with clear sound.
Save your settings often to try out different profiles safely. By fine-tuning these settings, you get the most out of your room correction. Taking the time to adjust these details is the last step to a deep, immersive listening experience.
Benefits of Room Correction
Your home theater system can do so much more when you fix its sound problems. Room correction makes your sound clear and true to the original, no matter the volume or music type.
Enhanced Listening Experience
Optimizing your listening space makes music and movies feel like you’re right there. Audio calibration gets rid of bad echoes and reflections. This makes the sound feel wider and more real.
Improved Balance Across Frequencies
Sound equalization helps control loud bass. Without it, bass can overwhelm the other sounds. With correction, bass is strong but doesn’t drown out the rest.
Greater Clarity in Dialogue and Instruments
Good sound lets every instrument and voice stand out. Room correction brings out these details, making dialogue clear in movies. It also makes each instrument sound unique, enriching your listening experience.
| Feature | Uncorrected Audio | Corrected Audio |
|---|---|---|
| Bass Response | Boomy and muddy | Tight and controlled |
| Dialogue | Muffled or unclear | Crisp and intelligible |
| Soundstage | Narrow and flat | Wide and immersive |
| Frequency Balance | Uneven peaks | Smooth and linear |
Common Myths About Room Correction
Many people think software can magically fix bad room acoustics. They believe an automated program can turn a poor space into a top-notch studio. But, room correction isn’t a cure-all for every sound issue in your home.
Debunking Misconceptions
The biggest myth is that digital tools can replace real acoustic treatment. Software can smooth out some sound issues, but it can’t fix long echoes or severe reflections from hard surfaces. Physical treatment should always be your first priority for the best audio setup.
Another myth is that software can fix bad speaker placement. No digital filter can restore the soundstage or imaging if speakers are wrong. You need to get your physical setup right first, then use software for fine-tuning.
Clarifying Common Confusions
Many users get confused about digital signal processing’s role. It’s best to see these tools as a way to refine your listening environment optimization, not rebuild it. Here are a few key points:
- Software is the final step: Always address physical room issues before applying digital filters.
- Limits of DSP: Digital tools can’t fix deep nulls caused by room dimensions or standing waves.
- Manage expectations: The goal is to improve balance, not to create a perfect, artificial sound profile.
By knowing these limits, you can focus on the most impactful improvements. Combining proper physical placement with digital adjustments leads to a more natural and engaging sound. This balanced approach is key to successful room correction and long-term satisfaction with your audio gear.
Future Trends in Room Correction Technology
The world of home audio is changing fast. New tools are coming out to make our listening spaces better. We’re moving toward smarter systems that can handle complex tasks easily.
Innovations in Acoustic Measurement
Brands like Dirac and Trinnov Audio are leading the way with new hardware. Their tools can measure sound with incredible precision. This means better room correction for everyone.
The Rise of AI in Sound Optimization
Artificial intelligence is now key in making sound optimization easier. These smart algorithms look at your room’s acoustics and suggest the best settings. This makes top-notch audio quality available to all.
Using these new tools keeps your setup up-to-date with technology. You can mix these digital solutions with traditional acoustic treatment for a balanced sound. We suggest trying these tools to get the most out of your home audio system.