
 Zoe Nora
Did you know two engineers created the iconic “jet engine” roar on classic rock records? They pressed their thumbs against spinning tape reels. This mechanical trick created the flanger effect, a staple in modern music production.
We use this tool to add depth, motion, and texture to our playing. Whether you want a gentle, swirling tape warble or a dramatic, sweeping flanger sound. This modulation effect transforms a dry signal into something truly immersive.
In this guide, we explore how to master your guitar flanger. We will help you navigate the market to find the perfect flanger pedal for your board. You will also learn how to dial in specific settings for your favorite tones.
Key Takeaways
- The effect originated from manipulating tape reels to create phase-shifting textures.
- It adds movement and a “jet-like” sweep to your guitar signal.
- Modern pedals offer precise control over speed, depth, and resonance.
- Understanding the signal chain helps you achieve cleaner, more musical results.
- Experimenting with settings allows you to create unique, psychedelic soundscapes.
What Is a Flanger Effect?
A Flanger is a time-based processor that changes time and phase. The flanger effect blends your original guitar signal with a fractionally delayed copy.
A low-frequency oscillator constantly changes the delay time, creating a sweeping, swirling motion. This movement gives the flanger sound its signature jet-plane quality, loved by many musicians.
Definition and Overview
When we discuss this effect, we mean a process that modulates the delayed signal. The delay time is usually very short, often less than 20 milliseconds.
Changing the delay time creates peaks and notches in the frequency spectrum. This pattern, called a comb filter, moves across the frequency range and produces a distinct, metallic shimmer.
Historical Background
The effect began in the early days of studio recording. Pioneers like Les Paul used tape machines to create unique textures before the vintage flanger pedal became standard.
Engineers slowed tape by pressing a finger against a tape reel’s flange. This manual technique created the phase cancellation needed for the effect, which the Beatles later popularized during the 1960s.
| Method | Mechanism | Control |
|---|---|---|
| Tape Flanging | Manual pressure on tape reel | Manual/Physical |
| Analog Pedal | Bucket Brigade Device (BBD) | Electronic/LFO |
| Digital Flanger | DSP Algorithms | Software/Digital |
Today, sophisticated circuitry replicates those classic sounds with precision. Modern units and a vintage flanger pedal share one goal: adding depth and movement to your guitar tone.
The Science Behind the Flanger
Every great guitar flanger uses a complex mix of time and phase. When engaged, it splits one signal into two identical paths: one stays untouched, while the other receives a short, changing delay.
When these signals recombine, they form peaks and troughs across the frequency spectrum. This pattern, called a comb filter, shifts as the delay changes. That movement creates the swirling flanger effect.
Phase Shifting Explained
Flanging differs from simple phase shifting. A phaser rotates signal phase with all-pass filters, but a flanger uses actual time delay. A delay of a few milliseconds makes some frequencies cancel and others reinforce.
This produces a harmonic series that sounds like a sweeping filter. With a very short delay, cancellations happen at higher frequencies. As delay grows, they move lower, creating the iconic sweeping motion.
Time Delay and Feedback
Feedback makes the effect more intense. Routing part of the delayed signal back to the input increases peak resonance. This makes the flanger sound more metallic and pronounced, often like a jet engine taking off.
Modern players often use a digital flanger for these sounds. Vintage tape machines changed reel speeds by hand, but a digital flanger uses Digital Signal Processing (DSP) for precise delays. This provides cleaner, reliable modulation that stays consistent during every performance.
| Feature | Analog Flanger | Digital Flanger |
|---|---|---|
| Signal Path | Bucket Brigade Device | DSP Microchip |
| Tone Character | Warm and Organic | Clean and Precise |
| Noise Floor | Higher | Very Low |
| Flexibility | Limited | Highly Programmable |
How a Flanger Pedal Works
A flanger pedal splits your guitar signal into two paths. One path stays unchanged, while the other receives a short, variable delay. Together, they create the signature sweeping effect.
When the signals meet again, they create constructive and destructive interference. This creates the swirling, jet-like movement of the classic Flanger sound. These mechanics help you shape the right tone for your setup.
Key Components of a Flanger Pedal
Every flanger pedal uses key controls to shape its output. The Low-Frequency Oscillator (LFO) drives the sweep’s speed and intensity. Rate, Depth, and Regeneration knobs manage these functions.
Rate controls modulation speed, while Depth sets the sweep’s range. Regeneration, often called Feedback, sends delayed sound back into the input. This increases the intensity of the peaks and valleys, creating a dramatic, metallic effect.
Popular Flanger Pedals on the Market
Choosing the best flanger pedal depends on your preference for analog warmth or digital precision. Many players want a vintage flanger pedal for its organic, slightly noisy character. A digital flanger provides cleaner, more flexible choices for modern pedalboards.
Before buying one, watch a detailed flanger demo to hear each unit with your playing style. Professional flanger reviews can also reveal build quality and noise floors. The table below lists respected units available today.
| Model | Type | Key Strength | Best For |
|---|---|---|---|
| Boss BF-3 | Digital | Versatility | Modern Rock |
| Electro-Harmonix Electric Mistress | Analog | Classic Texture | Vintage Tones |
| MXR M117R | Analog | High Headroom | Studio Use |
| TC Electronic Vortex | Digital | TonePrint Tech | Customization |
Flanger vs. Other Modulation Effects
Many guitarists find it hard to tell modulation pedals apart. Knowing their differences helps you build a versatile pedalboard for your musical goals. For more guidance, read modulation is key: phaser vs. flanger vs journey.
Flanger vs. Chorus
The chorus effect creates a lush, shimmering, wider sound. It mixes your original signal with a slightly delayed, pitch-shifted version. This creates a smooth doubling effect that sounds like several instruments playing together.
In contrast, a guitar flanger creates a stronger, metallic sweep. It uses a shorter delay time and feedback to create distinct comb-filter movement. Chorus gently thickens sound, but the flanger sound creates a dramatic, jet-like swoosh.
Flanger vs. Phaser
When comparing a Flanger with a phaser, the main difference comes from their technology. A phaser uses all-pass filters to create notches across the frequency spectrum. These notches have uneven spacing, producing a swirling, liquid texture that feels more organic and less mechanical than a flanger.
The flanger effect uses a time-based delay to create harmonically related peaks and troughs. This design gives it a precise, “in-your-face” quality that cuts through a dense mix. Choose based on whether you want a smooth, swirling wash or sharp, rhythmic modulation.
| Effect Type | Primary Mechanism | Sonic Character |
|---|---|---|
| Chorus | Short Delay & Pitch Shift | Wide, Lush, Smooth |
| Flanger | Short Delay & Feedback | Metallic, Sweeping, Intense |
| Phaser | All-Pass Filtering | Swirling, Liquid, Organic |
The Flanger in Rock Music
Few tools shaped rock guitar’s sound as much as the flanger effect. It grew from a studio curiosity into a standard part of electric guitar rigs. Its influence spans decades of landmark recordings that expanded what a six-string instrument could achieve.
Iconic Flanger Guitar Sounds
This effect started long before it became a standard pedalboard item. In 1959, Toni Fisher’s track “The Big Hurt” showed one of the first clear examples of flanging on a hit record. That experiment helped producers create swirling textures with tape machines.
Later, studios became laboratories for psychedelic exploration. Producer Eddie Kramer used the technique during the coda of Jimi Hendrix’s “Bold as Love.” This moment is widely credited as the first use of stereo flanging, creating otherworldly movement for listeners.
Influential Rock Guitarists
Studio engineers pioneered the sound, but legendary players brought it to wider audiences. Jimi Hendrix helped popularize the flanger sound through his innovative studio production. His willingness to experiment made a technical process a signature musical element.
Years later, Eddie Van Halen redefined the role of the guitar flanger in hard rock. On the 1981 track “Unchained,” he used it to give his rhythm work a metallic, jet-like quality. These artists showed that a vintage flanger pedal or digital unit can create atmospheric depth and aggressive, riff-driven power.
Incorporating Flanger in Your Playing
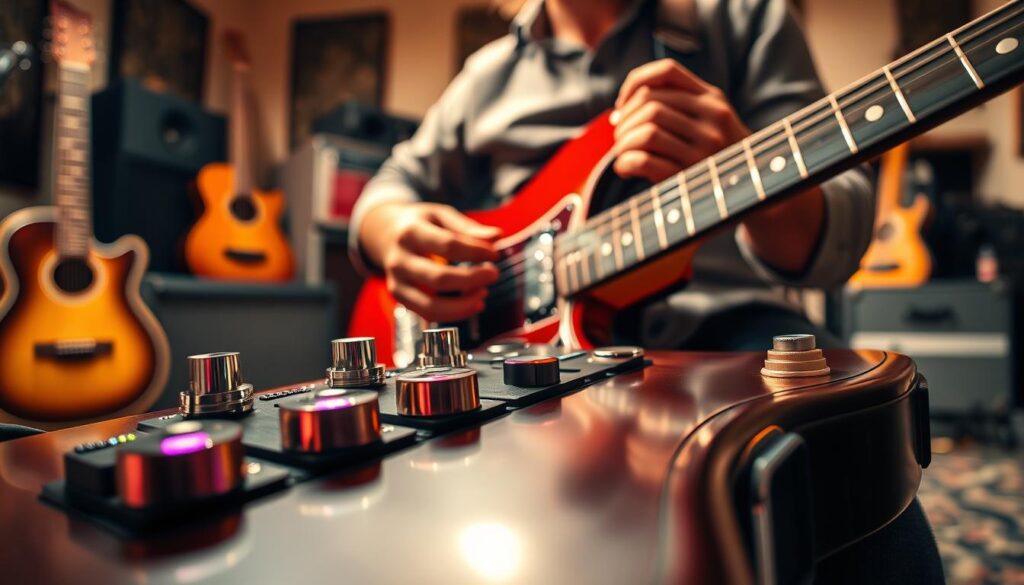
Subtle, well-timed modulation often makes guitar parts more compelling. Adding a flanger pedal can bring depth and movement to a static arrangement. Use your dynamics and timing for either a gentle shimmer or a dramatic sweep.
When to Use a Flanger Effect
The flanger effect fits many musical settings. Use it on clean chords for a glassy, airy tone that helps rhythm parts stand out. On picked parts, a light setting can create space like a double-tracked recording.
During energetic riffs, a guitar flanger adds a metallic edge that cuts through a dense mix. Use it during transitions or solos to build rising tension. Try these placements in a flanger demo to find settings that fit your playing style.
Creative Applications of Flanger
Beyond standard modulation, your gear can create unique textures. A very slow, shallow setting can copy the subtle tape warble of vintage analog recordings, adding nostalgia. High feedback and depth create the classic jet-engine sweep heard in iconic rock tracks.
For rhythmic textures, use the flanger sound for slicer-style movement. Sync your playing with the modulation cycle to create an auto-wah-like effect that pulses with the music. The best Flanger settings serve the song instead of distracting from it.
Adjust your controls to match the arrangement and your playing dynamics. Start with conservative settings, then raise the intensity until you find balance. Mastering the flanger is a journey of discovery that rewards players who experiment with their signal chain.
Setting Up Your Flanger Pedal
Your perfect, swirling sound depends on how you place your gear on your existing pedalboard. For best results, place your flanger pedal after compression and drive, but before delay and reverb. This order keeps modulation clear and prevents muddy signals.
Adjusting Parameters for Optimal Sound
When you first plug in, do not turn every knob fully up. Start with all controls at noon, then make gradual adjustments to hear how each shapes your tone. Rate sets oscillation speed, while depth controls the effect’s intensity in your signal.
Sweep and feedback knobs also shape your sound’s character. A digital flanger often gives more precise control than older analog units. Watch a flanger demo to learn how these settings work with different pickup configurations.
“The secret to great modulation is not in the intensity of the effect, but in how it complements the natural resonance of the instrument.”
| Parameter | Function | Recommended Starting Point |
|---|---|---|
| Rate | Speed of modulation | 9 o’clock |
| Depth | Intensity of sweep | 12 o’clock |
| Feedback | Resonance/Regeneration | 10 o’clock |
| Mix | Wet/Dry balance | 50% |
Common Mistakes to Avoid
Excessive regeneration can quickly change a musical sound into harsh, unusable noise. Do not let the effect hide your original guitar tone. If your signal gets lost, lower the mix or depth controls to keep it clear.
Many players ignore stereo phase behavior with a digital flanger in a dual-amp setup. Route your cables correctly to create a wide, immersive soundstage.
Finally, do not treat your Flanger as a one-setting device. The best flanger pedal is one you keep adjusting for each song’s needs. Avoid these common mistakes, and the Flanger can become an essential creative tool.
Flanger Effect in Different Genres
The guitar flanger helps us explore sound, from aggressive metal riffs to delicate jazz melodies. Though many players link this Flanger to retro sounds, its power comes from adapting it to different styles. Adjusting the controls lets the flanger effect fit almost any musical setting.
Use of Flanger in Metal
In heavy metal, we use the flanger to add chaotic movement to high-gain tones. With heavy distortion, it creates a sweeping, jet-like quality that makes riffs feel larger than life. Try higher feedback settings to increase resonance and help the sound cut through a dense mix.
For metal, use these tips to keep complex passages under control:
- Sync the rate of the flanger sound to the tempo of your rhythm section for a tighter feel.
- Use a shorter delay time to keep the effect focused and avoid muddying your low-end frequencies.
- Apply the effect sparingly during solos to add a dramatic, swirling texture without losing note definition.
Flanger in Jazz and Blues
When we play jazz and blues, our use of the flanger effect becomes subtle and graceful. Rather than aggressive rock sweeps, we create gentle, liquid-like modulation for clean or slightly overdriven tones. This lets our instrument’s natural character shine while adding a unique, shimmering dimension.
For these genres, keep the depth low and rate slow so the effect does not overpower expressive phrasing. A subtle flanger sound offers a sophisticated alternative to chorus and creates a wider stereo image. It avoids the typical “wobble” linked with other modulation pedals, while minimal feedback keeps the effect tasteful instead of distracting.
Maintenance and Care for Flanger Pedals
Whether you own a vintage flanger pedal or a modern digital flanger, proper care supports steady performance. Inspect your gear for a few minutes to help prevent costly repairs and protect your tone. Basic maintenance also protects the delicate circuitry behind its iconic sweeping sounds.
Tips for Longevity
The most important step in maintaining your Flanger is using the correct power supply. Check the voltage and polarity printed on the chassis to avoid damaging internal components. A high-quality, isolated power brick often keeps your signal clean and free from unwanted hum.
Keep your pedals clean by wiping them with a soft, dry cloth after every session. Avoid harsh chemicals, which may damage the finish or seep into the knobs. Store your gear in a cool, dry place when unused to prevent oxidation on the input and output jacks.
Troubleshooting Common Issues
If you notice weak modulation or signal loss, first check your patch cables. A faulty cable often causes signal problems, even when you suspect the pedal. If the issue continues, clean the jacks with specialized contact cleaner to remove dust or debris.
When reading flanger reviews, look beyond features and consider reports about construction quality and bypass behavior. A reliable unit should have a sturdy footswitch and housing that protects its internal board from impact. If you want the best flanger pedal, choose long-term durability to help your investment last through years of heavy use.
| Pedal Type | Cleaning Frequency | Power Needs | Storage Condition |
|---|---|---|---|
| Analog Flanger | Monthly | Isolated 9V | Humidity Controlled |
| Digital Flanger | Quarterly | High Current | Dust-Free Case |
| Vintage Unit | Weekly | Specific Voltage | Climate Controlled |
Ultimately, a well-maintained flanger pedal can provide years of reliable service. Treat your gear with respect, and it will deliver the modulation depth needed for your signature sound.
Conclusion: Elevating Your Sound with Flanger
Mastering the flanger effect reveals a wide sonic world for your instrument. With a few knob adjustments, you can turn a simple clean tone into thick, swirling texture or a dramatic jet-engine sweep.
Your guitar flanger is a versatile tool for your pedalboard. Explore how rate, depth, and feedback settings work together to create unique textures. Place the unit correctly in the signal chain for the best results with your specific style.
Compare the flanger sound with chorus or phaser pedals to choose the right modulation for your music. Whether you play heavy metal or smooth jazz, the right settings add depth to your performance.
Experiment with stereo routing and creative playing techniques. A signature tone takes patience and curiosity to develop. Grab your guitar, plug in your favorite flanger, and shape your own sonic identity today.