
 Zoe Nora
Nearly 80% of unwanted low-frequency noise in professional recordings comes from physical vibrations, not air movement. When recording vocals or hosting a show, your equipment battles invisible problems, including desk taps and HVAC hum.
Condenser microphones are incredibly sensitive to these mechanical disturbances. Without proper isolation, distracting rumbles can harm audio quality and resist post-production fixes. A high-quality microphone shock mount is the most effective way to separate your hardware from its environment.
Choosing the right shock mount for podcasting requires careful attention to your gear and recording space. We will cover suspension design, material durability, and overall compatibility. These factors help keep your voice clear and professional during every session.
Key Takeaways
- Mechanical vibrations are the primary cause of low-frequency noise in studio recordings.
- Condenser microphones require specialized isolation to prevent unwanted desk and floor rumble.
- Compatibility with your specific microphone model is the most critical factor during selection.
- Suspension design and material quality directly impact the longevity of your audio setup.
- Balancing your budget with necessary features ensures long-term recording success.
Understanding Shock Mounts and Their Importance
To improve studio recordings, you must understand vibration isolation. Many creators focus on room acoustics but overlook vibrations moving through microphone stands. A professional shock mount acts as the main defense against unwanted mechanical noise.
What is a Shock Mount?
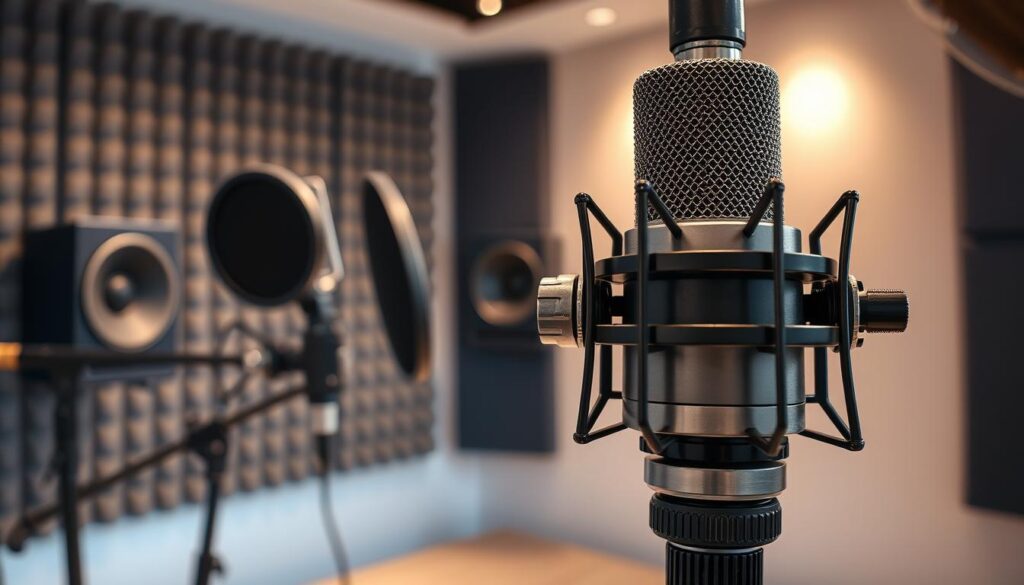
At its core, a shock mount is a mechanical cradle that suspends your microphone. It creates a buffer between the sensitive capsule and equipment such as a boom arm or floor stand. Elastic bands, springs, or tension-based materials decouple the microphone from the stand.
This suspension system keeps structure-borne vibrations from reaching the microphone diaphragm. Adjusting your desk or typing on a keyboard creates low-frequency rumbles that can ruin a clean take. Learning how to choose the right shock mount for your is a fundamental step in building a reliable recording chain.
“The most important part of a recording is the signal path, and that starts with keeping your microphone isolated from the physical world.”
Why Use a Shock Mount?
A shock mount for condenser microphone setup is almost mandatory for high-sensitivity gear. These microphones have lightweight diaphragms that capture even the most subtle vibrations. Without this protection, recordings may suffer muddy low-end interference or distracting thumps.
Remember, a shock mount for condenser microphone is not a substitute for acoustic treatment. While a microphone shock mount stops vibrations traveling through the stand, it does not block sound waves reflecting off your walls. View this tool as a necessary component for mechanical isolation, not a solution for poor room acoustics.
Investing in a professional shock mount keeps your audio crisp and clear. By eliminating floor-borne noise, it saves significant editing time. Ultimately, this simple hardware provides the stability required for truly high-quality audio production.
Types of Shock Mounts Available
Selecting the perfect microphone shock mount requires reviewing today’s available designs. Each style provides different mechanical isolation, which can change recordings in professional or home settings.
Elastic Shock Mounts
Elastic or “spider” mounts are widely seen as the gold standard for any shock mount for studio applications. These units use a suspended cradle held by elastic bands to separate the microphone from the stand.
This design works especially well for a shock mount for condenser microphone setup because it absorbs vibrations from many directions. It blocks floor rumble and desk bumps from reaching the sensitive capsule, ensuring pristine audio clarity.
Hard Mounts
Hard mounts, often called clip-on holders, create a rigid connection between the microphone and stand. They provide excellent stability but usually lack the isolation needed to block low-frequency noise.
We generally recommend these when the microphone is not prone to handling noise or outside vibrations. They are simple to use and durable, but they offer less protection than a suspended system.
Universal Shock Mounts
Universal designs fit microphones with many sizes and shapes. They offer great flexibility for studios that often switch between different pieces of gear, making them a versatile choice.
However, model-specific mounts often perform better because engineers design them for your device’s exact mass and dimensions. A universal microphone shock mount is convenient. A custom-fit option usually provides the most reliable isolation for your specific shock mount for condenser microphone needs.
Key Features to Consider When Choosing
When searching for the best shock mount for recording, several factors affect long-term performance. Check your microphone setup before buying to ensure a perfect fit. These details help prevent unwanted noise and unstable equipment.
Material Quality
A high-quality shock mount needs strong construction for lasting value. Look for frames made from solid metal or reinforced polymers that resist cracking.
The suspension system matters just as much. Top models often use resilient elastic bands or specialized silicone rings that keep their tension after years of heavy use. These materials separate the microphone from the stand and block low-frequency vibrations from reaching its capsule.
Design and Compatibility
Finding the right shock mount for studio use requires checking your microphone’s dimensions. Make sure the mount’s inside diameter matches the mic body for a secure grip without damaging its finish.
Also check the hardware’s weight capacity. Heavy large-diaphragm condensers need stronger clamps to prevent sagging during long sessions. Confirm the mounting thread matches your boom arm or stand, since most professional gear uses standard 3/8-inch or 5/8-inch threading.
Size and Adjustability
Every Shock mount should let you position your microphone precisely. Choose models with smooth angle adjustments, so you can tilt the mic for better off-axis rejection.
Make sure the design leaves enough room for your XLR cable. A cramped mount can strain the connector, causing signal dropouts or cable damage. Check that the frame supports vertical and horizontal positioning for different recording environments.
| Feature | Budget Option | Professional Choice |
|---|---|---|
| Frame Material | Lightweight Plastic | Solid Steel/Aluminum |
| Suspension | Standard Rubber | Reinforced Elastic/Silicone |
| Adjustability | Fixed Angle | Multi-Axis Swivel |
| Thread Size | Single Size | Universal Adapter Included |
How Shock Mounts Affect Sound Quality
Professional audio quality takes more than a high-end microphone. A reliable shock mount for condenser microphone setup blocks unwanted noise that could ruin an otherwise perfect take.
By separating the microphone from its stand, the mount creates a buffer. This buffer blocks outside energy from reaching the sensitive capsule, preserving clear, polished recordings.
Isolation Techniques
Mechanical vibrations often travel through desks, boom arms, and floor stands. Typing, footsteps, and HVAC equipment can cause these vibrations.
A shock mount for condenser microphone uses elastic bands or special suspension systems to stop these vibrations. By suspending the mic, the mount lets only airborne sound waves reach the diaphragm. This crucial isolation keeps your audio signal clean and free from mechanical interference.
Preventing Distortion
Strong mechanical energy can reach the microphone capsule as low-frequency rumble or unwanted thumps. These sounds can overwhelm the input signal and cause distortion that is hard to fix later.
A properly matched shock mount for condenser microphone preserves your voice’s natural low-end response. Without it, vibrations can strain the capsule, causing muddy or distorted sound. A suspension system calibrated for your microphone’s weight keeps internal parts stable during intense recording sessions.
Popular Shock Mount Brands and Models
Several leading brands offer reliable microphone support and strong build quality. Finding the best shock mount for recording means checking how well a model works with your current gear. Choose manufacturers known for steady performance in many recording spaces.
Rode Shock Mounts
Rode leads the audio industry with durable products for creators. Their mounts are a trusted professional shock mount choice for heavy studio microphones. Many models work as a shock mount for podcasting and block desk vibrations from broadcasts.
Heil Sound Shock Mounts
Heil Sound makes strong mounts for serious shock mount for studio setups. Because each mount may fit certain microphone bodies, check its dimensions and thread requirements before buying. Precision is key when you match the mount with your hardware for a secure fit.
Audio-Technica Shock Mounts
Audio-Technica makes dedicated mounts for microphones in the popular AT2020 family. They provide strong isolation and offer an affordable shock mount choice without lowering performance. These models also reduce handling noise effectively.
Universal options, such as the Rycote InVision USM, fit many microphone diameters. They are high-quality shock mount alternatives with advanced suspension technology. Universal mounts offer greater flexibility when you often switch between microphones in your collection.
How to Install a Shock Mount Properly
Installing your microphone shock mount is simple but vital for any studio setup. Secure hardware correctly to keep unwanted vibrations from ruining your audio tracks. Make all physical adjustments before recording to prevent handling noise from entering your signal.
Step-by-Step Installation
First, identify the correct thread size for your boom arm or stand. Most mounts include a screw adapter for 5/8-inch and 3/8-inch threads, so attach the correct adapter before attaching the mount.
- Carefully thread the microphone shock mount onto your stand until it feels firm, but do not force it.
- Insert your microphone into the center of the suspension cradle, ensuring it is balanced and secure.
- Adjust the clamp or tension knob to hold the microphone in place without applying excessive pressure.
- Perform a gentle stability test by lightly tapping the stand to ensure the suspension is absorbing the shock effectively.
Common Installation Mistakes to Avoid
Even experienced engineers can make small errors that affect sound quality. Avoid these common mistakes to maintain a professional signal chain during recording.
- Overtightening: Forcing screws can strip threads or damage the delicate suspension bands.
- Off-center placement: If the microphone is not centered, the weight distribution will cause the mount to sag, leading to uneven isolation.
- Cable tension: Always leave enough slack in your XLR cable so that it does not pull against the suspension, which can transfer vibrations directly to the mic.
- Incompatible threads: Using the wrong adapter can lead to a wobbly connection that introduces mechanical noise into your recordings.
These steps create a stable environment for your gear. A well-installed microphone shock mount keeps your audio clean and free from unwanted floor or desk vibrations.
Maintenance Tips for Your Shock Mount
A well-maintained shock mount for studio setup keeps recordings free from unwanted vibrations. Routine care protects your gear’s mechanical integrity for years. Regular upkeep stops unexpected noise from ruining your best takes.
Cleaning Your Shock Mount
Clean equipment is the first step in effective maintenance. Use a soft, dry microfiber cloth to wipe dust from the frame and suspension parts. Avoid harsh chemical cleaners or solvents because they can weaken rubber or thermoplastic materials over time.
For stubborn debris, use a slightly damp cloth with water. Make sure every component is completely dry before reattaching your microphone. Proper cleaning preserves the look and reliable function of your shock mount for studio use.
Inspecting for Wear and Tear
Regular inspections help you find problems before they cause audio artifacts. Check the elastic bands for signs of fraying, cracking, or permanent stretching. Loose or saggy bands may not isolate your microphone properly.
Examine all fasteners and screws to ensure they stay tight and secure. Look for metal fatigue or stress fractures in the frame. Check cables for strain, since poor placement can pull on the mount and upset its delicate balance.
Addressing these details early keeps your recording environment quiet and professional.
When to Replace Your Shock Mount
Knowing when to replace suspension hardware helps maintain professional audio standards. Even a high-quality shock mount for condenser microphone will eventually wear out under daily studio use. Inspect your gear regularly to keep it in peak condition.

Signs of Wear
Visual checks provide the first defense against poor audio. Look for stretched elastic bands, frayed fabric, or cracks in the plastic housing. Loose hardware or an off-center microphone signals trouble.
Read the top 10 signs your shock mount is worn to prevent damage.
“The integrity of your isolation system is the foundation of a clean recording; once that foundation shifts, your audio quality will inevitably follow.”
Impact on Sound Quality
When a shock mount for condenser microphone fails, sound problems often appear at once. You may hear tapping sounds or a steady low-frequency rumble during playback. These problems occur because the suspension no longer separates the microphone from external vibrations.
If you suspect failure, make a simple test recording. Compare it with older, clean tracks to find more handling noise or uneven interference. When repairs cannot restore necessary tension, replacing the unit is the only way to guarantee professional results.
| Symptom | Cause | Recommended Action |
|---|---|---|
| Sagging Position | Stretched Elastic | Replace Bands |
| Audible Tapping | Loose Hardware | Tighten or Replace |
| Excessive Rumble | Degraded Isolation | Full Unit Replacement |
Budgeting for a Shock Mount
You do not need to spend a fortune to protect your microphone from unwanted vibrations. Price often shows build quality, but it does not prove performance. Before choosing a model, check fit, thread compatibility, and suspension tension.
Finding the best shock mount for recording depends on how well it matches your microphone. A lower-cost mount that fits well will usually beat an expensive generic model.
Affordable Options
If you need an affordable shock mount, reliable models start at about $19.99. These entry-level models suit people starting a home studio or a new shock mount for podcasting setup.
Most budget-friendly models use basic elastic suspension systems that reduce low-frequency rumble. When shopping in this range, choose durable metal threading to keep the mount secure on your boom arm or stand.
High-End Choices
Higher-priced models usually cost $50 to $79 and often include advanced engineering. These premium versions often use specialized Lyre suspension technology, which removes the need for sagging elastic bands.
Professional-grade mounts offer wider compatibility and better adjustment knobs for precise positioning. If you record daily or travel often, the increased durability makes these mounts a smart long-term studio investment.
Expert Recommendations on Shock Mounts
When you want studio-grade audio, advice from experienced engineers can guide your choice. We gathered expert tips to help you select a professional shock mount for your needs.
Tips from Audio Engineers
Engineers stress that even the best gear works well only when installed carefully. They recommend these key factors to keep your setup quiet and stable during every recording session:
- Exact Fit: Always verify that the mount is designed for your specific microphone diameter to prevent slippage.
- Suspension Tension: Ensure the elastic bands provide enough resistance to hold the mic firmly without being overly tight.
- Cable Management: Route your XLR cables with enough slack to avoid transferring vibrations directly to the microphone body.
- Physical Discipline: Avoid touching the boom arm or the stand while recording to prevent unwanted handling noise.
User Reviews and Feedback
Real-world users often mention daily features that product specifications may overlook. Many creators seeking a high-quality shock mount value easy installation and lasting durability.
For a reliable shock mount for podcasting, users report several key benefits. A well-chosen mount can reduce low-frequency rumble from desk bumps or keyboard typing.
“The difference between a generic mount and a high-quality shock mount is night and day. Once I upgraded, my podcast audio became much cleaner, and I stopped worrying about accidental desk vibrations ruining my takes.”
When reading reviews, look for comments about adjustment range and compatibility with popular boom arms. A shock mount for podcasting should position your microphone well during long sessions without sagging or losing its grip.
Conclusion: Making the Right Choice for Your Mic
The right equipment can turn your recording space into a professional studio. A high-quality Shock mount keeps audio clean and blocks unwanted mechanical noise.
Summary of Essential Factors
Choose a microphone shock mount that fits your microphone’s weight and body shape. Elastic suspension systems give sensitive condenser mics better isolation. Universal options suit people who often change gear, while model-specific designs offer a secure, custom fit.
Final Guidance for Your Setup
Review your recording space and budget before buying. Check the shock mount’s build quality and adjustability for lasting performance.
Before a critical session, test for desk vibrations, footsteps, and cable movement. A well-chosen shock mount protects your signal and improves every recording’s clarity.