
 Zoe Nora
Nearly 80% of viewers will leave a video when its sound quality is poor. People often focus on visuals, but clear sound supports every successful digital project.
Whether producing a podcast, filming a video, or hosting a remote interview, professional audio recording is essential. You need more than expensive gear; your environment, technique, and preparation also matter.
Anyone can achieve studio-grade results by learning a few core principles. Control room noise and set proper levels to improve your content at once. This guide covers best practices for audio recording, from equipment choices to final editing techniques. These steps help your message sound clear and reach listeners.
Key Takeaways
- Sound quality is a primary factor in audience retention for digital media.
- Success relies on balancing equipment, environment, and technical skill.
- Controlling background noise is the first step toward professional results.
- Proper level management prevents distortion and ensures consistent volume.
- Consistent practice and editing will improve your output over time.
Understanding the Basics of Audio Recording
Audio recording is more than pressing a button; it is a technical craft that shapes how audiences understand your message. It captures sound waves and turns them into digital files for storage, editing, and sharing. Professional voice recording and live musical performance use the same basic principles.
What is Audio Recording?
Recording audio translates acoustic energy into an electrical signal, which your hardware then digitizes. This digital file serves as a permanent record of the performance and allows precise control during post-production. Preparation is the secret weapon of every successful creator.
We recommend writing and rehearsing a script before you begin. Preparation makes mistakes easier to fix and helps speakers keep steady pacing and expression throughout the session.
Why Quality Matters in Audio Recording
High-quality audio matters because it shapes how your audience engages with your content. Background hums or uneven volume can distract listeners and weaken your message’s authority.
Intelligibility is the most critical factor in any production. Clear, balanced audio without distracting noise lets your audience focus on the content instead of struggling to hear details.
Types of Audio Recording
Different projects need different ways to capture the best sound. These categories help you choose equipment and techniques for each task.
- Voice recording for narration or audiobooks.
- Music capture for instruments and vocal tracks.
- Interviews and podcasts that require natural, conversational flow.
- Video soundtracks that need to sync perfectly with visual elements.
No matter the type, maintaining a natural delivery keeps your audience connected. Mastering these basics helps every voice recording meet high standards for clarity and professionalism.
Essential Equipment for Quality Sound
Smart choices often produce the best results, and you do not need a professional studio for clear audio. A modest setup can outperform high-end gear in a poorly managed space. Successful sound recording depends on matching your tools to your environment and source material.
Microphones: Choosing the Right One
Choosing the correct microphone is your first step. For beginners, a high-quality USB microphone offers a simple plug-and-play solution for podcasts and voiceovers. For instruments or complex vocals, an XLR microphone offers more flexibility and professional signal control.
- Dynamic microphones: Great for loud sources and untreated rooms.
- Condenser microphones: Ideal for capturing fine detail in quiet, controlled spaces.
Audio Interfaces: Why You Need One
An audio interface connects your microphone to your computer. It changes analog signals into digital data while preserving audio quality. For any producer, learning how to choose the right audio interface for your setup is a vital skill.
This recording equipment helps your computer process high-quality sound without latency or distortion. It also provides phantom power for many professional microphones, helping you achieve cleaner, more polished sound.
Acoustic Treatment: Improving Your Environment
Even expensive gear struggles in rooms with too much echo or background noise. You can greatly improve your sound recording quality with items already found at home. Soft surfaces absorb unwanted reflections and work especially well.
Try these practical, budget-friendly ways to treat your space:
- Place thick rugs on hardwood floors to dampen sound.
- Hang heavy blankets or quilts on walls to reduce echo.
- Use bookshelves or soft furniture to break up sound waves.
- Close curtains or use clothing racks to create a makeshift vocal booth.
By focusing on these essential elements, you create a controlled environment where your gear performs at its best. Keep your setup consistent, because it matters as much as the components you choose.
Setting Up Your Recording Space
Transforming your home office or bedroom into a useful recording studio is easier than you might think. You do not need expensive soundproofing materials for professional results. Focus instead on how your space affects your audio recording setup.
Finding the Perfect Location
Choose a naturally quiet room away from busy areas for your sessions. Avoid rooms near busy streets, laundry rooms, or noisy air conditioning units. A small room with soft furniture often has better acoustics than a large, empty hall.
If possible, choose a room with thick carpets and heavy curtains. They absorb sound reflections and keep your audio from sounding hollow or echoey. Consistency is key when building a reliable work space.
Managing Background Noise
Even the best recording equipment cannot hide a humming refrigerator or buzzing computer fan. Before starting, silence your phone and close windows to block street noise. If you share your home, tell family or roommates about your schedule.
Turn off appliances that create constant background noise during your session. If you need a fan, place your microphone as far from it as possible. These small steps keep your audio recording clean and free from distractions.
Setting Up Your Gear
Properly placing your recording equipment is vital for high-quality sound. Keep your microphone away from bare walls or glass windows to reduce sound bounce. If your room sounds too “live,” hang heavy blankets or use acoustic foam panels.
Organize cables neatly to prevent trips and possible interference. Place rugs or thick blankets on hardwood floors to reduce sound reflections. By arranging your recording studio carefully, you create a professional space where your talent can shine.
Techniques for Achieving Clear Audio
Mastering the art of sound recording requires careful attention before we press record. While high-end equipment helps, our microphone technique often shapes final audio quality. By refining our habits, we create crisp, professional captures without unwanted artifacts.
Mic Placement: Getting the Best Sound
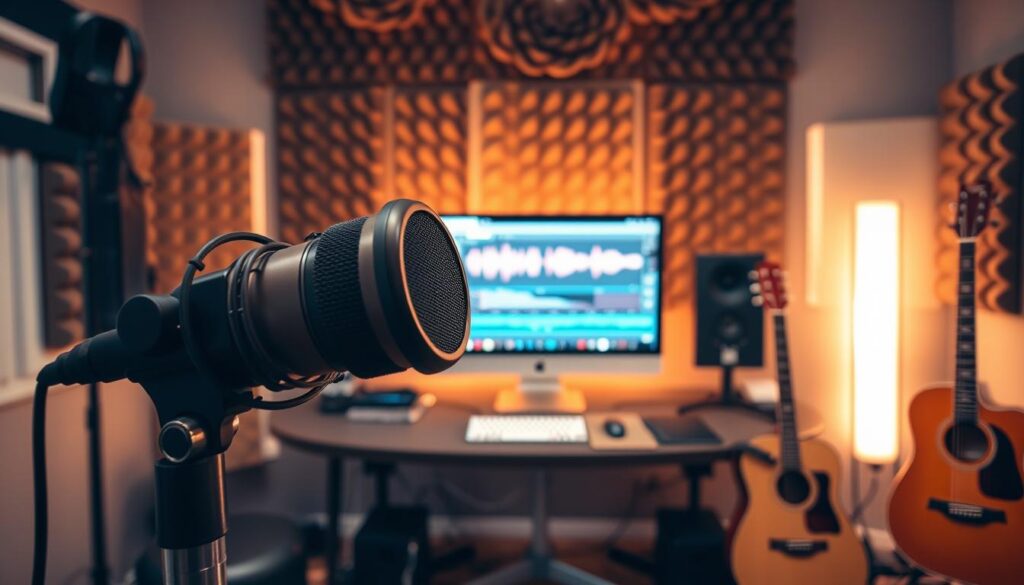
The distance and angle of the microphone are critical in sound recording. Keep the microphone six to eight inches from your mouth, and maintain consistent posture. This setup preserves a natural tone, reduces proximity effect, and prevents volume changes.
Pointing the capsule at the source captures the most detail. Angling it slightly off-axis can reduce harsh plosives from sounds like “p” and “b.” This sweet spot creates balanced, studio-quality sound.
Using Headphones for Monitoring
Relying on laptop speakers is a common mistake that hides critical audio flaws. We must use closed-back headphones to monitor input in real-time. They reveal low-frequency hum, clothing rustle, and loose cable noise that could ruin a take.
Headphones also help us detect sibilance and plosives immediately. If we hear them, we can adjust our position or technique at once. This saves significant editing time later.
Testing Levels Before Recording
Before the main session, we record a short test phrase to check gain levels. We aim for a healthy signal peaking around -6dB to -12dB, which provides headroom and prevents clipping. Proper gain staging creates a clean, distortion-free recording.
We should also record thirty seconds of “room tone” in total silence. It captures our environment’s natural noise floor for later use with noise reduction software. By checking levels and the environment first, we keep our sound recording process efficient and high-quality.
Recording Software and Apps
The right digital environment can turn a simple recording session into a polished production. Modern audio production depends on software that captures your sound. Knowing these tools can streamline your workflow and produce professional results.
Digital Audio Workstations (DAWs)
A Digital Audio Workstation is the central hub for your digital recording projects. It lets you record, edit, and mix multiple tracks in one interface. Explore the top digital audio workstation (DAW) software to find a platform that fits your hardware setup.
Keep your input meters out of the red to avoid digital clipping. Aim for an average level near -10 dB during tracking. Also, disable Automatic Gain Control (AGC) on your interface or computer settings for full manual signal control.
Recommended Software for Beginners
If you are starting, choose software with an intuitive interface and helpful tutorials. Many entry-level programs offer track management and basic waveform editing without complex menus. Simplicity is key when learning signal flow and arrangement.
Advanced Features for Professionals
Experienced users often need advanced tools for detailed audio production tasks. Advanced software includes powerful automation for adjusting volume, panning, and effects over time. It also includes noise reduction plugins that clean recordings made in less-than-ideal environments.
Export settings also matter for professional delivery. Choose high-resolution formats like WAV or AIFF to preserve the integrity of your work. The following table shows typical feature progressions across software tiers.
| Feature Category | Entry-Level | Professional |
|---|---|---|
| Track Count | Limited | Unlimited |
| Editing Tools | Basic | Advanced/Spectral |
| Automation | Minimal | Full/Complex |
| Plugin Support | Standard | Advanced/Third-Party |
Tips for Vocal Recording
Your voice is your studio’s most important instrument, so treat it with care for a great voice recording. Professional results need physical preparation, good posture, and mindful breathing. Stand tall with your chest open so your lungs expand fully and support clear, steady sound.
Warm-Up Exercises for Better Performance
Before each session, wake up your vocal cords. Simple humming or lip trills can loosen the tension in your throat and jaw. Spend at least ten minutes warming up before a long session.
Regular warm-ups prevent vocal fatigue and help maintain a steady tone during your voice recording. They prepare your instrument and prevent the flat delivery caused by starting cold. A relaxed body also creates a more natural, expressive performance.
Techniques for Different Voice Types
Each speaker has unique traits that call for specific microphone adjustments. If your voice has harsh “s” sounds, called sibilance, angle the microphone slightly off-axis. This simple change can improve your voice recording clarity without losing warmth.
If you struggle with plosives—the popping sounds from “p” and “b”—use a pop filter. Keep a steady distance from the mic to avoid the proximity effect, which can make your voice muddy or too bass-heavy. The right balance keeps your audio clear and professional.
Handling Vocal Dynamics
Managing performance volume is a key skill for any recording artist. If your delivery shifts from whispers to shouts, control your voice recording levels manually. Move slightly away from the microphone during louder passages to prevent clipping.
Lean closer when you need to capture softer, more intimate details. This dynamic control helps maintain a natural sound that engages listeners. Mastering these movements creates a polished product that sounds effortless and balanced.
Instruments: Recording Best Practices
A high-quality studio recording starts with understanding how instruments interact with their surroundings. We consider microphone placement, input gain, and room acoustics to capture each performance’s true sound.
Setting Up for Different Instruments
Each instrument needs a tailored approach for clear, full sound. For acoustic guitars, we place a small-diaphragm condenser microphone near the 12th fret for balanced tone. For amplified sources like electric guitars, we place the microphone near the speaker cone to emphasize the punchy characteristics of the amplifier.
Percussion instruments need careful input gain to prevent clipping during loud transients. For drums, we suggest placing microphones farther away to capture the full kit. Keep gain levels conservative to maintain headroom, a hallmark of a truly professional recording.
Multi-Tracking Techniques
Multi-tracking lets us record individual parts separately, giving us full control during the final mix. This method requires consistent timing and careful monitoring from every performer. We use high-quality headphones so musicians hear previous takes clearly without bleed into the new track.
Steady gain staging across all tracks helps create a cohesive sound. Isolating each instrument lets us add specific processing later, which supports a polished studio recording. We encourage performers to focus on rhythm, making the layers fit together smoothly.
Capturing Room Ambiance
Sometimes, a room’s natural sound adds needed character to a track. We balance direct sound with room ambiance by placing ambient microphones farther from the source. This creates a sense of space and realism that artificial reverb cannot always match.
Knowing when to preserve natural space is a key skill in any professional recording environment. If the room sounds muddy, we move microphones closer to the instrument to favor the direct signal. By testing placements, we find the perfect balance between clarity and our studio’s natural acoustic signature.
Editing Your Audio Recordings
Editing is where your digital recording takes shape and finds its voice. This phase lets us refine work without changing the original source files, so quality stays high.
Basic Editing Techniques
We begin by trimming unwanted silence and removing mistakes to tighten the performance. Use non-destructive editing methods to protect raw files while arranging clips on the timeline.
Reducing long pauses keeps listeners engaged and preserves a natural flow. Carefully removing background noise or accidental breaths creates cleaner, more professional sound.
Using Effects and Plugins
In audio production, we use EQ and compression to balance frequencies. A high-pass filter removes low-end rumble that can muddy a mix.
Apply these effects with restraint instead of fixing poor recording habits. Noise gates can silence quiet sections, but careful settings prevent cutting natural speech or instrument decay.
| Tool | Primary Function | Best Use Case |
|---|---|---|
| Equalizer (EQ) | Frequency balance | Removing harsh or muddy tones |
| Compressor | Dynamic control | Smoothing out volume spikes |
| Noise Gate | Silence management | Reducing background hiss |
| High-Pass Filter | Rumble removal | Cleaning up low-frequency noise |
Ensuring Smooth Transitions
Transitions between clips must feel seamless, keeping listeners immersed in the audio production. Short crossfades prevent clicks or pops at edit points.
Consistent room tone is vital for a natural-sounding digital recording. Abrupt changes in background ambience can break the illusion of continuous performance.
Check loudness levels across segments for a uniform listening experience. These small details help the final output sound polished and intentional.
Best Practices for Mixing and Mastering
Professional audio production depends on a careful balance of creative mixing and technical mastering. These stages may overlap, but each serves a different purpose in creating a finished song. Mixing balances individual tracks, while mastering adds final polish for consistent playback on all devices.
Understanding the Mixing Process
Mixing brings our creative vision to life through level, panning, and effect adjustments. Proper gain staging forms the foundation of a clean mix and keeps signals healthy without clipping. We often practice mixing as we go to keep the arrangement tight and focused.
EQ and compression help create space for each instrument across the frequency spectrum. Managing these elements creates a cohesive soundstage that feels wide and deep. This stage matters for any recording studio project seeking clarity and impact.
Common Mistakes to Avoid
Over-processing can strip life and dynamics from a performance. Preserve the recording’s natural feel instead of relying only on plugins. We also recommend checking your mix in mono to ensure phase coherence and balance.
Failing to use a reference track is another common mistake. Comparing your work with a high-quality professional recording helps you judge loudness and tonal balance. Avoid pushing levels too high, because this leaves no room for final mastering.
Tips for Mastering Your Tracks
Mastering is the final step in preparing your music for the world. We aim for consistent loudness while keeping enough headroom for streaming platforms. Test your master on various systems, including headphones, car speakers, and mobile devices, to ensure it sounds good everywhere.
| Feature | Mixing | Mastering |
|---|---|---|
| Primary Goal | Balance and Tone | Consistency and Loudness |
| Scope | Individual Tracks | The Final Stereo File |
| Key Tools | EQ, Compression, Panning | Limiters, Multiband EQ |
| Output | Multitrack Session | Final Distribution File |
Troubleshooting Common Audio Issues
Technical problems often occur during a studio recording, but clear diagnosis saves time and effort. When you hear hum, hiss, or clipping, stay calm and follow a clear testing plan. Check each part of the signal chain to find the source without stress.
Identifying and Fixing Noise Problems
Buzz and room echo often come from the environment or poor cable management. Before replacing gear, check your cables and power connections for loose ends or interference. Moving a microphone away from a computer monitor or power supply may remove hum from your studio recording.
If hiss continues, check your gain staging. High noise floors often come from pushing preamps too hard or using low-quality cables. Keep the environment quiet before you start the actual capture process.
Dealing with Equipment Malfunctions
When audio dropouts or uneven levels occur, review your software settings and input selections. Incorrect buffer sizes or sample rate mismatches often cause problems in your digital audio workstation. Double-check your hardware drivers to confirm they are updated and properly configured for your specific interface.
If the problem continues, test your microphone on another channel or with another cable. This test helps show whether the fault lies in the hardware or signal path. A reliable studio recording setup needs consistent maintenance and regular testing of all connections.
Effective Solutions for Mix Challenges
Mixing brings its own challenges, especially when takes have problems. Choose whether to repair a glitch, re-record the passage, or accept a natural pause. Avoid over-editing, because artificial cuts can sound more distracting than a small, natural imperfection.
If an effect causes phase issues or muddiness, reduce the wet/dry mix instead of deleting the plugin. Sometimes, the best fix for a difficult mix is stepping back and listening with fresh ears. Trust your instincts: decide whether a track needs a technical fix or already captures the right emotion.
Final Tips for Successful Audio Recordings
Great sound takes technical skill and steady habits. Small changes in our daily workflow often create the biggest improvements in our work.
Staying Organized Throughout the Process
We label every file with a clear name and date, then save backups on Western Digital drives. We check levels and listen through Audio-Technica ATH-M50x headphones to catch errors early. A friend can spot unwanted noise we might miss during a long Audio recording session.
The Importance of Practice
Consistent effort builds the instincts needed for professional recording. Each session helps us improve microphone placement and control our recording space. Regular practice shows how our gear responds to different voices and instruments.
Continuous Learning and Improvement
We view every project as a step toward better studio recording quality. We improve room acoustics and refine our technique before buying expensive new hardware. These habits help keep our sound crisp and clear.
We grow by staying curious and testing new methods whenever we press the record button.