
 Zoe Nora
Did you know over 60% of home theater owners face issues getting their audio equipment right on the first try? Many find the technical side of home entertainment overwhelming. But we’re here to make it easier for you.
Our guide makes setting up your receiver simple. You’ll get the best sound and visuals from your speakers and display. We’ll guide you through each step, from connecting your gear to adjusting your audio and video settings.
Most modern units show an Easy Setup screen right after you turn them on for the first time. This makes the initial receiver configuration easier for everyone. With our expert tips, you’ll quickly learn how to set up your networking, streaming, and sound settings.
Key Takeaways
- Understand the importance of the initial power-on sequence.
- Learn how to navigate the built-in Easy Setup interface.
- Optimize your audio and video settings for a premium experience.
- Connect your networking and streaming features with confidence.
- Troubleshoot common installation hurdles quickly and effectively.
Understanding Receiver Configuration Basics
Learning how to configure receiver hardware is key to getting top-notch sound at home. It’s about matching your AV receiver’s software with your entertainment system’s parts.
What is Receiver Configuration?
Configuration links your hardware to your listening space. It makes sure every sound from your media player is handled right before it hits your speakers.
By tweaking the receiver settings, you tell the device about your equipment. This includes how many speakers you have, their size, and where they sit.
Why is Receiver Configuration Important?
Getting it right is crucial because every room sounds different. Without proper setup, sound can bounce off walls or get lost, making it sound muddled.
Today’s receivers have automatic calibration systems to figure out speaker placement and room effects. They measure sound travel time to ensure audio arrives just right, creating a seamless surround sound field.
Key Components Involved in Receiver Configuration
To manage your system well, you need to know the main parts of your receiver. These parts work together to give you great sound and video:
- Amplifier Channels: These power your speakers.
- HDMI Inputs: These are the main paths for high-definition video and audio.
- Network Functions: These let you update firmware and stream content.
- Speaker Terminals: These are where you connect your wiring.
- Processing Modes: These digital settings handle different audio formats.
When you learn how to configure receiver features, you control your media better. Fine-tuning your receiver settings turns your living room into a real movie theater.
Preparing for Setup
A smooth receiver setup starts long before you plug in the first cable. Organize your workspace and check your hardware. This makes the whole process stress-free and efficient.
Gathering Necessary Equipment
Before starting the receiver installation, gather all needed components. You’ll need your receiver, display screen, speakers, and source devices. Make sure they’re all ready for connection.
Don’t forget your high-quality HDMI cables, remote control, and essential calibration microphone. Having these items ready prevents interruptions during setup.
Checking Compatibility with Other Devices
Successful integration means your hardware must work well together. Check your receiver options to see if they support your speaker layout and display resolution.
Make sure your HDMI cables are up to date for high-bandwidth content. Also, check that your wireless features, Bluetooth devices, and voice-control systems are compatible with your new unit. This avoids connectivity problems later.
Creating a Comfortable Setup Environment
The location of your hardware is key to performance. Place your unit in a stable, well-ventilated area to avoid overheating.
Also, make sure your main listening spot is clear and easy to reach. This is critical for the automatic calibration microphone to measure sound accurately. It ensures a balanced audio experience for your home theater.
By taking these steps, your receiver setup is optimized for the best output. Proper preparation makes the receiver installation easier. You’ll have more time to enjoy your favorite media.
Steps to Configure Your Receiver
Setting up your home theater system starts with a clear plan for receiver configuration. By following a step-by-step guide, we make sure everything works together perfectly. This ensures top-notch performance from your system.
Initial Power On and Basic Setup
First, ensure your TV is set to the right HDMI input for your receiver. Once it’s on, most units will start an Easy Setup process on your screen.
Just follow the on-screen instructions to set up your basics. This includes choosing your language, connecting to the network, and finding your speakers.
Connecting to Your TV and Other Devices
Your receiver is the heart of your entertainment system. It’s best to connect all your HDMI sources, like gaming consoles and streaming devices, directly to the receiver.
This setup makes your receiver installation simpler. It lets you use one HDMI cable for both audio and video to your TV. Plus, it’s easier to manage all your devices with one remote.
Updating Firmware for Optimal Performance
Learning how to use your receiver software is key. Manufacturers often update their systems to fix bugs and add new features.
Always look for a firmware update option in the settings menu when you’re connected to the internet. Keeping your system updated means you get the latest features and improvements.
| Setup Phase | Primary Action | Expected Outcome |
|---|---|---|
| Power On | Select TV Input | Display Setup Menu |
| Device Routing | Connect HDMI Cables | Centralized Control |
| System Update | Download Firmware | Optimal Performance |
Configuring Audio Settings
Learning how to set up your receiver’s audio is key to enjoying your home theater. It makes sure every sound is clear and sharp. This includes music, dialogue, and sound effects.
Selecting the Right Speaker Setup
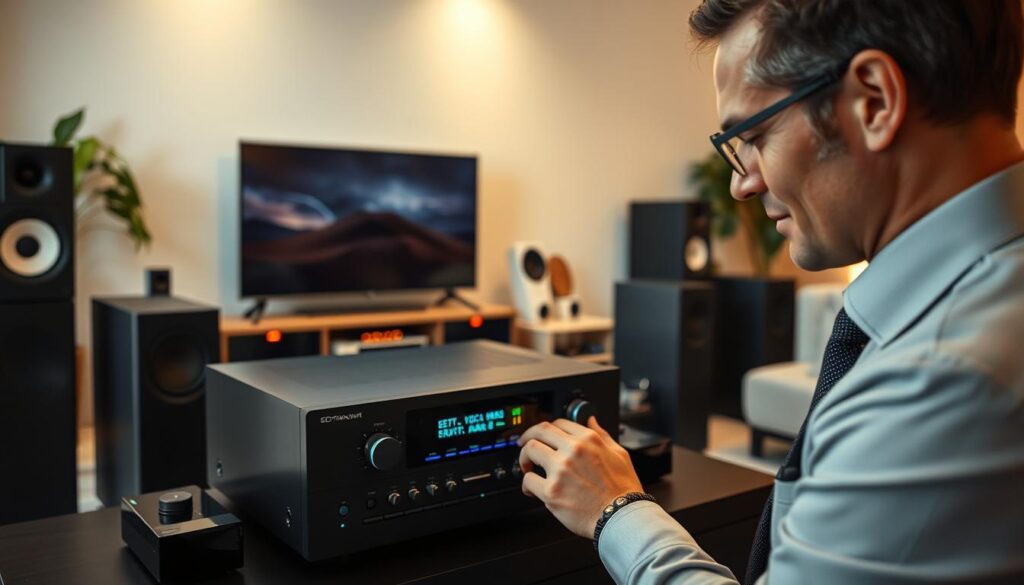
The first step is to tell your device about your speakers. You need to say how many speakers you have and where they are in the room.
This means telling it about your surround channels and height speakers. This is important for formats like Dolby Atmos. It keeps the sound clear and balanced.
Adjusting Equalizer and Audio Modes
After setting up your speakers, you can adjust the sound settings. Most receivers have an equalizer to fine-tune the sound for your room.
“Sound is the soul of the cinema; without proper balance, the story loses its emotional weight.”
Try different listening modes to find what works best for you. For example, “Direct” mode is great for music. But “Movie” mode is better for dialogue and surround sound.
Fine-Tuning Volume Levels
Automatic tools can help, but manual adjustments are often needed for the best sound. Follow this AV receiver calibration guide for perfect channel balance.
Use an SPL meter to check if all speakers are at the same volume. Adjusting your subwoofer is also crucial. It keeps the bass clear and balanced.
By mastering these settings, you get a natural and controlled sound. Regular adjustments are key to keeping your audio top-notch.
Configuring Video Settings
Let’s dive into how to tweak your video settings for a better viewing experience. When we send video through a home theater system, the path must be clear and set right. Adjusting your receiver settings ensures the high-quality signal from your device reaches your TV without losing quality.
Ensuring Optimal Display Resolution
To get the sharpest image, we need to match the output resolution of our devices to our display’s native resolution. Most modern receivers have “passthrough” modes that send the raw signal to the TV. We highly recommend using this feature to avoid processing that might cause lag or artifacts.
Make sure your HDMI cables can handle the bandwidth needed for your resolution, like 4K or 8K. If you see flickering or a blank screen, check your receiver options to ensure the output resolution is set to “Auto” or matches your TV’s max.
Managing Aspect Ratios and Screen Settings
Wrong aspect ratios can make images look stretched or cropped, ruining the movie experience. Set your receiver to “Original” or “Direct” mode to keep the content’s intended format. This stops the receiver from forcing widescreen into a standard frame.
If you see black bars on your screen, go to the display menu to adjust zoom or overscan settings. Make sure the correct input is selected on both the receiver and TV for a seamless picture. Proper alignment of these settings ensures every frame looks as the director intended.
Enabling HDR and Other Visual Enhancements
High Dynamic Range (HDR) adds vibrant colors and deeper contrast to your home theater. To enjoy these, enable “Enhanced HDMI” or “Deep Color” modes in your receiver settings. These receiver options let the device handle the extra data needed for HDR10, Dolby Vision, or HLG formats.
Also, make sure your TV input is set to accept these advanced signals. When everything is in sync, you’ll see a big boost in brightness and color accuracy for all your favorite movies and games.
Connecting to the Internet
Getting a stable network connection is key for your home theater. It lets you access updates, streaming services, and control features. Proper receiver configuration keeps your system up-to-date and working well.
Wired vs. Wireless Connections
When setting up your receiver installation, you have to pick between Ethernet or Wi-Fi. Ethernet is better for staying stable, as it avoids interference. It’s great for streaming high-quality audio because it keeps the bandwidth steady.
Wi-Fi, on the other hand, is easy to use and flexible in where you place your devices. It’s good if your router is far from your entertainment area. But, make sure your Wi-Fi signal is strong to avoid problems.
| Feature | Wired (Ethernet) | Wireless (Wi-Fi) |
|---|---|---|
| Stability | Excellent | Moderate |
| Installation | Requires Cabling | Plug and Play |
| Speed | Consistent | Variable |
| Best For | High-Res Audio | General Streaming |
Setting Up Wi-Fi on Your Receiver
To start with Wi-Fi, go to the network settings on your home theater receiver. Look for available networks and pick your home’s SSID. Then, enter your network password using the on-screen keyboard.
After entering your password, the system tries to connect to your router. A successful connection is shown by a status icon or message. Test the connection by using a built-in app to make sure data is flowing right.
Troubleshooting Connection Issues
For connection problems, first check your signal strength. A weak signal can cause issues, which can be fixed by moving your router or using a signal booster. Make sure your router isn’t blocked by big metal objects or thick walls.
If you still can’t connect, check your password again. It’s case-sensitive. Also, make sure your receiver configuration is set to the right frequency band. If problems continue, update your firmware. This can fix network bugs.
Setting Up Streaming Services
Turning your home theater into a streaming hub starts with receiver setup. Connect your device to the internet. This opens a world of digital content that works well with your audio system.
Linking Popular Streaming Accounts
Modern receivers let you sign in to services like Spotify, Tidal, or Pandora easily. You’ll find a menu for account management. Here, you can enter your login details or scan a QR code.
Consistency is key for managing these logins. Keep your login info safe. This helps keep your receiver customization smooth during updates or power cycles.
“The best way to enjoy high-fidelity audio is to ensure your streaming source is configured to output the highest possible quality directly to your receiver.”
Navigating Built-in Apps on Your Receiver
After linking your accounts, organize your favorite apps for easy access. Most interfaces let you pin apps to the home screen. This saves time in your daily entertainment routine.
You can switch between streaming inputs with your remote or a mobile app. This makes finding content quicker, so you can enjoy it more.
Customizing Your Streaming Preferences
Adjusting your audio output is crucial. Choose the right audio mode for your content. This could be “Direct” or “Multi-Channel Stereo.”
- HDMI Switching: Use this to route video from external sticks like Roku or Apple TV to your display while keeping audio on the receiver.
- Audio Modes: Adjust settings to enhance dialogue clarity or expand the soundstage for music.
- App Organization: Remove unused apps to keep your menu clean and responsive.
By controlling these settings, your system works just how you want. Proper receiver customization makes every movie night or music session more immersive.
Exploring Advanced Receiver Features
Today’s receivers do more than just play audio. They offer advanced features for a connected home. These options let you enjoy media in more rooms than one. They make your home audio system more personal and flexible.
Multi-Room Audio Configurations
Many receivers support playing different music in different rooms. You can watch a movie in the living room while someone listens to music outside. This level of control makes your device the heart of your home’s audio system.
To set up these zones, you might need to connect speakers or use wireless streaming. Check your manual to see how many zones your receiver can handle. This ensures each room gets great sound without any interference.
Integration with Smart Home Devices
Good receiver customization means your device works well with other smart gadgets. Most receivers use networks and Bluetooth to connect with your smart home. This lets you automate your entertainment.
For example, you can make your lights dim when you start a movie. This makes your home feel modern and easy to use. Always update your receiver’s firmware to keep it working with the latest smart home tech.
Utilizing Voice Control Capabilities
Voice control has changed how we use our home theater systems. By linking your device to Amazon Alexa or Google Home, you can control it with voice commands. Convenience is the main benefit of this feature, as it means no more searching for a remote.
Remember, the exact voice commands you can use depend on your receiver model. Some offer more features than others. Try out different commands to find what works best for you and your daily routine.
Troubleshooting Common Issues
When your home entertainment setup stops working, a systematic approach helps fix it. Start with simple checks before looking at complex settings. This way, you can find out if the problem is with the cables, TV, or receiver.
Resolving Audio and Video Desync
Audio and video desync often happens because of processing delays. First, check your HDMI ARC settings, as they can cause timing errors. Make sure all cables are securely plugged in for a stable connection.
If the delay continues, check your receiver configuration for “Audio Delay” or “Lip Sync” features. Adjusting these settings can fix the timing. Always test with a different source to avoid hardware issues.
Handling Remote Control Malfunctions
A non-responsive remote control is often fixed by replacing the batteries or avoiding interference. Start with new batteries, as low voltage can cause signal loss. Also, make sure there’s a clear path between the remote and the receiver’s infrared sensor.
The most effective way to solve technical problems is to isolate each component one by one until the culprit is found.
Fixing Connectivity Problems
Intermittent connections or missing signals often come from wrong source selection or old network settings. Try power-cycling your devices by unplugging them for thirty seconds. This clears temporary errors. If using a network feature, check that your router has a strong signal to the receiver.
The following table provides a quick guide to common issues you might encounter during your setup process:
| Symptom | Primary Check | Secondary Action |
|---|---|---|
| No Audio | Source Selection | Check HDMI Cable |
| Video Flickering | Display Resolution | Update Firmware |
| Remote Unresponsive | Battery Level | Clear Obstructions |
| Network Dropouts | Wi-Fi Signal | Restart Router |
By following these steps, you can keep your system running smoothly. Remember, regular receiver troubleshooting keeps your system reliable for years.
Regular Maintenance for Optimal Performance
Keeping your receiver in top shape is key. By following a maintenance guide, you can make your equipment last longer. This way, your audio and video will stay clear and reliable for years.
Updating Software and Firmware
Modern receivers are like smart computers. They need updates to work with new services and tech. Regularly checking for updates is crucial for fixing issues.
Most devices can update automatically. If yours can’t, visit the maker’s website every few months. Staying current with firmware updates fixes many streaming and control problems.
Cleaning and Physical Maintenance Tips
Keeping your receiver clean is as important as updating its software. Dust can cause it to overheat, leading to damage. Make sure vents are clear for good airflow.
Here’s how to clean your device safely:
- Use a soft, dry microfiber cloth for the outside.
- Don’t use liquid cleaners or sprays to avoid damage.
- Use compressed air to remove dust from vents carefully.
- Always turn off and unplug before cleaning.
Understanding When to Seek Professional Help
Some problems need a pro’s help, even with good care. If you see calibration errors or a burning smell, turn off the power right away. These signs mean there’s a serious electrical issue.
Don’t try to open the casing if you’re not an electronics expert. Fixing internal problems can void your warranty and is dangerous. If unsure, call an authorized service center for safe and proper repair.
Additional Resources and Support
Setting up your home theater takes time and the right info. We hope this guide helps you manage your audio and video with ease.
Each Yamaha product family has its own setup steps. When you hit a snag, turn to reliable resources for a great sound experience.
Official Product Documentation
Always check your owner manual for your model. It has detailed wiring diagrams and menu guides. You can also find digital versions on the Yamaha support website.
Community Knowledge Bases
Online forums are great for learning from others. They’re full of tips on speaker setups and firmware issues. You can find answers to your problems by searching threads.
Direct Technical Assistance
Professional support teams offer personalized help. You can contact them through forms, email, or phone. They’ll help you troubleshoot and get the best out of your equipment.