
 Zoe Nora
Did you know over 70% of home audio systems don’t reach their full potential because of bad low-frequency management? Many think expensive gear is the only way to get great sound. But, the real secret is in the physics of your room.
These units handle frequencies from 20 Hz to 200 Hz. They add the depth that makes music and movie soundtracks come alive. Without the right setup, even the most powerful gear can sound muddy or thin.
Mastering subwoofer placement is key to a balanced audio experience. Understanding room acoustics, listening positions, and phase alignment can turn a chaotic soundstage into a precise, immersive environment.
In this guide, we’ll show you how to get deeper, cleaner, and more even bass. Let’s get started on optimizing your home theater for the best possible performance.
Key Takeaways
- Low-frequency units are vital for adding depth to your audio experience.
- Room acoustics play a major role in how bass waves behave in your space.
- Proper positioning helps eliminate dead spots and boomy resonance.
- Calibration and phase adjustments are necessary for a seamless sound.
- Small changes in location can lead to massive improvements in clarity.
Understanding the Basics of Subwoofers
Learning how a subwoofer works is key to getting top-notch sound at home. These speakers are made to handle the lowest sounds that regular speakers can’t. They’re essential for a full audio experience.
What is a Subwoofer?
A subwoofer is a special speaker for low sounds, from 20Hz to 200Hz. In a home theater, it’s the core of the sound system. It works with other speakers to create a complete audio experience.
Your main speakers handle the voices and mid-to-high sounds. The subwoofer adds the physical impact of big sounds, like explosions and deep music. This lets your other speakers focus on clear and detailed sounds.
How Subwoofers Work
Unlike high sounds, bass waves go in all directions. They fill the room, not just one spot. This makes them interact with your room’s layout.
These long, strong waves bounce off walls and ceilings. This can make the bass sound better or worse, depending on your room.
- Omnidirectional nature: Bass travels in all directions, making room interaction inevitable.
- Boundary loading: Placing a sub near walls or corners can increase output but may also cause muddiness.
- Integration: Proper calibration ensures the sub blends seamlessly with your main speakers.
Importance of Subwoofer Placement
Finding the optimal subwoofer position is crucial. It’s not just about how it looks in your room. It affects how your system sounds in your space.
Without the right placement, your subwoofer might sound boomy or uneven. The right spot ensures tight, accurate bass. This makes your listening area sound great.
Factors Influencing Subwoofer Placement
Your room greatly affects your audio system’s quality, mainly the low-frequency sound. Before moving anything, it’s key to know how your space shapes sound waves. Using the right sub placement tips can make your bass sound tight and clear.
Room Size and Shape
The size and shape of your room create standing waves. These waves cause sound peaks and nulls. A peak makes bass sound louder, while a null makes it seem to disappear.
Smaller rooms can have too much pressure, while bigger, odd-shaped rooms need more power. We suggest mapping your room to find these problem spots. Knowing where these issues are helps you place your subwoofer right, avoiding bad sound.
Speaker Layout and Configuration
The spot of your subwoofer relative to your main speakers is key for a good mix. If it’s too far, timing and sound localization can suffer. We aim for a cohesive soundstage where bass blends with the main speakers.
Getting the subwoofer’s distance right ensures a smooth transition between high and low sounds. This balance keeps the audio immersive, no matter where you sit.
Acoustic Treatment Considerations
What’s in your room affects sound a lot. Hard surfaces like floors and walls bounce sound, causing echoes and smearing bass. Soft items like furniture and rugs absorb sound, making it cleaner.
For top-notch sound, bass traps in corners can cut down on low-frequency buildup. Adding these elements is a key sub placement tip for studio-quality sound at home. By controlling your room’s acoustics, you set your subwoofer up for success.
Common Subwoofer Placement Options
Deciding where to place your subwoofer is crucial for your home audio system. The best subwoofer location varies based on your room’s layout, furniture, and listening preferences.
Corner Placement
Putting a subwoofer in a corner boosts bass output. The walls amplify sound, making it louder in the room.
But, corner placement can make sound boomy or muddy. It highlights room resonances, needing extra tuning for clear sound.
Wall Placement
For a balanced sound, try placing the subwoofer against a wall. It smooths out the sound between the subwoofer and main speakers.
Wall placement avoids overwhelming bass. It keeps sound clear and impactful for movies and music.
Free-Standing Placement
Free-standing placement offers the most control. It lets you adjust sound without wall interference.
This method needs more space but offers accurate sound. Try different distances to find the best spot for your space.
The Listening Position Test
Finding the perfect spot for your subwoofer is not just a guess. Many people place their gear in a corner, but this can cause boomy or uneven sound. By using a subwoofer positioning guide, you can get tight, accurate low-end frequencies.
Finding the Sweet Spot
The best way to find the ideal spot is called the subwoofer crawl. Start by placing your subwoofer on your main listening chair or sofa. Play a track with deep bass notes.
Then, crawl around your room on your hands and knees. Listen for the spot where the bass sounds balanced and clear. Place your subwoofer there on the floor.
How to Test Bass Response
Use music with a wide range of low frequencies for the best results. Avoid tracks that are too compressed, as they can hide your room’s acoustic response. Consistency is key when testing different spots.
Move around the room with your ears low, like the subwoofer driver. This helps you hear what the unit will produce. You want to avoid the “muddy” sound from standing waves.
Adjusting for Different Listening Areas
Room acoustics change with your seating arrangement. Even small changes in your chair can affect the bass. If you have multiple seats, find a spot that works for everyone.
If one seat has too much bass and another too little, use a subwoofer positioning guide to adjust. Sometimes, moving the subwoofer a few inches can greatly improve the sound. Being flexible with your layout is key to professional-grade audio at home.
Subwoofer Phase and Polarity
Getting your subwoofer to work right is all about timing and sound wave alignment. When your subwoofer and main speakers sound off together, they should blend well. But if they’re out of sync, you might get weak bass or a hollow sound.
What is Phase?
Phase is about the timing of sound waves from your subwoofer and main speakers. It’s like a timing check for your sound system. When the waves line up, the bass gets stronger, making the sound fuller and more impactful.
If the waves don’t match, they can cancel each other out. This often happens at the crossover point. Knowing how this works is key to setting up your subwoofer right.
How to Adjust Phase Settings
Most subwoofers have a phase control switch or dial. Start at 0 and adjust in small steps while playing a bass-heavy track. Listen for when your speakers and subwoofer sound like one unit.
Make these adjustments when you change your speaker setup or move your gear. Small changes can make a big difference. Aim for consistency, not just louder volume.
Effects of Polarity on Sound
Polarity is about the electrical signal’s positive and negative sides. If your subwoofer’s polarity is reversed, it moves the wrong way. This makes the bass sound weak and far away.
Checking your polarity is crucial. If your bass sounds thin, check your speaker wires. Make sure your system is in the right polarity. This lets your subwoofer breathe and perform at its best.
Using Multiple Subwoofers
Adding multiple subwoofers to your home theater can make sound clearer and more immersive. A single subwoofer works well in small spaces. But bigger rooms often have dead zones due to standing waves.
Having a second subwoofer fills these gaps. This ensures everyone gets great sound.
Benefits of Dual Subwoofer Setup
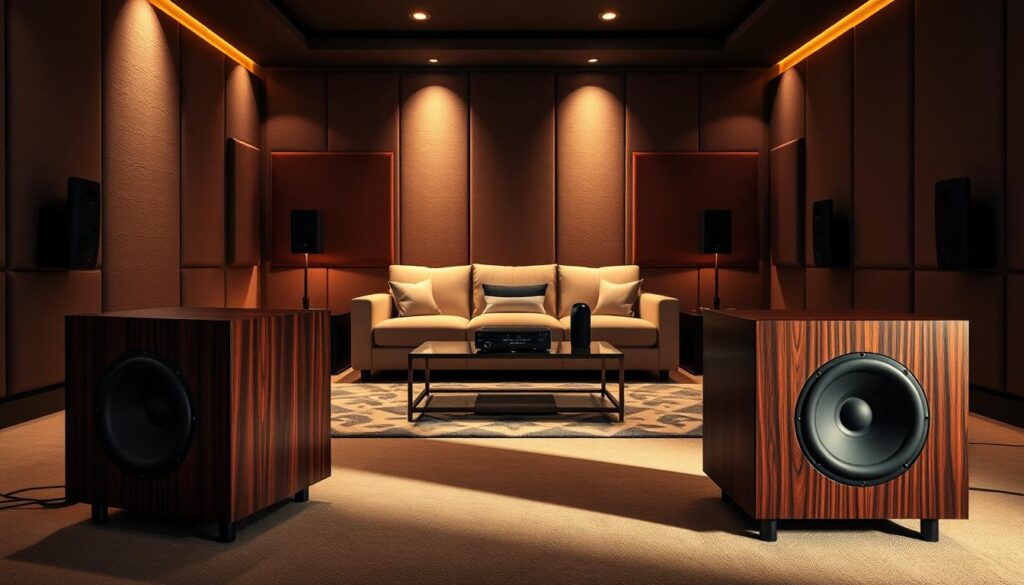
Using two subwoofers spreads sound energy evenly in the room. By placing them in different spots, you can reduce sound peaks and nulls. This leads to consistent bass response for everyone, not just one spot.
Optimal Placement for Multiple Subwoofers
Where you place subwoofers depends on your room and your receiver. A good spot is at the midpoints of opposite walls. This setup balances room modes for a smoother sound.
If wall spots are not possible, try opposite corners. This boosts sound output and low-frequency impact. Remember to think about your furniture and seating when placing your subwoofers.
Balancing Output for Even Bass
After setting up your subwoofers, focus on making them work together. Proper subwoofer calibration tips are key to avoid sound weakening. Start by setting both volumes the same using a sound pressure level meter or your receiver’s software.
Then, check the phase settings to make sure both subwoofers sound together. Only adjust equalization after confirming phase and placement. These subwoofer calibration tips will give you tight, punchy bass that enhances your audio system.
Room Calibration and Equalization
Even with the ideal subwoofer placement, your room’s acoustics can still cause uneven bass. Moving your hardware helps avoid big acoustic problems. But, electronic correction adds the precision needed for a balanced soundstage.
We see physical positioning as the base, while calibration is the finishing touch. Remember, electronic tools can’t fix every problem, like deep nulls where sound waves cancel out.
What is Room Calibration?
Room calibration uses software and hardware to measure how speakers interact with your environment. It analyzes the frequency response at your listening spot, finding peaks and dips from room boundaries.
The goal is to even out these irregularities for a flat, accurate sound. Calibration systems help tame boomy bass by reducing energy at specific frequencies that cause unwanted resonance.
Tools for Room Calibration
Many home theater receivers have built-in calibration software like Audyssey, Dirac Live, or YPAO. These systems use a dedicated microphone to capture sound data from different seats.
For those wanting more control, external subwoofer equalizers or miniDSP units offer advanced options. These tools let you make detailed adjustments beyond what standard receiver software can do.
| Tool Type | Primary Function | Ease of Use |
|---|---|---|
| Receiver Auto-EQ | System-wide balance | High |
| External DSP | Precise frequency control | Moderate |
| Bass Traps | Absorb reflected energy | Low |
Adjusting EQ Settings for Best Results
When adjusting EQ settings, focus on reducing modal peaks first. Avoid boosting deep nulls, as it can make the subwoofer work too hard and cause distortion.
In dedicated home theaters, installing bass traps in corners is recommended. These physical treatments absorb excess low-frequency energy, reducing the need for electronic correction to achieve the ideal subwoofer placement.
Always do your final measurements after setting up your furniture. By combining smart physical placement with careful electronic tuning, you get tight, punchy, and accurate bass every time.
Common Mistakes in Subwoofer Placement
Many enthusiasts struggle with muddy or weak bass. They often overlook simple setup rules. To get high-quality audio, you need to pay attention to subwoofer placement best practices. This helps avoid common mistakes that can ruin sound quality.
Placing Subwoofers in Wrong Locations
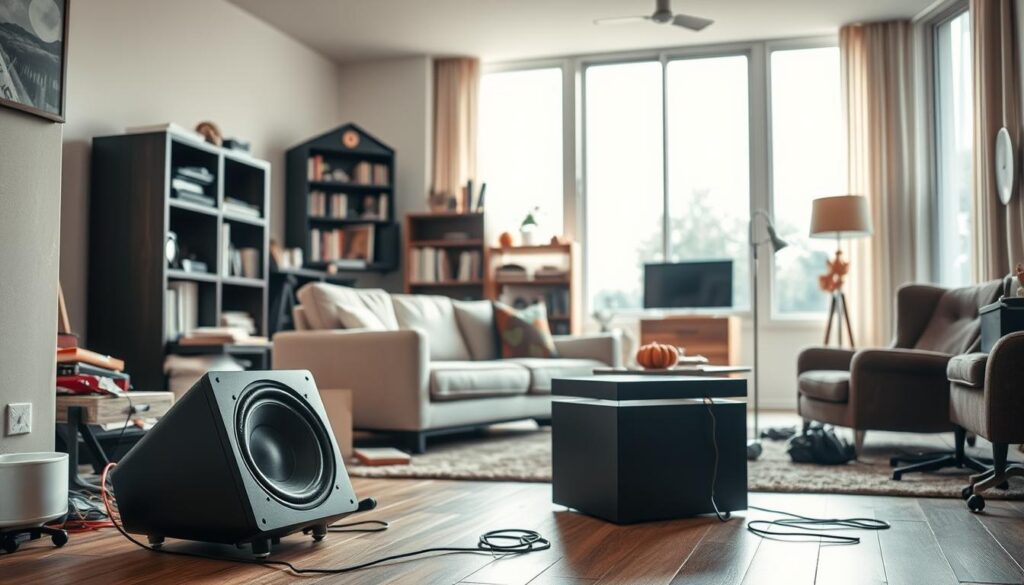
One big mistake is hiding the subwoofer in a closed cabinet or bad furniture. This limits airflow and traps sound waves. This results in muffled or boomy bass that’s hard to understand.
In-wall installations need special planning to avoid structural vibrations. If you don’t isolate the unit right, you might get unwanted rattles. These can take away from your music or movies.
Ignoring Room Acoustics
Your room’s shape greatly affects low frequencies. Many ignore the impact of parallel walls and hard surfaces. This can cause standing waves and uneven bass distribution.
Also, furniture can block or reflect sound, making it harder to get good sound. To follow subwoofer placement best practices, keep the area around the unit clear. This lets sound waves move freely.
Overlooking Phase and Delay Settings
Even with the right physical placement, ignoring technical settings can mess up your sound. Not calibrating phase and delay can make your subwoofer and main speakers sound disjointed.
Here are some common errors to watch out for:
- Blocking ports: Never place the unit too close to walls or corners that obstruct airflow.
- Ignoring phase: Incorrect phase settings can cause bass cancellation at the listening position.
- Cable hazards: Always secure your cables to prevent tripping and ensure long-term connectivity.
- Neglecting access: Ensure you can easily reach the controls for future adjustments.
By following these subwoofer placement best practices, you can avoid common mistakes. This ensures a tighter, more impactful listening experience in any room.
Maintenance and Upkeep of Subwoofers
Proper care of your subwoofer keeps it delivering deep, clean bass for years. Many focus only on the initial setup. But, ongoing maintenance is key to keeping sound quality high.
Following subwoofer setup advice means treating your equipment like your main speakers. This ensures your subwoofer performs well over time.
Regular Cleaning and Care
Dust is a big problem for audio components. Use a soft, dry microfiber cloth to clean the exterior regularly. Make sure vents and ports are clear of dust, as obstructions can cause unwanted rattling or airflow noise.
Check your cable connections every few months. Ensure they are tight and free of oxidation. Avoid harsh chemical cleaners on the driver cone. A gentle touch is best when cleaning.
“Quality sound is not just about the gear you buy, but how well you look after it over time.”
Monitoring Performance Over Time
Your room changes as you add furniture or move decor. These changes can affect how bass waves interact with your space. We suggest a quick listening test periodically to check sound balance.
If performance drops suddenly, check your cables first. A loose connection or frayed wire can cause inconsistent bass. Staying proactive with your subwoofer setup advice helps catch these issues early.
Updating Firmware and Software
Modern subwoofers often need digital signal processing (DSP) updates. Manufacturers release these to improve system stability and accuracy. Always check the official support page for your model for updates.
Updating your firmware ensures your device works well with your receiver or processor. This simple step can fix sync issues and unlock new features. Keeping your system current shows you’re a true audio enthusiast.
Conclusion: Achieving the Best Bass Response
Getting high-quality sound takes patience and a willingness to test your space. We believe the best results come from treating your room as a unique instrument. It needs careful tuning.
Refining Your Setup
Effective subwoofer placement is about finding the right balance. You should test different spots, like corners or along walls, to see how they affect your space. Remember, bass response changes a lot between seats because of room modes.
The Value of Iteration
See your audio journey as a continuous process of discovery. Feel free to try out different subwoofers or small phase shifts to improve the low-end. Brands like SVS or Klipsch have great tools, but your ears are the best judge of what sounds balanced and immersive.
Enjoying Your Soundscape
Great audio makes movies and music come alive in ways regular speakers can’t. By spending time on proper subwoofer placement, you make every note feel impactful and clear. We hope you enjoy the deep, resonant bass that turns your home theater into a true sanctuary for sound.