
 Zoe Nora
Did you know over 40 million records were sold in the US last year? This shows listeners love the warm, authentic sound of analog media. Starting your first high-fidelity audio system might seem hard, but it’s a journey to better sound.
We’re here to guide you through it. Our best vinyl setup tips will turn your home into a concert hall. Whether you just listen or are an audiophile, knowing the basics is key. For more on the technical side, check out this ultimate guide to turntables and record players to set up your gear right.
Focus on the right vinyl setup essentials to save time and money. We’ll walk you through setting up your turntable to speakers, so your music sounds just right. Let’s get your system ready for that first spin.
Key Takeaways
- Identify the four primary components: turntable, preamp, amplifier, and speakers.
- Prioritize vibration isolation by placing your speakers on separate surfaces from your player.
- Understand the difference between moving magnet and moving coil cartridges for better sound.
- Use a ground wire connection to minimize unwanted hum in your audio signal.
- Choose a configuration that fits your space, whether it is a compact powered system or a modular setup.
What You Need for a Vinyl Setup
Starting your vinyl journey requires the right gear. It might seem overwhelming at first. But, breaking it down makes it easier. Knowing what you need is the first step to a setup that fits your budget and space.
Essential Components of a Vinyl Setup
To enjoy your favorite albums, you need four main parts. These vinyl setup essentials are a turntable, preamplifier, amplifier, and speakers. Each one is crucial for turning records into the warm sound we love.
Some systems come in one unit for small spaces. But, separate parts offer more flexibility for upgrades. This way, you can improve your system as your tastes change.
“The beauty of vinyl lies in the tactile experience of the music, where every component works in harmony to bring the artist’s vision to life.”
| Component | Primary Function | Upgrade Potential |
|---|---|---|
| Turntable | Reads the record groove | High |
| Preamplifier | Boosts phono signal | Medium |
| Amplifier | Powers the speakers | High |
| Speakers | Produces sound waves | High |
Optional Accessories to Enhance Your Experience
After setting up your core system, consider tools for protection. One key best vinyl setup tip is to care for your records early on. Use high-quality brushes and cleaning kits to keep them clean.
These tools help prevent dust and reduce noise. Clean records mean better sound quality over time. Investing in these accessories is worth it for your music’s longevity.
Choosing the Right Turntable
Starting your journey into high-fidelity sound means picking the perfect turntable. This device is the heart of your audio system. It spins records at the right speed for the stylus to track the grooves accurately. Making the right choice is crucial for your vinyl setup.
Belt-Drive vs. Direct-Drive Turntables
When looking at models, you’ll see two main motor types. Belt-drive turntables have a motor on the side, connected to the platter by a rubber belt. This design is great because it isolates the motor from the platter. It greatly reduces mechanical noise and vibration.
Direct-drive turntables, on the other hand, have the platter directly on the motor. DJs often prefer these because they offer high torque and quick speed changes. For the best home listening, we usually recommend belt-drive models for their clear sound.
Recommended Brands for Beginners
Starting your collection should be fun, not stressful. Look for reliable brands that offer good performance and ease of use. These brands are key vinyl setup essentials for beginners.
Audio-Technica is a great starting point, with versatile models that are easy to set up. U-Turn is also a top choice, known for its simple design and quality components. Both brands make it easy to start enjoying analog music without needing to know a lot about tech.
The Importance of a Quality Cartridge
The cartridge is the heart of your vinyl setup, turning tiny grooves into rich sound. It holds the stylus and changes physical vibrations from records into electrical signals. Without a high-quality cartridge, even the best record player setup won’t give you the sound quality you expect.
Difference Between Moving Magnet and Moving Coil
When you look at the market, you’ll find two main types of cartridges: Moving Magnet (MM) and Moving Coil (MC). Knowing their output levels is key for your audio setup.
- Moving Magnet (MM): These are great for beginners. They have a higher output of about 5 millivolts, working with almost any standard phono input.
- Moving Coil (MC): These offer better detail and speed. But, they have a much weaker signal, about 0.2 millivolts max, needing special high-gain amplification.
How to Choose the Right Cartridge for Your Turntable
Picking the perfect cartridge is crucial when setting up a record player. First, check if it fits your tonearm. Weight and compliance affect how well it tracks.
If you’re new, start with an MM cartridge. They have replaceable styli, saving you money and effort. For a deeper sound, consider an MC cartridge for your vinyl setup tutorial.
Your choice should match your sound preference. Whether you want ease or the best sound, the right cartridge changes how you enjoy your music.
Setting Up Your Turntable Correctly
A successful record player setup starts with paying attention to the mechanical details. Assembling your components with care ensures your records sound as the artist meant. This is the key to a high-quality listening experience at home.
Step-by-Step Guide to Assembly
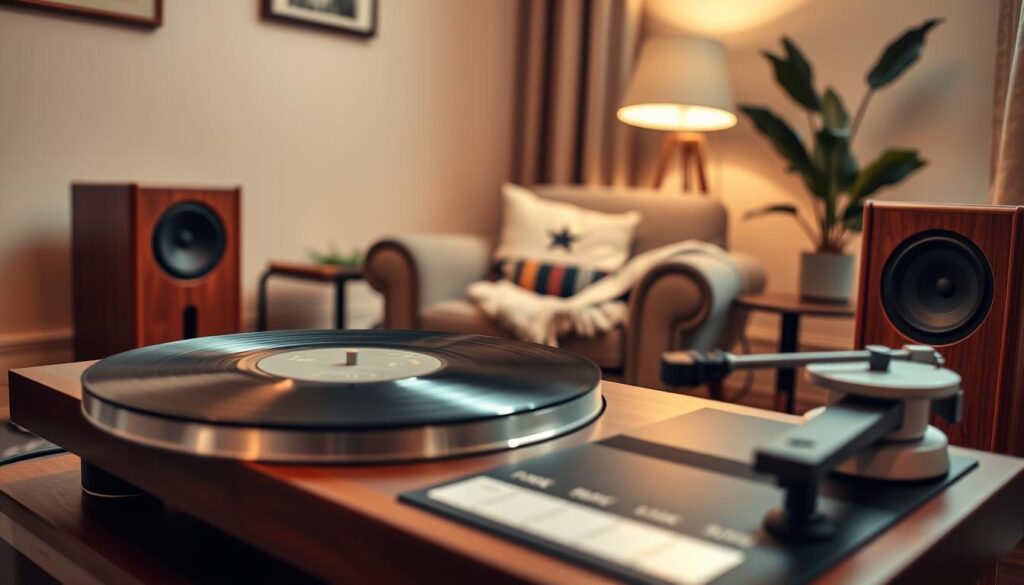
Begin by placing the unit on a flat, stable surface. Make sure the platter is perfectly level to avoid uneven wear on your stylus. After securing the platter, balance the tonearm according to the manufacturer’s tracking force requirements.
Proper calibration of the tracking force is crucial for clear audio. For more detailed guidance, check our vinyl setup tutorial. These small steps will greatly enhance your music’s depth and detail.
Tips for Optimal Placement
The turntable’s location greatly affects its performance. Place it on a sturdy, level surface away from your speakers. This separation prevents acoustic feedback and unwanted vibrations from affecting your sound quality.
Many prefer floorstanding loudspeakers or dedicated speaker stands to keep turntables and speakers separate. This protects the delicate needle from external tremors. Proper isolation is key to a clean, crisp sound that brings your vinyl to life.
Understanding Tonearms and Their Function
When you start your record player setup, the tonearm is key. It connects your cartridge to the vinyl. This metal arm lets the stylus follow the record groove as it spins. Without a good tonearm, your music might sound distorted or skip.
Fixed vs. Removable Tonearms
Many beginners use fixed tonearms. They are simple and strong. These arms are often set up right at the factory, making it easy to start.
But, high-end turntables have removable headshells. This lets you change cartridges easily without rewiring. If you want to try different sounds, a removable headshell is great.
Best Practices for Tonearm Setup
Getting your tonearm balanced is crucial. You need to adjust the counterweight for the right tracking force. This keeps the stylus in touch with the record without wearing it down.
Also, set the anti-skate dial right. This stops the arm from pulling too hard towards the record’s center. It keeps the sound balanced. This vinyl setup tutorial will help you get the best sound from your records.
Remember, patience is important when setting up your tonearm. Taking your time to get it right will protect your records. It will also make sure your setting up a record player experience is great for years to come.
The Role of Speakers in a Vinyl Setup
Your speakers are the last step in your audio journey, turning electrical signals into the music you love. When you set up your turntable, the speakers you pick will shape your listening experience. They bring every record to life, making your music sound clear and deep.
Active vs. Passive Speakers
Knowing the difference between speaker types is key in any vinyl setup guide. Active speakers, or powered speakers, have an amplifier built-in. This is great for those who want to save space and avoid extra clutter.
Passive speakers need a separate amplifier or receiver to work. This might seem more complicated, but it lets you upgrade your power source as your system grows. You can mix and match parts to get the sound you want for your room.
Recommended Speaker Brands for Vinyl
Choosing a well-known brand means your investment will last. Many people like brands that offer great sound and value. For example, ELAC is known for its precise engineering and clear sound.
If you want a more lively sound, Triangle has excellent choices. For those watching their budget, Micca offers quality speakers at a lower price. Here’s a comparison to help you choose:
| Feature | Active Speakers | Passive Speakers |
|---|---|---|
| Amplification | Built-in | External Required |
| Setup Complexity | Low | Moderate |
| Upgrade Path | Limited | High Flexibility |
| Best For | Minimalists | Audiophiles |
Connecting Your Vinyl Setup to a System
Connecting your turntable to an amplifier is key for a pristine sound. It’s all about the connection. A good turntable setup means your music sounds its best, without any noise.
Overview of Connection Types
RCA cables are the go-to for most systems. They carry the sound from your turntable to your speakers or receiver. Make sure all plugs fit snugly to avoid any sound issues.
If you have a phono stage, plug your turntable into the “Phono” input. If it has a preamp, use “Line” or “Aux”. Always check your manual for the right input.
Tips for Clean Wiring
Keeping your cables organized is crucial. Keep audio cables away from power cords to avoid interference. This simple step can make a big difference in sound quality.
If your turntable has a ground wire, connect it to your amplifier or preamp. This helps reduce electrical noise. But, if you still hear a hum, try removing the ground wire. This can improve your sound.
For a better sound, keep your system tidy. Use cable ties to organize your wires. This makes your space look good and makes adjustments easier. A well-organized setup means better sound every time.
Maintaining Your Vinyl Records
Keeping your records safe is as crucial as picking the right turntable setup. Quality gear enhances your music, but the discs’ condition affects sound quality. A regular maintenance routine keeps your collection enjoyable for years.
Cleaning Techniques for Long-Lasting Records
Dust and debris in the grooves harm sound quality. They cause pops and clicks that ruin the listening experience. Always use an anti-static brush before playing to remove surface dust.
For a thorough clean, use a record washing kit. Experts say it’s the easiest and most effective way to clean stubborn grime. This method keeps your records in top condition without harming the vinyl.
Proper Storage Methods to Avoid Damage
Storing your records correctly is as important as cleaning them. Always store them upright to avoid warping from weight. Storing flat can cause permanent damage.
Also, keep your records in a cool, dry place away from sunlight. Heat can soften vinyl and change its structure. By following these tips, you protect your records and enjoy great sound quality.
Troubleshooting Common Vinyl Setup Issues
Even with careful vinyl player installation, you might face minor issues. Audio gear sometimes needs small tweaks to keep performing well. Knowing how to spot these problems helps you fix them without professional help.
Skipping Records: Causes and Solutions
Records skipping often comes from wrong tracking force or anti-skating settings. The right amount of pressure keeps the needle in contact with the record. Too little pressure makes it skip.
Too much anti-skating force can also cause problems. Check your manual to make sure your tracking force is correct. If your gear is old, a new phono cartridge might improve stability.
Hum and Buzz: How to Eliminate Noise
A hum or buzz usually means a grounding issue. First, check that your ground wire is tight on both your turntable and amplifier. A loose wire is often the cause of noise.
Also, make sure RCA cables are fully plugged in. Cables near power cords can pick up interference. Proper turntable setup means keeping cables away from power sources for a clear sound.
| Issue | Primary Cause | Quick Fix |
|---|---|---|
| Skipping | Incorrect Tracking Force | Adjust Counterweight |
| Humming | Grounding Fault | Check Ground Wire |
| Distortion | Worn Stylus | Replace Cartridge |
| Channel Loss | Loose RCA Cable | Reseat Connections |
Exploring Advanced Vinyl Setup Options
Learning the basics of your audio system is just the start. Once you’re comfortable with your vinyl player, you can start making it even better. This means upgrading your gear to match your changing tastes.
Upgrading Your Equipment Over Time
Replacing your cartridge with a top-notch model like the Nagaoka MP-110 can make a big difference. It brings out more detail in your records. This simple swap improves sound quality across all frequencies.
Consider getting a dedicated phono preamp or a special turntable mat. These can help reduce unwanted vibrations. They help you set up a turntable that meets your high-fidelity standards.
DIY Modifications to Enhance Sound Quality
Trying out isolation feet or custom headshells lets you customize your setup. These DIY projects can turn your turntable into a unique piece of audio engineering.
We encourage you to share your progress with others. Your journey into analog sound is just starting. Every tweak brings you closer to the perfect sound.