
 Zoe Nora
Did you know that over 90% of modern chart-topping tracks use manipulated audio fragments instead of traditional live recordings? This shift has made the humble sampler the essential engine for contemporary beat production. By turning raw audio into playable instruments, we can reshape sound in ways once thought impossible.
Choosing the right workflow supports your creative process. Whether you prefer hardware’s tactile feel or a plugin’s flexibility, each method offers unique advantages. Some producers use a vast loop library for ideas, while others build custom kits from scratch.
Platforms like Soundtrap simplify this process by placing needed tools in one place. By combining a powerful sampler, virtual instruments, and an online MIDI editor, you can focus on your music. Let us explore how these tools turn simple ideas into professional tracks.
Key Takeaways
- Modern music production relies heavily on transforming recorded audio into new, playable sounds.
- A high-quality sampler acts as the core engine for creative beatmaking workflows.
- Hardware and software setups offer different benefits depending on your specific production goals.
- Using a curated loop library can significantly speed up your initial songwriting process.
- Integrated platforms like Soundtrap provide a seamless environment for editing, arranging, and mixing.
How sampler tools turn audio into playable parts
We turn raw recordings into expressive instruments with specialized software. The process of audio sampling lets us map any sound, from field recordings to vocal snippets, across a keyboard for music.
At its core, a sampler connects static audio files with live musical expression. By changing how a sound plays, we can turn a short clip into a flexible composition tool.
For professional results, we must manage several technical details during editing. The sample rate sets the frequency range and overall fidelity of captured audio. Higher settings usually sound clearer but need more processing power.
When we load a file into a tool like Soundation’s Simple Sampler, we follow these steps to prepare the sound:
- Importing: Loading the raw audio file into the software environment.
- Chopping: Defining specific start and end points to isolate the desired musical fragment.
- Mapping: Assigning the chopped audio to specific keys or pads for triggering.
- Tuning: Adjusting the pitch to ensure the sample aligns with the key of our project.
- Shaping: Using envelopes and filters to control the attack, decay, and sustain of the sound.
Beyond basic playback, we use looping to sustain sounds indefinitely or create rhythmic textures. By adjusting the sample rate and pitch, we can greatly change the original recording’s character. This flexibility makes the modern sampler an essential tool for any producer crafting unique, playable sounds from scratch.
Choose a sampler format that fits your production setup
We often find the best sampler fits our creative flow. Your tools shape your approach to sound design and your speed from idea to finished track.
Whether you prefer a computer-based setup or physical gear, know your options before choosing. Each format offers benefits for your production style.
DAW-native samplers for an integrated workflow
DAW-native tools sit inside your recording software for a smooth workflow. They keep instruments, effects, and automation in one window.
Because they match your software, they often provide the lowest latency and closest integration. You can map a MIDI controller to trigger sounds without complex routing or setup problems.
Plugin samplers for cross-platform production
If you switch between recording programs, plugin samplers offer a strong choice. These third-party tools keep one interface across the DAWs you use.
They often include advanced sound design features missing from basic stock tools. Plugins keep your custom patches and settings available across all your studio computers.
Hardware samplers for hands-on control
Many producers prefer the hands-on feel of a drum machine or dedicated hardware unit. These devices reduce computer-screen distractions and support a performance-based approach to beatmaking.
A hardware sampler lets you shape audio with physical knobs and pads. This tactile feedback often creates organic rhythms and unique creative energy. A mouse and keyboard can rarely match that feeling.
DAW-native samplers for fast beatmaking
To speed up your beat production, start with your DAW’s native Sampler tools. These built-in instruments suit your software, so you spend less time fixing problems and more time creating. Read the complete guide to sampling to unlock more from your studio.
Ableton Simpler and Sampler
Ableton Live offers two distinct paths for audio work. Use Simpler for quick one-shot edits, slicing, and looping. For deeper control, Sampler builds multi-zone instruments with detailed modulation.
Logic Pro Quick Sampler and Sampler
Logic Pro offers an intuitive design with its Quick Sampler. Drag any audio file into it to create a playable instrument at once. For advanced users, the full Sampler supports deep multisampling, making it powerful for professional sound design.
FL Studio Sampler and DirectWave
FL Studio is known for step sequencing, and its native Sampler drives this workflow. It quickly triggers drum hits and short loops. For advanced synthesis and mapping, DirectWave creates complex, multilayered patches.
“The best tool is the one that gets out of your way and lets the music happen.”
| DAW | Primary Tool | Best For |
|---|---|---|
| Ableton Live | Simpler | Rapid slicing and looping |
| Logic Pro | Quick Sampler | Drag-and-drop ease |
| FL Studio | Sampler | Step-sequenced drums |
Choosing the right Sampler starts with your creative goals. Whether you value speed or deep sound design, these native tools can strengthen your beat production.
Plugin samplers for slicing, pitching, and rearranging audio
Plugin samplers bridge raw audio files and creative musical expression. They enable fast, precise audio sampling and simplify pitch, time, and transient changes. Advanced algorithms handle these tasks without complex manual editing.
Serato Sample for quick sample chopping
Serato Sample is known for its powerful transient detection engine. It finds and chops samples in seconds, making it popular with producers who work quickly. The Pitch ‘n Time algorithm keeps audio high-quality when shifting keys or stretching loops significantly.
Momentum for beat-focused sample manipulation
Momentum suits producers who rely heavily on a loop library for their tracks. It connects with cloud-based content, so users can drag sounds into projects. Producers can slice, reverse, and re-pitch beats during long sessions, keeping creative momentum strong.
TAL-Sampler for vintage-inspired workflows
If you prefer classic hardware, TAL-Sampler offers a unique vintage-inspired experience. It emulates the grit and warmth of early digital samplers, giving modern productions an analog feel. This tool combines old-school style with modern software convenience.
| Sampler | Primary Strength | Best Use Case |
|---|---|---|
| Serato Sample | Fast Chopping | Hip-hop and Remixing |
| Momentum | Loop Integration | Modern Beatmaking |
| TAL-Sampler | Vintage Character | Sound Design |
Instrument samplers for detailed playable sounds
We use dedicated instrument samplers to build detailed, layered virtual instruments from scratch. Unlike beat-focused tools that favor quick slicing, these platforms support multisampling and complex key mapping. This method brings static recordings to life as expressive, playable instruments through sound design.
Native Instruments Kontakt
Kontakt is the industry standard for professional sample libraries. Its engine supports advanced scripting, so developers can create realistic articulations, including round-robins and legato transitions. Producers can build instruments that respond to their playing style.
Steinberg HALion
HALion combines traditional sampling with powerful synthesis in one comprehensive environment. Its integrated workflow helps us combine recorded audio with wavetable or granular oscillators. This flexibility makes it a top choice for users pushing modern sound design within one plugin.
UVI Falcon
UVI Falcon is a hybrid powerhouse with many oscillators and effects in one interface. It excels at deep modulation, letting us map almost any parameter to a controller for real-time performance. Its advanced scripting capabilities transform simple source audio into complex, evolving textures for high-end sound design.
Hardware samplers for hands-on beatmaking
Leaving the computer screen can refresh your creative process. Many producers connect with music through physical pad hits and knob turns. A dedicated drum machine keeps your focus on rhythm and feel, without mouse or keyboard distractions.
Akai MPC units
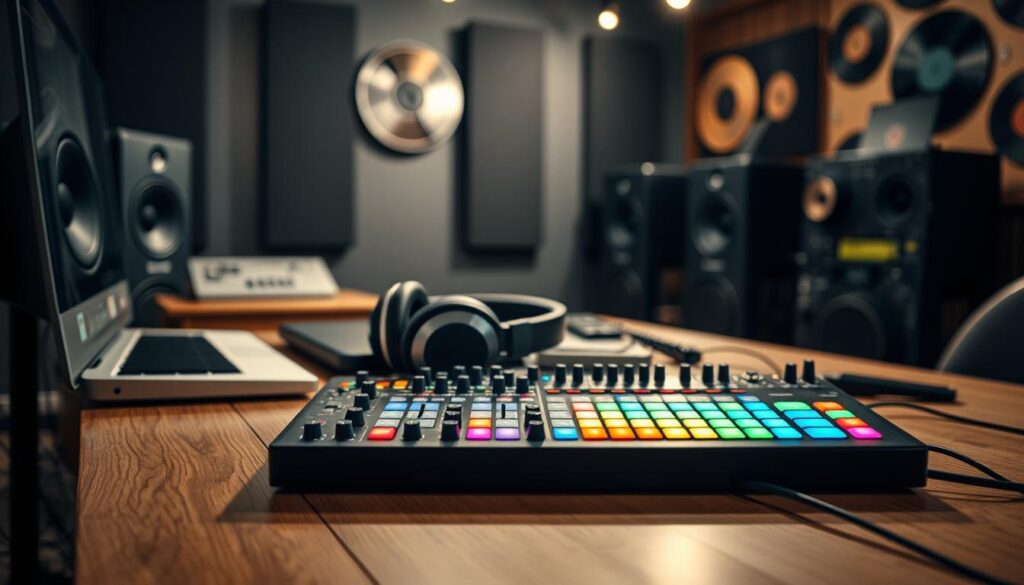
The Akai MPC series remains a cornerstone of modern beat production. These units are famous for their legendary pad sensitivity and strong sequencing tools. You can build complex arrangements by layering samples on pads, with tactile feedback software often lacks.
- Standalone operation for studio or stage.
- Deep MIDI control for external gear.
- Advanced sample editing and chopping tools.
Roland SP-404MKII
Portability and creative effects make the Roland SP-404MKII an excellent choice. It is loved for its unique resampling workflow, which lets you bake effects into audio. This unit suits producers who capture inspiration on the go and perform live sets easily.
Elektron Digitakt II
The Elektron Digitakt II offers a powerful way to arrange patterns. It excels at parameter locking, which automates changes on every sequence step. This control appeals to producers who enjoy detailed sound design and changing rhythmic textures.
| Sampler | Best For | Key Strength |
|---|---|---|
| Akai MPC | Full Production | Pad Feel |
| Roland SP-404MKII | Live Performance | Effects |
| Elektron Digitakt II | Sound Design | Sequencing |
Choosing the right hardware depends on your needs for beat production. Choose a classic drum machine for its feel or a digital sequencer for deep modulation. Adding these devices to your setup gives you a physical interface and keeps your creativity flowing.
Which sampler features matter most to producers
Knowing which sampler features matter most can speed up your music production process. Clear playback matters, but audio tools help you turn ideas into finished tracks faster. We value features that combine technical depth with creative speed.
Sample slicing, looping, and time-stretching
Chopping audio into smaller parts supports modern beatmaking. High-quality time-stretching keeps samples in sync with your project tempo and avoids unwanted artifacts. Many producers use a large loop library for ideas, but creative changes make those loops unique.
- Transient detection for automatic slicing.
- Real-time time-stretching to match project BPM.
- Seamless looping modes for rhythmic textures.
Envelopes, filters, and modulation
After choosing a sample, shape its character to fit your mix. ADSR envelopes control attack and decay, which helps create punchy percussion. Filters and modulation sources, such as LFOs, add movement to static audio files.
These tools turn simple recordings into expressive, playable instruments. Subtle modulation keeps samples from sounding repetitive or flat over time.
Effects, sequencing, and automation
A built-in drum machine style sequencer helps arrange patterns quickly. Effects such as distortion, reverb, and delay process sounds inside the sampler. Automation records parameter changes over time, creating a more dynamic performance.
Storage, file support, and library management
Good project management depends on how well your sampler handles file formats and storage. Choose software that supports high-resolution audio and maintains a professional sample rate throughout your signal chain. Efficient library management leaves more time for making music and less time for searching.
| Feature Category | Primary Benefit | Workflow Impact |
|---|---|---|
| Slicing/Stretching | Tempo alignment | High |
| Modulation | Sound character | Medium |
| File Management | Project stability | High |
Build a sample-based beat from source audio to arrangement
We can turn simple recordings into complex musical arrangements with a structured workflow. Whether you start with a field recording or generated loop, beat production demands consistency and attention to detail.
Load and prepare the source recording
First, gather high-quality source material. Tools like Soundation’s Gennie can generate unique samples based on moods, tempos, or keys. Once you have audio, it is vital to clean the file before beginning.
Check your recording for background noise, clicks, or uneven transients that could cause problems later. Proper audio sampling starts with a clean foundation for creative changes.
Chop, map, and tune the sample
After preparing your audio, slice it into smaller, useful segments. This phase of sound design lets you isolate strong parts, such as a specific drum hit or melodic phrase.
After chopping, map these segments to your sampler’s pads or keys. Tune each slice to your project’s key to prevent clashing frequencies. Use the following table to organize your workflow:
| Task | Goal | Tool |
|---|---|---|
| Slicing | Isolate transients | Sampler Editor |
| Tuning | Match project key | Pitch Shifter |
| Mapping | Assign to MIDI | MIDI Controller |
Sequence the parts and shape the final mix
Now that your samples are ready, build the arrangement. Start by sequencing drum patterns and melodic elements to create a cohesive groove. Experimentation is key, so do not fear rearranging slices to find a unique rhythm.
Finally, shape the mix by applying filters, envelopes, and effects to your samples. Effective audio sampling and sound design require balanced levels, so every element sits well in the mix. Maintaining a clean signal path throughout your beat production creates a professional, polished final result.
- Verify that all samples are in time with the project tempo.
- Use automation to add movement to your filters and effects.
- Check for phase issues when layering multiple samples.
Use samples legally in your productions
Understanding music law is essential for every modern beatmaker. Before using any loop library or sound pack, check its specific license. Knowing the difference between royalty-free material and copyrighted recordings helps prevent legal trouble later.
When we buy or download sounds, we often receive a license, not ownership of the audio. Royalty-free does not mean a sound belongs to the public domain. It means we do not pay ongoing fees for each stream or sale of our music.
Keep a digital folder with purchase receipts and license agreements for every project you release.
Content identification systems need special care. If we use a sample directly from a copyrighted commercial recording without clearance, automated systems may flag our tracks. This can lead to demonetization or music removal from streaming platforms.
It is safer to use professional services like Soundtrap, which provide clearly labeled, cleared assets for commercial use.
Most standard licenses strictly prohibit creating derivative works or reselling samples. Never repackage or sell sounds unless we own their original copyright. The table below shows key differences among sample usage rights.
| License Type | Commercial Use | Resale Rights | Source |
|---|---|---|---|
| Royalty-Free loop library | Allowed | Prohibited | Licensed Provider |
| Public Domain | Allowed | Allowed | Expired Copyright |
| Copyrighted Recording | Requires Clearance | Prohibited | Commercial Media |
Connect a sampler to your DAW and MIDI controller
We will show you how to connect your sampler, DAW, and MIDI controller for smooth music production. A reliable hardware and software connection supports a professional production setup. First, get a high-quality audio interface for signal routing and monitoring.
Connect your sampler’s audio outputs to your interface inputs, then monitor through speakers or headphones with minimal latency. For a hardware sampler, connect it to your computer through USB or a dedicated MIDI interface. This connection sends note data from your MIDI controller to the sampler, helping your DAW capture performances accurately.
Set MIDI channels correctly to prevent duplicated notes or incorrect triggering. Many modern DAWs let you select your MIDI controller from a device list for immediate control. Assign it to a matching sampler-track channel; browser-based Soundtrap and Soundation offer visual editors without complex wiring.
Check clock synchronization to keep your sampler aligned with your DAW’s project tempo. Also check key or pad velocity, so your performance feels natural and expressive. The table below lists key components for a successful connection.
| Component | Primary Function | Connection Type |
|---|---|---|
| Audio Interface | Signal conversion and monitoring | USB/Thunderbolt |
| MIDI Controller | Triggering samples and notes | USB/5-pin MIDI |
| Sampler | Audio playback and processing | Analog/Digital I/O |
| DAW Software | Recording and arrangement | Software/Host |
Fix common sampler workflow problems
When your production session stalls, knowing how to fix common sampler issues saves valuable time. Technical glitches can interrupt inspiration, but most have simple solutions. Addressing these hurdles early keeps our creative process uninterrupted.
Eliminate clicks, pops, and uneven loop points
Audio artifacts often appear when a sample ends where its waveform does not cross the center line. To fix this, we look for zero-crossing points when editing audio files. If a click remains, a very short crossfade at the start and end of the loop usually solves it.
Uneven loops often come from inaccurate start and end markers. Zoom in as far as possible, then align the markers with the grid. Modern software also offers automatic loop smoothing to blend transitions smoothly.
Keep samples in tune and on time
Pitch drift and timing errors are common with varied source material. Ensure the sample rate of imported audio matches project settings, preventing unwanted pitch shifts. If a sample sounds out of tune, use pitch correction tools to match your track’s key.
For timing issues, use time-stretching algorithms to match samples to the project tempo. It is essential to check that the sampler correctly identifies the original BPM. If timing remains loose, manual warping or slicing creates a tight rhythm section.
Manage latency, CPU load, and missing files
Performance issues can quickly derail a productive session. If your MIDI controller responds slowly, reduce the audio buffer size in the settings menu. This lowers the time your computer needs to process the signal.
When CPU usage spikes, use the freeze or flatten function to turn resource-heavy sampler tracks into simple audio files. This frees processing power for other tasks. Finally, keep project folders organized and use consolidated file formats to prevent missing samples.
Conclusion
Choosing the right sampler format changes our approach to beat production. Whether we use an Akai MPC or software tools, our choices shape each track’s sound. We should choose features that fit our goals and keep digital libraries organized for efficient work.
Legal sample use remains vital to our professional growth. We should verify rights to source material and protect our creative work. Reliable hardware and software connections help ideas become high-quality audio without technical interruptions.
If you want to refine your technical skills, learn pro tools fast with expert music production and keep sessions running smoothly.
Platforms like Soundation show that thousands of creators build music every day, proving accessible technology expands modern sound. Through systematic troubleshooting and arrangement, we turn simple recordings into polished, professional compositions. Keep experimenting with these tools to find your unique voice in beat production.