
 Zoe Nora
Did you know this software has been the top choice for over ten years? It’s behind most hits you hear on the radio. Mastering it can be a game-changer for anyone serious about music.
This guide is here to make music production easier for you. It doesn’t matter if you’re new or want to improve. Our expert tips will boost your confidence to make professional audio at home.
Learning Pro Tools doesn’t have to be hard. Our step-by-step guide will help you learn key features for top-notch music production. Let us help you unlock this software’s power, so you can focus on your creativity.
Key Takeaways
- Understand why this software is the global industry standard.
- Learn how to set up your home studio for professional results.
- Discover efficient workflows to speed up your creative process.
- Gain confidence in navigating complex digital audio features.
- Transform your home recordings into polished, radio-ready tracks.
Getting Started with Pro Tools
We think a strong technical base is key for music producers using Pro Tools. A reliable setup keeps your creative flow smooth. By following AVID Master Instructor Jon Connolly’s lessons at Berklee College of Music, you can create a top-notch workspace.
System Requirements for Pro Tools
First, check if your computer can run this powerful audio software. A stable system avoids latency and crashes. Make sure your processor speed, RAM, and storage drive are up to par for the best performance.
| Component | Minimum Requirement | Recommended Spec |
|---|---|---|
| Processor | Intel Core i5 | Intel Core i9 or Apple M-Series |
| RAM | 16 GB | 32 GB or higher |
| Storage | SSD (512 GB) | NVMe SSD (1 TB+) |
Understanding the Interface
The digital audio workstation interface might look tough at first. But it’s made for speed. The Edit window is for arranging, and the Mix window is for balancing tracks. Knowing these layouts helps you work fast.
The toolbar at the top gives you quick access to tools like the Smart Tool. It does trimming, selecting, and grabbing. Learning these shortcuts boosts your productivity. Consistency in your workflow leads to pro results.
Quick Installation Guide
Installing Pro Tools is easy if you use the AVID Link manager. Make sure your iLok account is active for license authorization. Download the software, run the installer, and follow the prompts to set up your playback engine.
After installation, restart your computer to update drivers. Then, launch the audio software and pick your audio interface in the hardware setup. These steps get your digital audio workstation ready for your first recording.
Essential Tools in Pro Tools
Building a professional studio needs the right mix of hardware and software. The right gear sets up a solid base for your creative work. Mixing physical tools with Pro Tools features leads to top-notch results.
Audio Interfaces: What You Need
An audio interface connects your instruments to your computer. It turns analog signals into digital data for your audio software. Look for devices with low latency and high-quality preamps for clear recordings.
- Check for enough input and output channels for your needs.
- Ensure it matches your computer’s connection type, like USB-C or Thunderbolt.
- Choose units with stable drivers to avoid playback issues.
MIDI Controllers for Enhanced Production
A MIDI controller lets you play virtual instruments hands-on. It’s better than using a mouse. This way, your performances sound more natural and expressive.
Modern controllers have knobs and faders that adjust your session automatically. This lets you tweak volume, panning, and effects without reaching for your keyboard.
Plug-ins That Make a Difference
The right plug-ins can turn a simple recording into a masterpiece. You don’t always need to spend a lot to get great results. Pro Tools comes with Steinberg’s ARA plug-ins, like SpectraLayers Go and Wavelab Go, for free.
These tools offer advanced editing and mastering features. They were once only for top studios. Using these free music software tools can make your audio sound professional without breaking the bank.
Recording Audio Like a Pro
Starting your music production journey is when you hit record. Your goal is to capture every detail of a performance. By getting good at your recording software, you make sure every performance detail is kept for the final mix.
Setting Up Your Session for Success
Before a performer comes in, set up your Pro Tools session. Choose a sample rate and bit depth of 48kHz and 24-bit. This gives you room for high-quality audio later.
Use clear names and colors for your tracks to stay organized. Make sure your input levels are between -12dB and -6dB. This avoids digital clipping and keeps your audio clean.
Best Practices for Microphone Placement
The microphone’s position affects the sound. For vocals, six to eight inches is often best. If there’s too much bass, move it a bit further.
For acoustic instruments, try different angles to capture the room’s resonance. Always use a pop filter to avoid harsh sounds. These small changes can greatly improve your recordings.
Monitoring Your Sound
Creating a good headphone mix is key for a great performance. If a singer can’t hear themselves, their pitch and timing will suffer. Use Pro Tools to create a mix that focuses on the important parts for the performer.
Keep the volume low to avoid ear fatigue. A balanced mix helps the artist focus on their performance, not the backing track. Here’s a table to help choose the right microphone:
| Microphone Type | Best Use Case | Key Advantage |
|---|---|---|
| Large Diaphragm Condenser | Vocals and Acoustic Guitar | High sensitivity and detail |
| Dynamic Microphone | Drums and Electric Guitars | Handles high sound pressure |
| Ribbon Microphone | Brass and String Sections | Warm and natural vintage tone |
Editing Techniques in Pro Tools
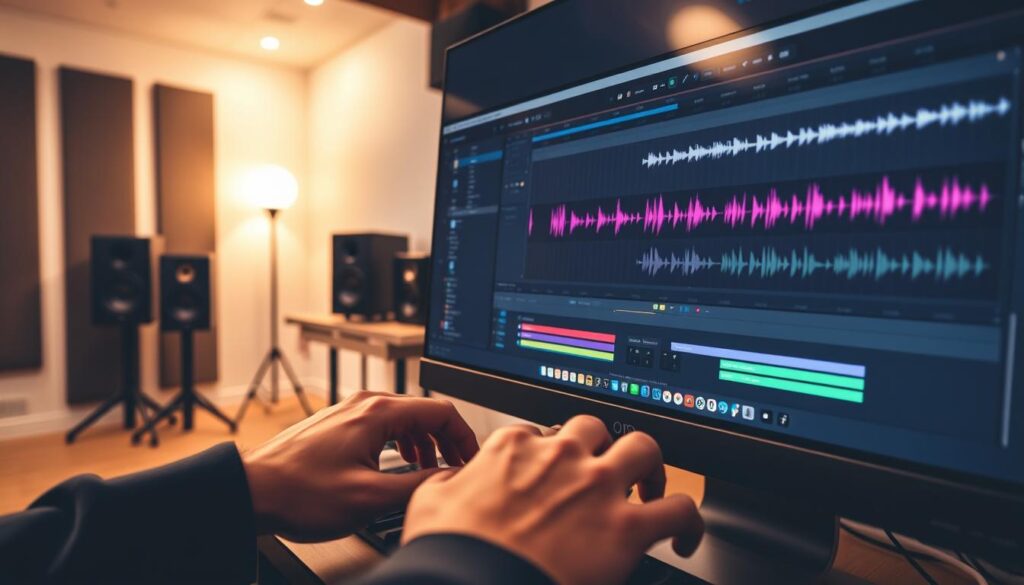
Improving audio performances needs both technical skills and creative thinking. Working in a digital audio workstation aims to enhance the listener’s experience. It keeps the performance’s emotional essence intact. Good music editing fixes small mistakes without losing the original’s feel.
The Basics of Audio Editing
Professional production starts with cleaning up raw audio. Focus on removing unwanted sounds like silence, breaths, or background noise. Use simple tools to select specific parts and keep your track professional.
Consistency is crucial for a great mix. When editing, listen for smooth transitions between clips. Proper editing makes your rhythm section sound tight and vocals fit perfectly.
Utilizing Cut, Copy, and Paste Effectively
Speed is key in a session. Mastering cut, copy, and paste in Pro Tools saves time. These functions help you duplicate great parts, like a catchy chorus, across your project.
Use keyboard shortcuts to work faster. Instead of the mouse, learn shortcuts to move audio quickly. This keeps your creative flow uninterrupted while building your song.
Advanced Editing Features to Explore
Once you know the basics, try more advanced tools. Elastic Audio lets you tweak timing with precision. Advanced crossfading also helps smooth transitions, avoiding clicks or pops.
| Editing Tool | Primary Function | Best Use Case |
|---|---|---|
| Smart Tool | Combines trim, select, and grabber | General daily tasks |
| Elastic Audio | Time-stretching and warping | Fixing rhythmic timing |
| Crossfade | Smoothing clip boundaries | Eliminating audio pops |
| Strip Silence | Removing quiet regions | Cleaning drum tracks |
Using these advanced tools in Pro Tools elevates your music editing skills. Every tweak in your digital audio workstation brings your project closer to perfection.
Mixing Fundamentals
When you open Pro Tools, your song starts to come alive. This is where we turn recorded tracks into a cohesive sound. By focusing on audio mixing, we make raw ideas shine.
Balancing Levels in Your Mix
The right volume levels are key to a great mix. We make sure each instrument is heard well without drowning others. Proper gain staging keeps the sound clear and prevents distortion.
“Mixing is the process of balancing the elements of a song so that they work together to create a unified emotional experience.”
Start by lowering all faders and then raise them one by one. This helps you balance the kick drum, bass, and vocals. Consistency is crucial for a solid track.
Using EQ to Shape Your Sound
After setting levels, EQ is your main tool for clarity. We use EQ to adjust each instrument’s sound. This prevents a “muddy” mix where sounds clash.
For example, you might reduce low frequencies on a guitar to make space for the bass. Pro Tools has powerful plugins for precise adjustments. Sometimes, cutting frequencies works better than boosting them.
Adding Effects: Reverb and Delay
Reverb and delay add depth and character to your sound. These effects make your mix feel real and immersive. They help listeners feel like they’re in the room.
- Reverb: Creates the sense of a room or hall environment.
- Delay: Adds rhythmic echoes that fill out the stereo field.
- Compression: Controls the dynamic range to keep levels steady.
In Pro Tools, use these effects wisely. Subtle mixing techniques often lead to the best results. Keep trying until your mix is balanced, spacious, and powerful.
Mastering Your Tracks
Mastering is the last step in making your music sound great everywhere. It’s different from music editing, which focuses on arranging sounds. Mastering makes sure your music sounds good on all devices and platforms.

The Mastering Process Explained
The goal of mastering is to make your music sound balanced and clear. Engineers use Pro Tools to fine-tune the sound. They adjust the sound to fit well on all speakers, from studio monitors to phones.
Mastering also gets your tracks ready for albums or EPs. It makes sure the sound is the same from song to song. This is the last check before your music is shared with the world.
Tips for Preparing Your Mix for Mastering
Before mastering, your mix needs to be perfect. Make sure there’s enough headroom for mastering. Don’t use too many limiters, as they can limit the sound’s range.
Export your files in high-quality formats like 24-bit WAV or AIFF. Keep your session tidy by labeling tracks and removing unused plugins. Good preparation leads to a better final product.
Common Mastering Mistakes to Avoid
One big mistake is over-processing your audio. This can make it sound flat and lifeless. Over-compression can ruin the natural sound of your music. Always check your mix at different volumes to improve it, not just make it louder.
| Feature | Mixing Stage | Mastering Stage |
|---|---|---|
| Primary Focus | Individual track balance | Overall stereo image |
| Dynamic Range | Preserved for expression | Controlled for consistency |
| File Output | Multitrack stems | Final stereo master |
Don’t rush the mastering stage. Take breaks to keep your ears fresh. A clean signal path and careful processing ensure your music sounds its best.
Working with MIDI
MIDI sequencing changes how we work with virtual instruments in our studio. With Pro Tools, we can tweak digital performance data for top-notch results. This lets us fine-tune every detail of a performance, even after it’s recorded.
Understanding MIDI Data Basics
MIDI is a language that tells our music software which notes to play and how. It doesn’t hold actual audio but gives instructions on pitch, velocity, and duration. This setup offers us a lot of flexibility during production.
We can easily swap out instrument sounds without re-recording. By tweaking note velocities, we add human-like dynamics to our parts. Getting the hang of these basics makes our virtual instruments sound alive and real.
Creating Engaging MIDI Sequences
To craft complex arrangements, we use MIDI Playlists and the Notes Focus View. These tools help us organize and refine our ideas without cluttering the timeline. Keeping our workspace tidy is key to staying creative.
Experimenting with rhythm and timing is easier when we can see our notes clearly. We often use the grid to align our sequences or nudge them for a more natural feel. Finding this balance between precision and groove makes our tracks sound professional.
Popular MIDI Effects in Pro Tools
Our recording software comes with various MIDI effects that add depth to our music. Arpeggiators are great for creating complex patterns from simple chords. We also use real-time quantization to keep our performances tight while keeping their original feel.
These effects in our music software let us explore new textures that are hard to play manually. Whether layering synthesizers or building drum patterns, these tools give us the flexibility needed for modern music production. By using these features, we consistently improve the quality of our work in Pro Tools.
Collaborating with Other Musicians
Collaboration is key in today’s music world. We often work with talented artists from far away. By mastering remote teamwork, we keep our vision clear throughout the project.
How to Share Projects in Pro Tools
Sharing your work well is the first step in a successful partnership. Pro Tools makes it easy to share sessions. Use the “Save Copy In” feature to include all files and settings.
Cloud storage is also crucial for audio mixing. Sync your project folder to a shared drive. This lets your team access the latest version instantly. Make sure everyone has the same software version to avoid problems.
Tips for Remote Collaboration
Clear communication is key for remote work. Start with a consistent naming convention for tracks and files. This helps avoid confusion when working together.
Version control is also important. Save versions like “Song_v1” and “Song_v2.” This lets you go back to previous versions if needed.
Managing Feedback in Your Workflow
Getting and using feedback is crucial. Use markers in Pro Tools to leave notes at specific times. This keeps feedback organized and avoids lost details in emails.
Keeping a professional dialogue helps build strong relationships. Focus on the technical aspects of the track, not personal taste. Here’s how to manage your collaborations well.
| Method | Primary Benefit | Best For |
|---|---|---|
| Cloud Syncing | Real-time updates | Small project files |
| Session Packages | Total portability | Full project transfers |
| Marker Notes | Contextual feedback | Detailed audio mixing |
Troubleshooting Common Issues
Technical problems are a normal part of working in a studio. Even top places like Warner Bros. and Capitol have experts like Jon Connolly to fix issues. Learning to troubleshoot and avoid common problems in Pro Tools keeps your creative work flowing smoothly.
Identifying Playback Problems
First, check your playback engine settings if audio won’t play. Make sure your interface is set right in the software preferences. Incorrect hardware routing often causes silent tracks or error messages.
Look at your input and output paths in the I/O setup window. Sometimes, resetting the default paths fixes communication problems between your hardware and software. Consistency is key for a professional sound engineering environment.
Fixing Latency Issues
Latency can be really annoying, causing a delay between playing and hearing. Lower your hardware buffer size to the lowest stable setting. A smaller buffer means faster audio signal processing.
If delays still happen, use low-latency monitoring features. This skips some processing to give a direct signal path. Managing latency effectively shows you’re skilled in Pro Tools.
Resolving Software Crashes
Software crashes often come from bad plug-ins or corrupted files. Keep your software and operating system up to date to avoid these problems. If a session keeps crashing, try importing tracks into a new, clean file.
Always save your work often to avoid losing it. When you face ongoing issues, check the logs for clues. Staying calm and methodical helps you solve problems fast and keep your professional reputation.
Staying Organized in Your Project
Good project management is key to a successful studio session. Keeping your workspace tidy saves time and boosts creativity in sound engineering. A well-organized workflow helps you stay focused, even when tasks get tough.
File Management Tips for Pro Tools Users
Start organizing files before you record anything. Create a folder for each Pro Tools session. This keeps audio, backups, and media in one spot. Consistency is key for working in different studios or with others.
Use the “Save Copy In” feature to keep your files together. This avoids lost files and makes your project easy to move around. A tidy drive saves you from stress during tight deadlines.
Naming and Color-Coding Tracks
Good track naming is a game-changer in sound engineering. Instead of “Audio 1,” name tracks clearly, like “Lead Vocal” or “Kick Drum.” This makes big sessions easy to navigate.
Color-coding tracks helps you see your mix visually. Use different colors for drums and vocals. Enhanced markers help you find specific parts of your song quickly, speeding up editing.
Using Track Groups Effectively
Grouping tracks helps manage volume and effects across channels. In Pro Tools, you can adjust everything at once. This is great for drum kits or layered vocals.
Streamlining your workflow with groups lets you make changes easily. Create groups for related instruments to keep your mix balanced. Learning these habits helps your technical setup support your creativity.
Resources for Continued Learning
Mastering sound is a lifelong journey. We think that regular practice and top-notch study materials can boost your Pro Tools skills. This will take you to new levels.
For better music production, check out educational sites. Pro Tools Expert has free video tutorials for over seven years. These guides give you in-depth looks at software functions.
Educational Materials and Guides
Books are key for any serious engineer. “The Mixing Engineer’s Handbook” by Bobby Owsinski is a must-read. It teaches you about signal flow and balance.
Reading these books helps you grasp the theory behind your digital workstation. It’s essential for every knob turn.
Community Engagement
Joining online forums connects you with like-minded people. Sites like the Avid Pro Audio Community let you ask questions and share projects. This keeps your skills sharp as the industry evolves.
We urge you to keep trying new things and building your sound every day.